Welcome to CheckTrack!
This guide will help you understand how to use CheckTrack and explore its features in detail. Let’s get started.
Work Journey:
Note:
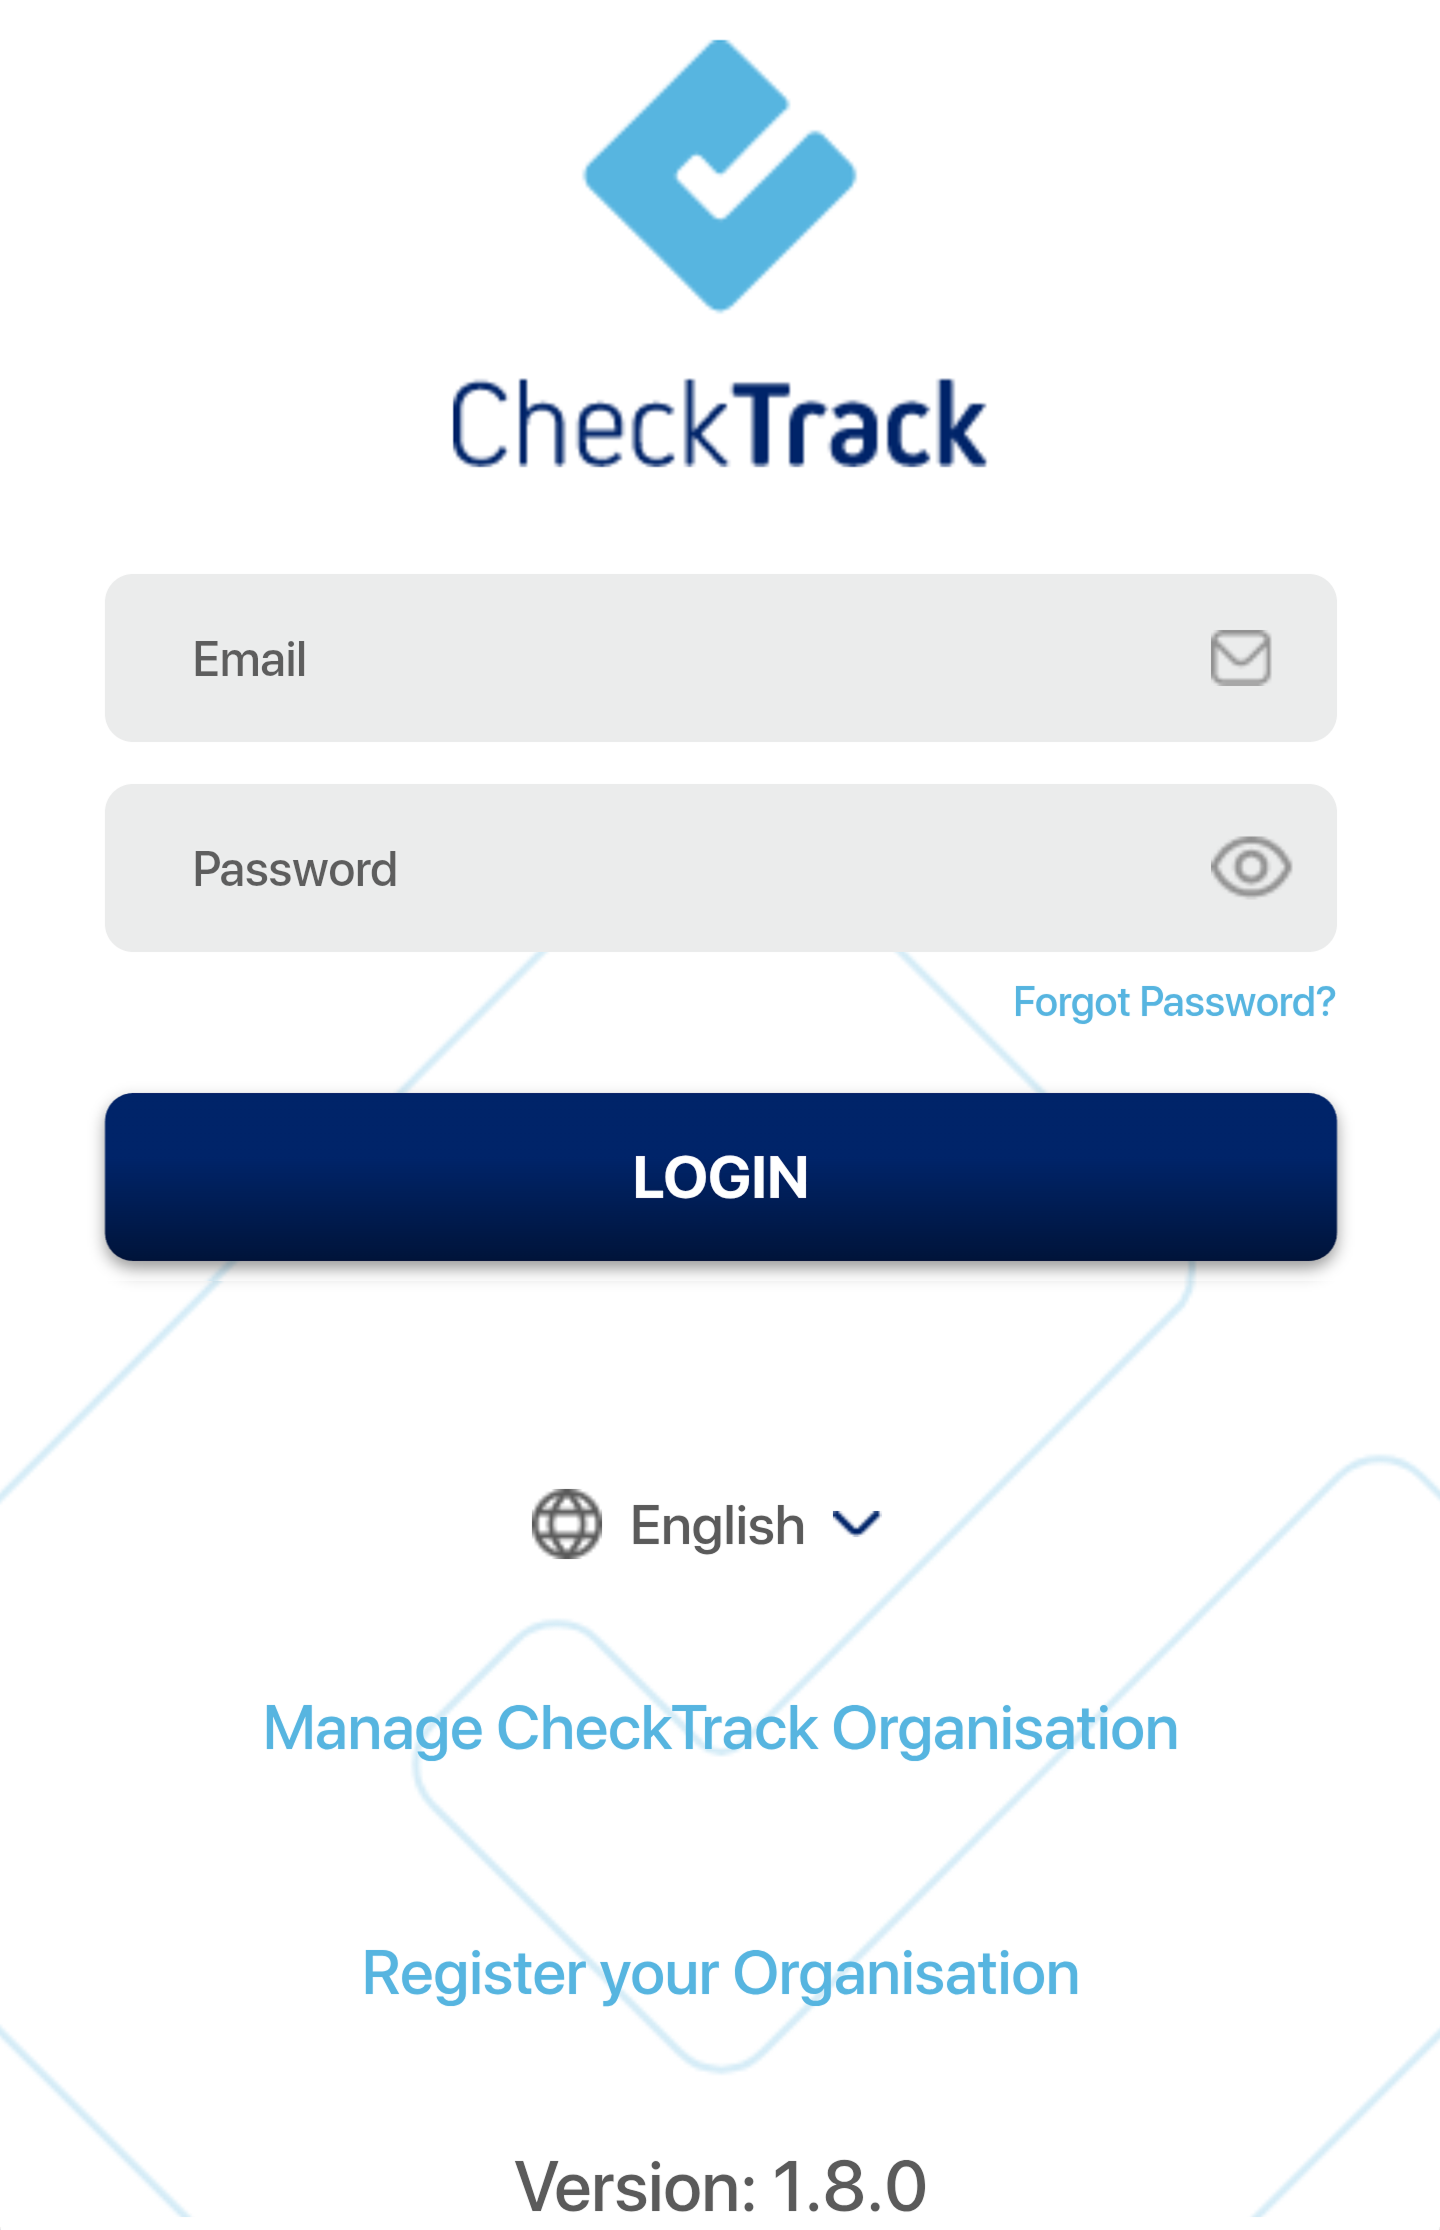
The first is the login screen, where AMH can enter their credentials (email and password) to access the application.
Once you log in, the Dashboard appears.
Dashboard:
It serves as a visual representation of all features available to the user, making navigation easy and ensuring a seamless understanding of CheckTrack. The CheckTrack Dashboard provides quick detailed access to the features, ensuring smooth operations.
The dashboard includes:
- Team Members: Manage and view your team.
- Work Schedules: Add/Edit the team’s Work schedules.
- Projects: Create projects and tasks.
- My Timesheets: Log working hours for yourself.
- Approvals: Review and approve timesheets and leaves for reportees, reimbursements, and IT Declarations for all employees.
- Tax Deductions: View and declare different tax deductions.
- Payrolls/Payments: Access, initiate, and complete payroll processes.
- Leave Management: add and edit leave types.
- Payroll Management: allows for declaring salary structures and the tax and investments related declarations finalization date.
- Organization Settings: Configure company details, add/edit tax details, configure reimbursements, and add/edit work locations.
- My Details: can view and update your personal information.
- Reimbursement: raise a reimbursement request for yourself.
- Payslips: View and download current and past payslips for yourself.
- Reports: Generate reports on leave, attendance, timesheets, salary, and reimbursements for all employees.
- Support: can raise a support request or provide feedback for the CheckTrack team whenever needed.

Team Members:
The Team Members feature in CheckTrack allows company admins to view, manage, and add team members effortlessly.
Adding a New Team Member in 3 Simple Steps:
- Click the Add Team Member button.
- Fill in the form with the new member’s details (name, email address, and role).
- Click Save, and the new member is successfully added.
Note:
- Company admins can update employee profile information from the Team Members list.
- Avoid using special characters in team member names (~, !, @, #, $, %, ^, &, *, (, ), _, +, -, =, {, }, [, ], |, , :, ;, ‘, “, <, ,, ., >, /, ? ).
- Assigning roles to team members helps define their access and permissions within CheckTrack, ensuring proper management of responsibilities.

Team Members:
Let’s understand what the individual team member section covers:
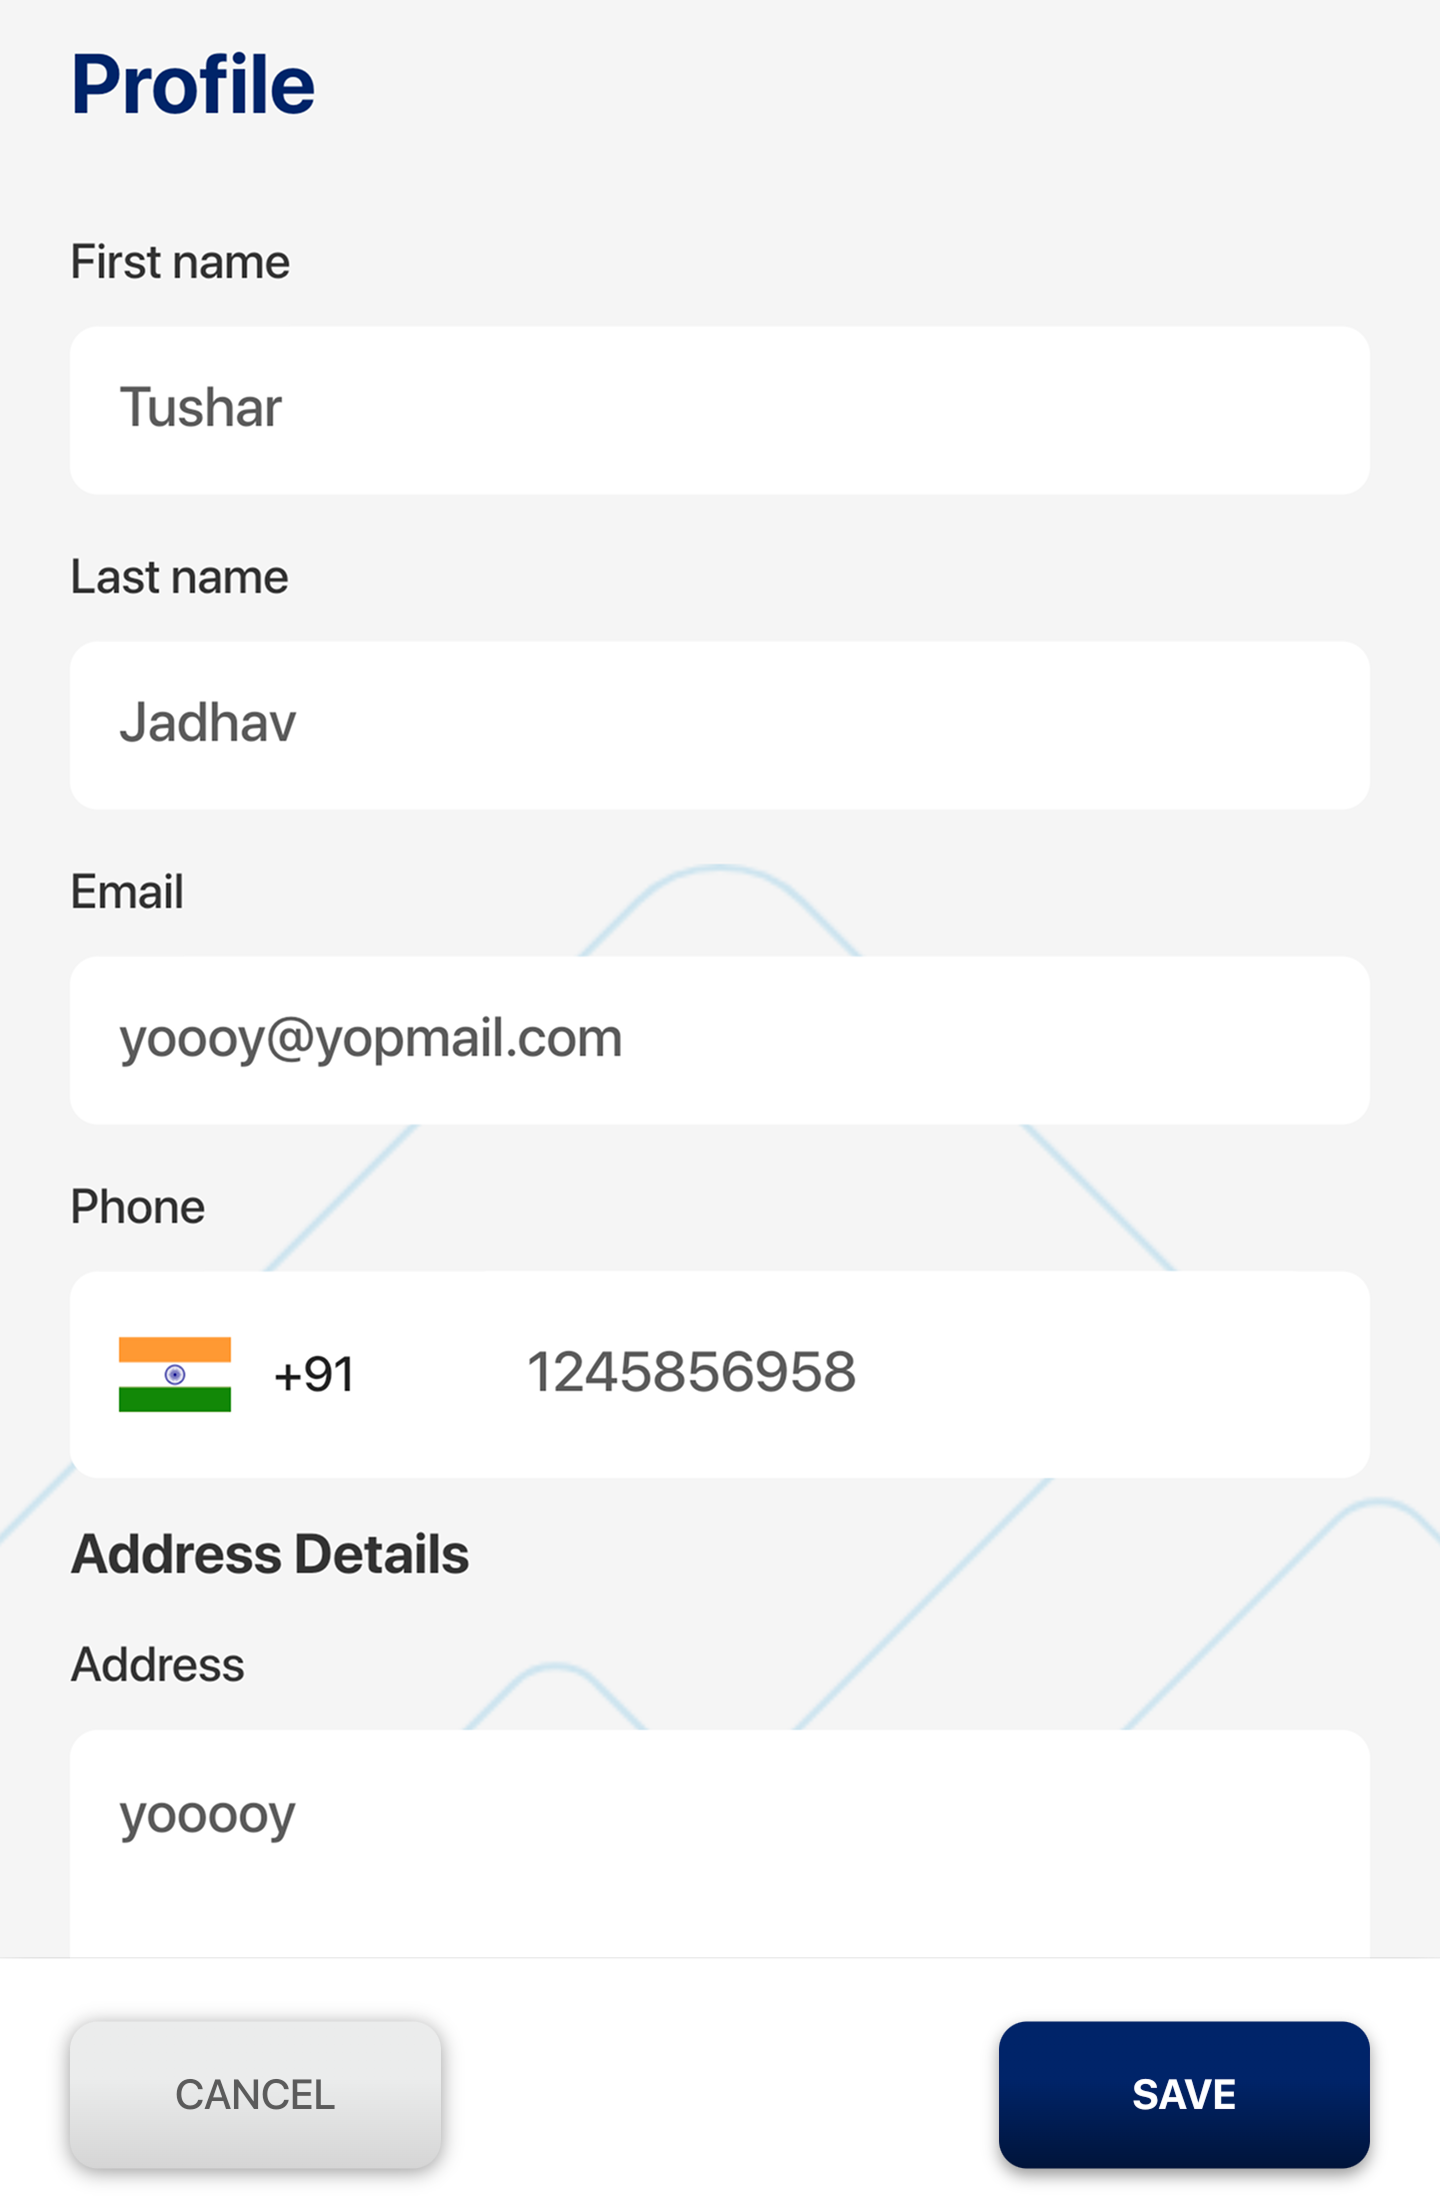
1. Profile
This section contains basic information, including:
- Name
- Contact details
- Employment type
- Job title
- Date of joining
- Timezone
- Reporting manager
- Termination date
Note:
Once a Termination Date is entered, the team member’s access to the system will be revoked after the specified date.
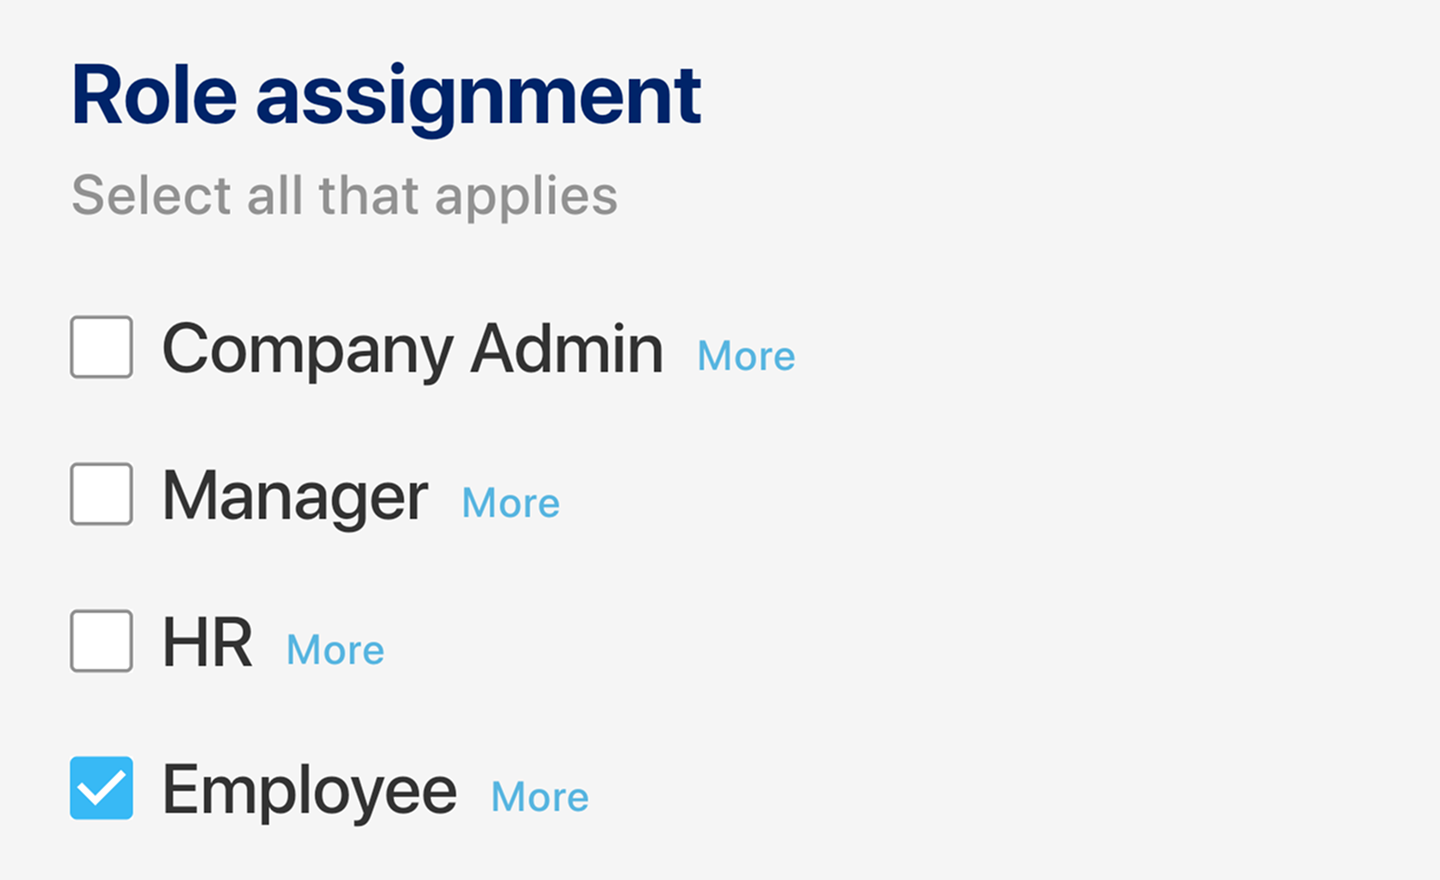
2. Role Assignment
Displays current role within the organization, along with assigned permissions, which is editable.
3. Associated Work Schedule
Shows the work schedule assigned to the respective team member.

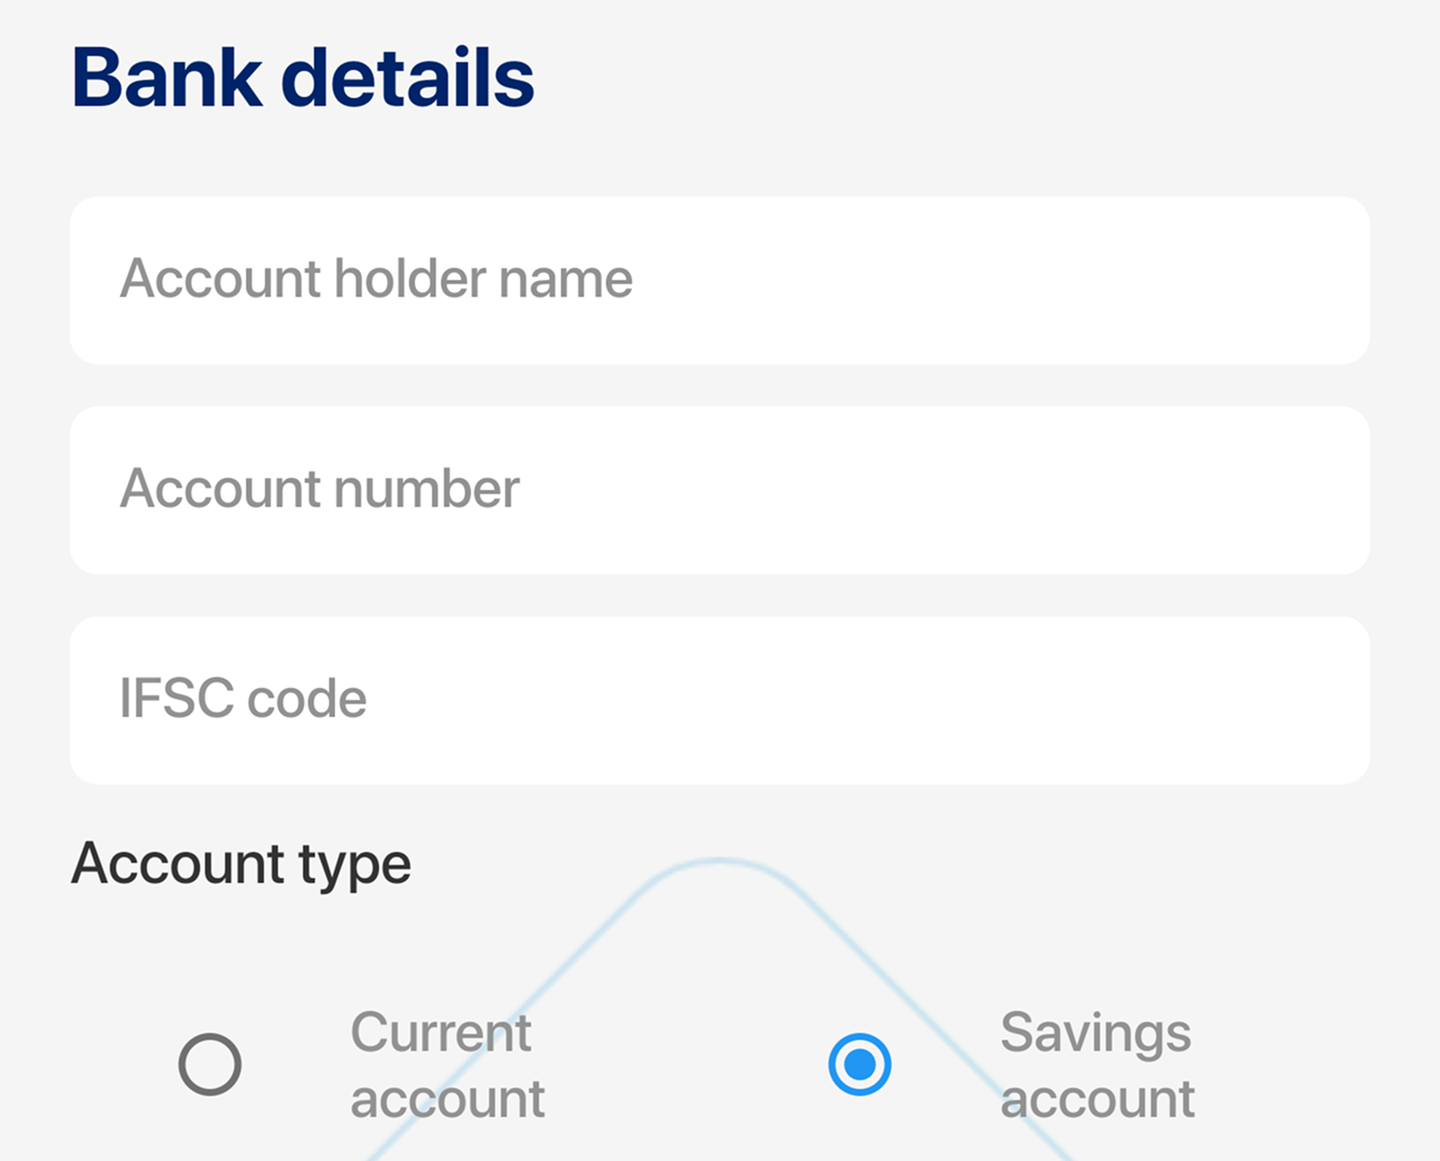
4. Bank Details
Includes bank account information:
- Account number
- Account holder name
- IFSC code
- Account type
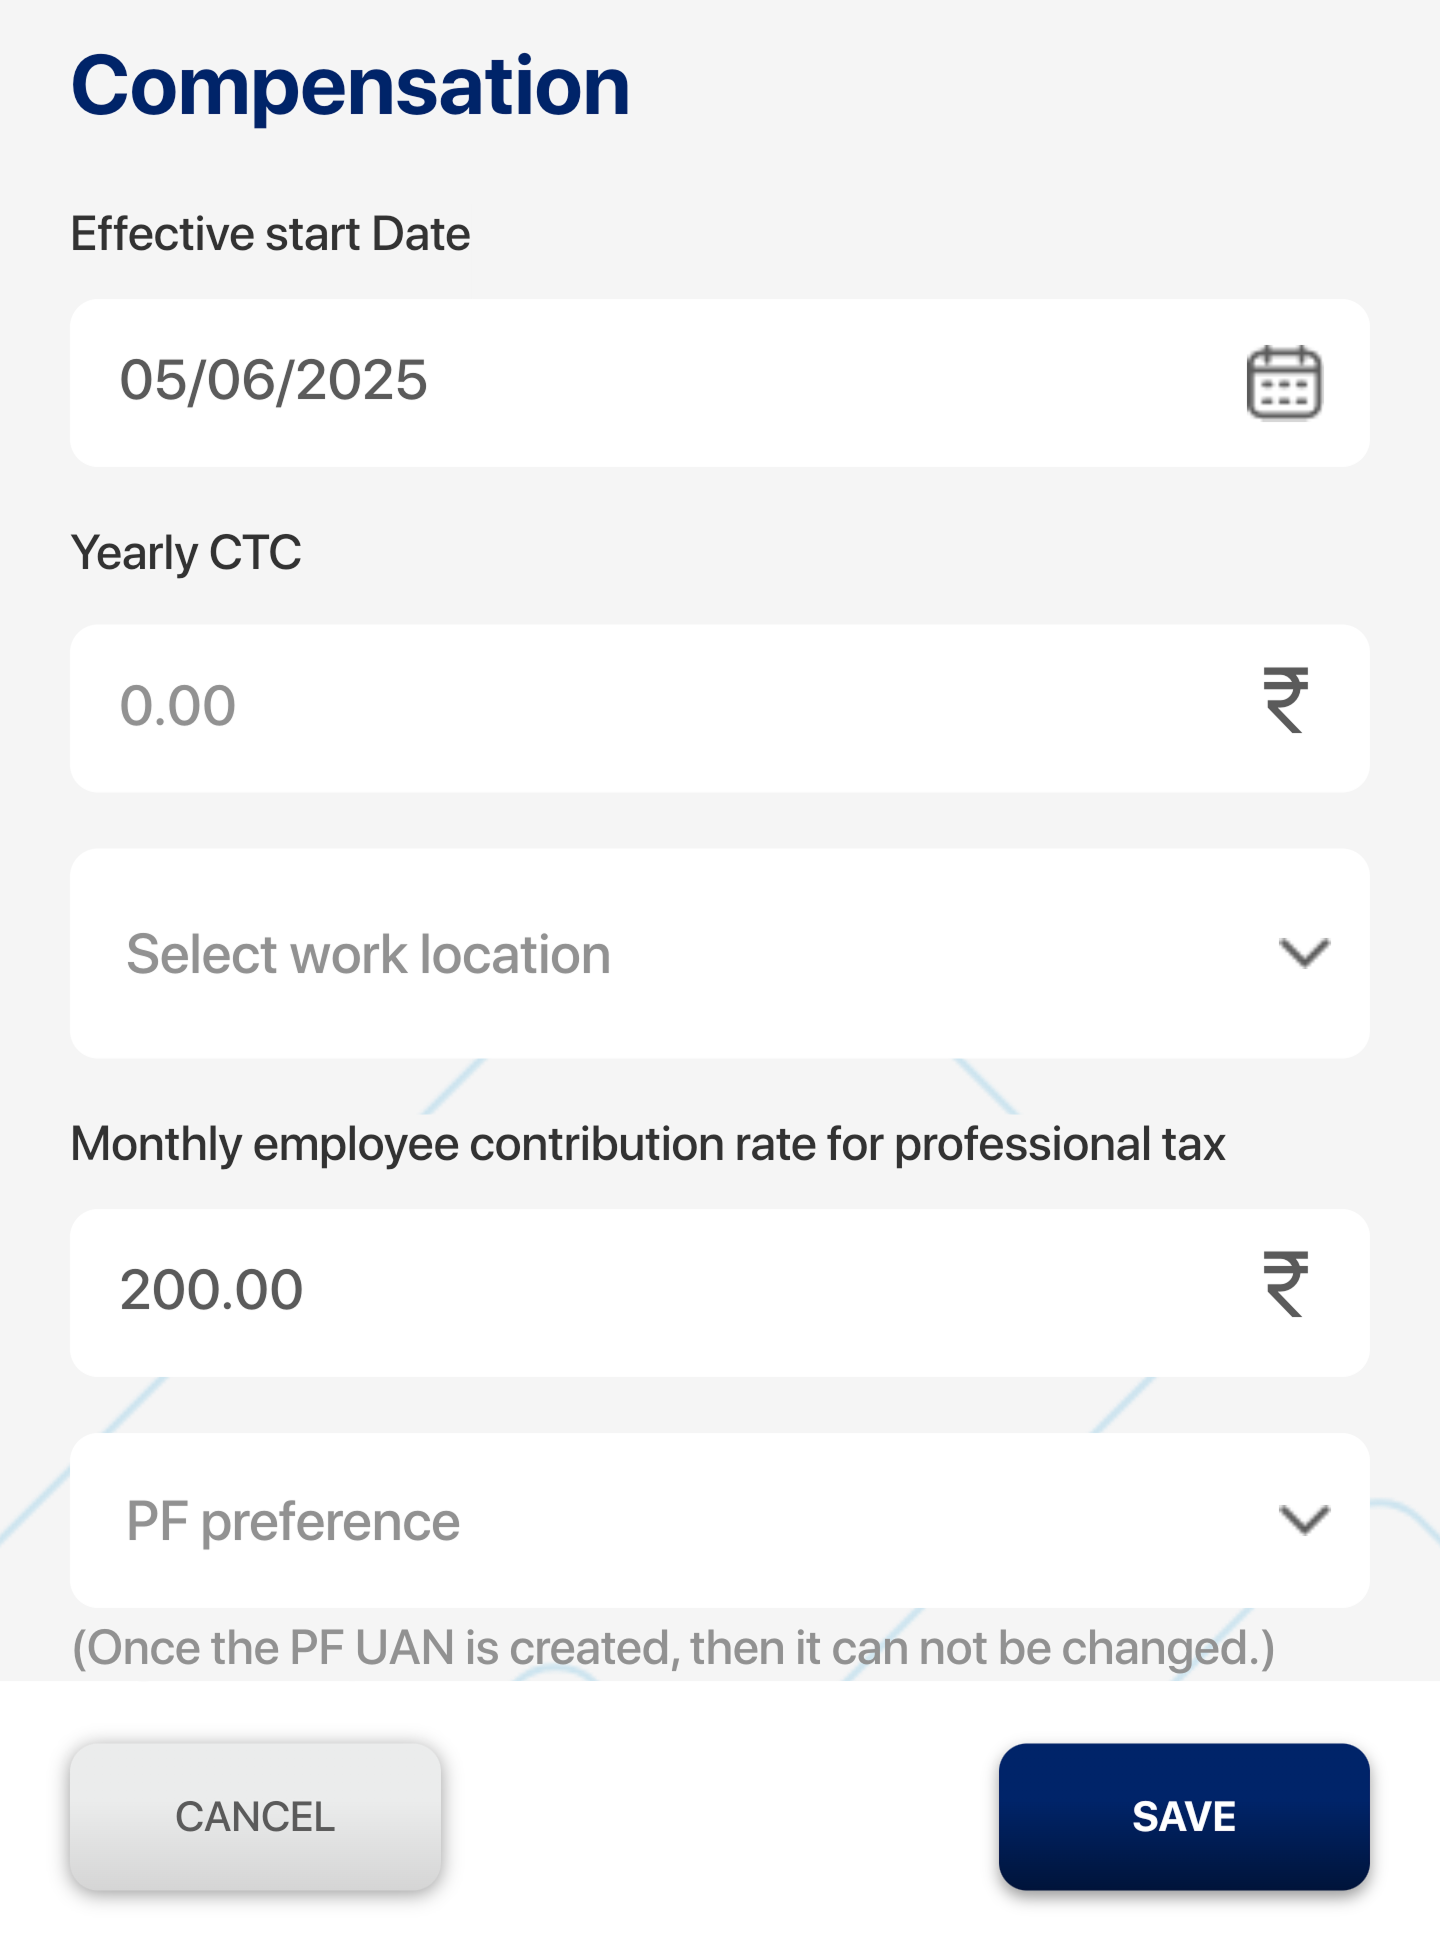
5. Compensation
Configure details about compensation, including:
- Effective start date
- Yearly CTC
- Work location
- Professional Tax
- PF preference
- Gratuity to be deducted or not
- ESI number
- Calculate the salary breakup
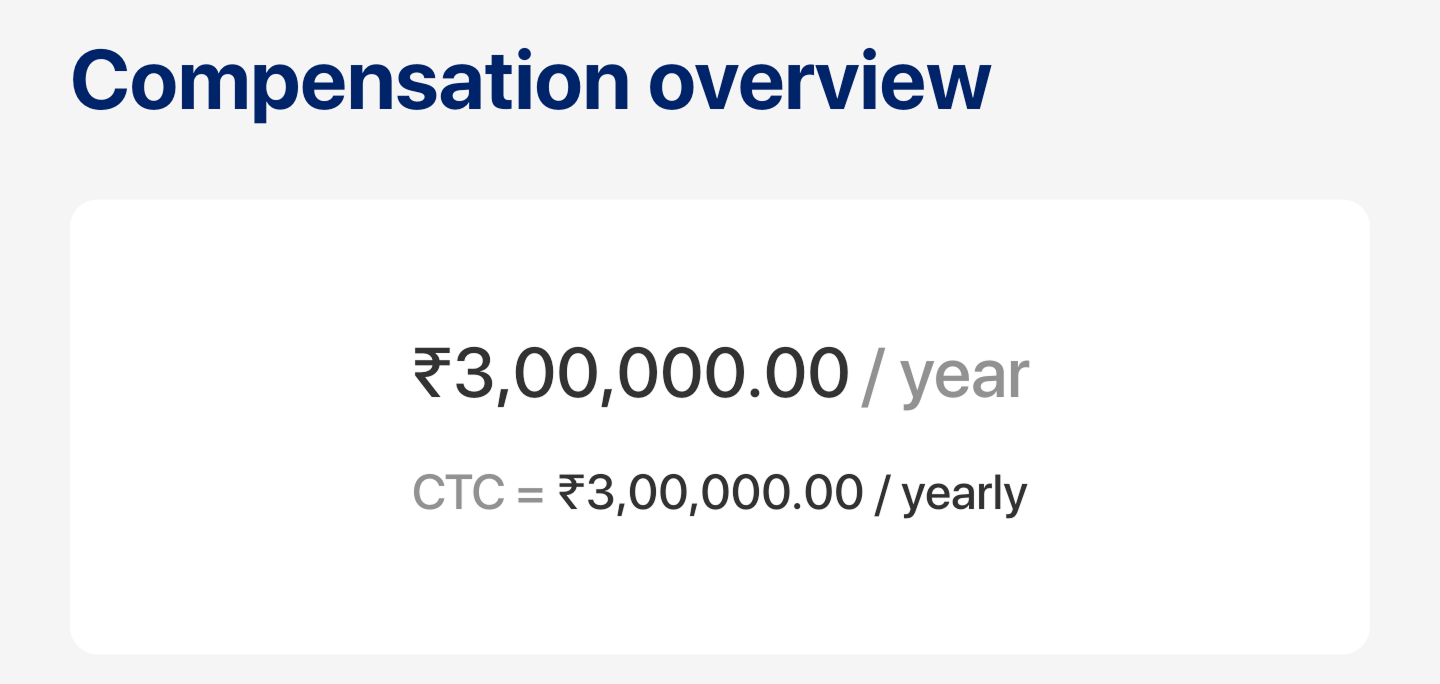
6. Compensation Overview
Summarized view of the overall compensation package with its components.
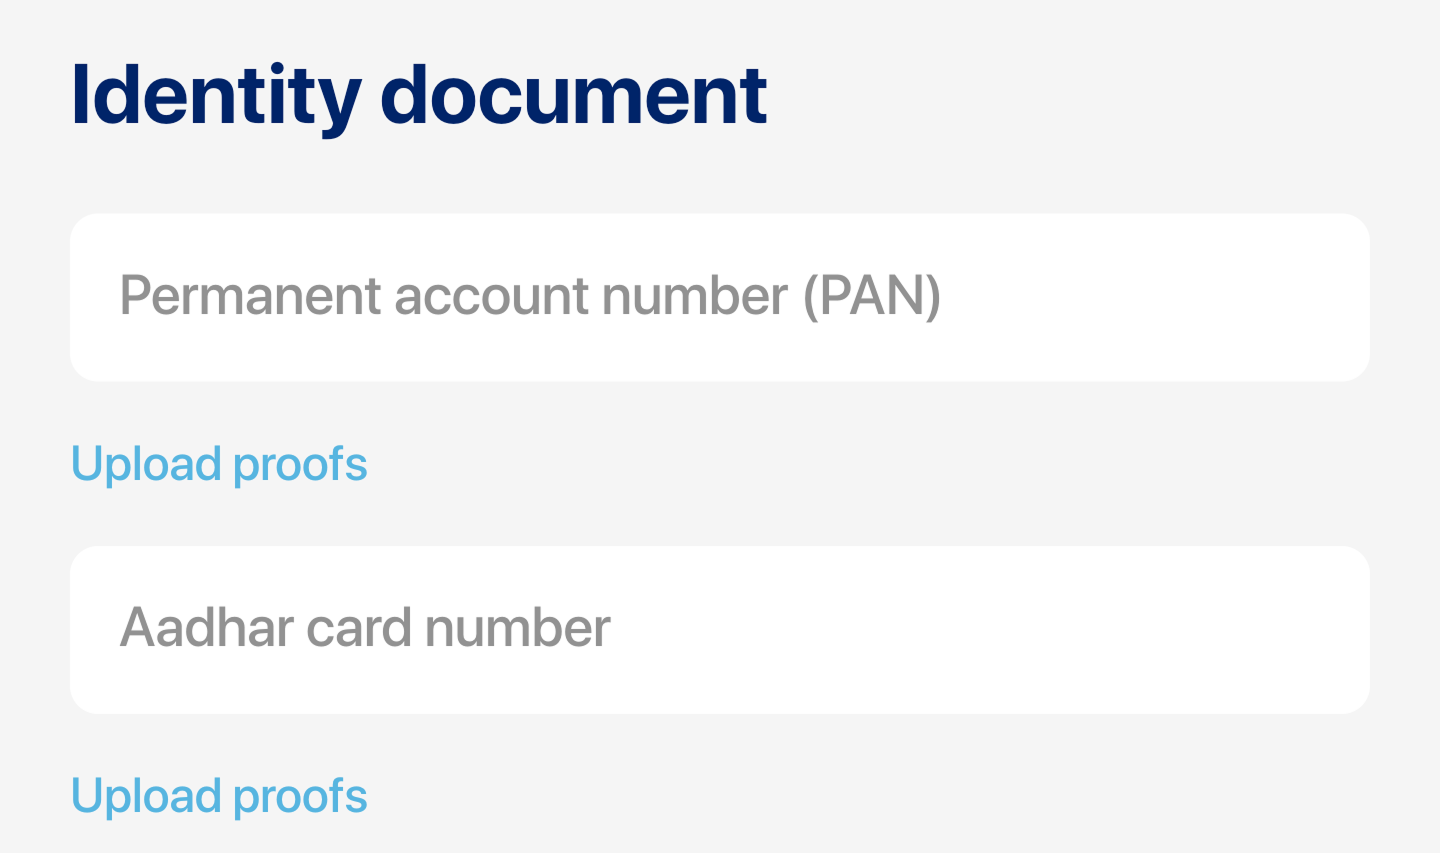
7. Identity Document
Allows to view, upload, and manage identity documents, such as:
- Aadhaar card
- PAN card
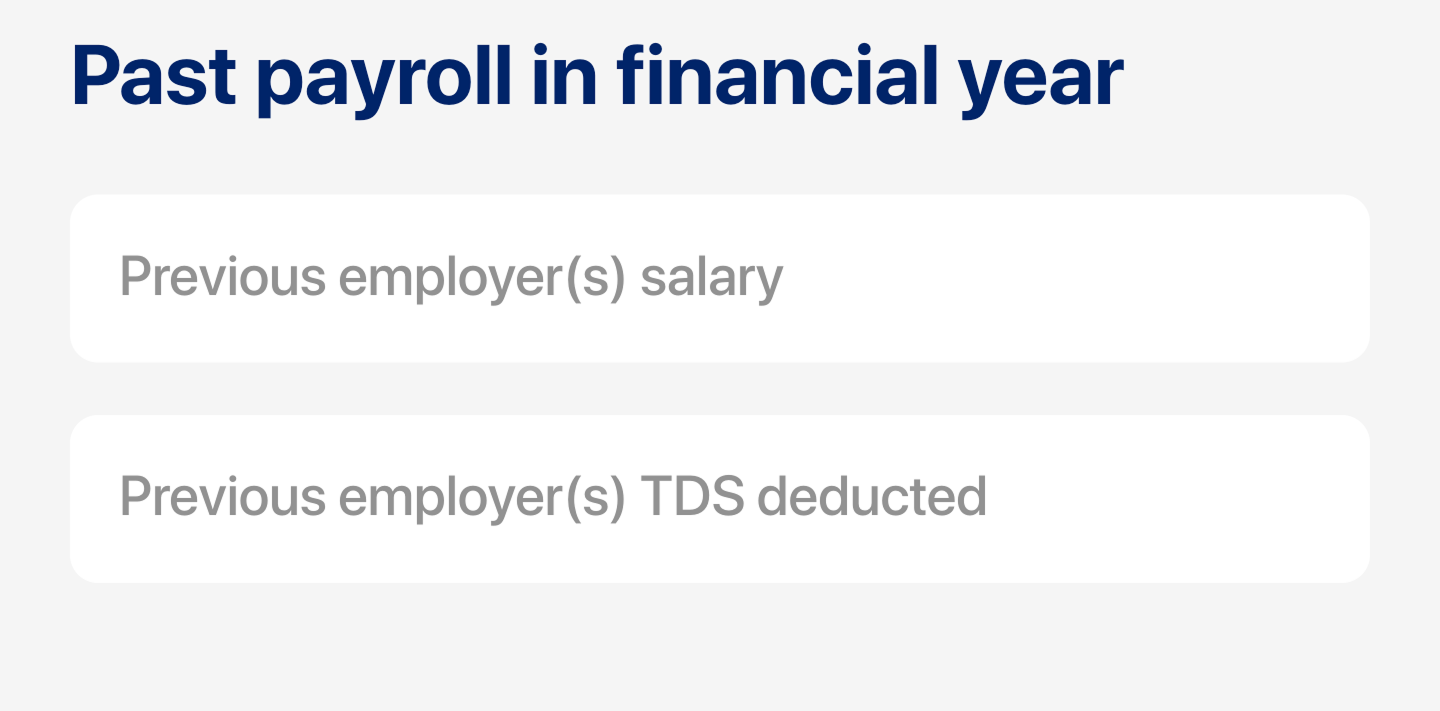
8. Past Payroll in Financial Year
Displays entry of past payroll, including:
- Salary from previous employer
- TDS from previous employers
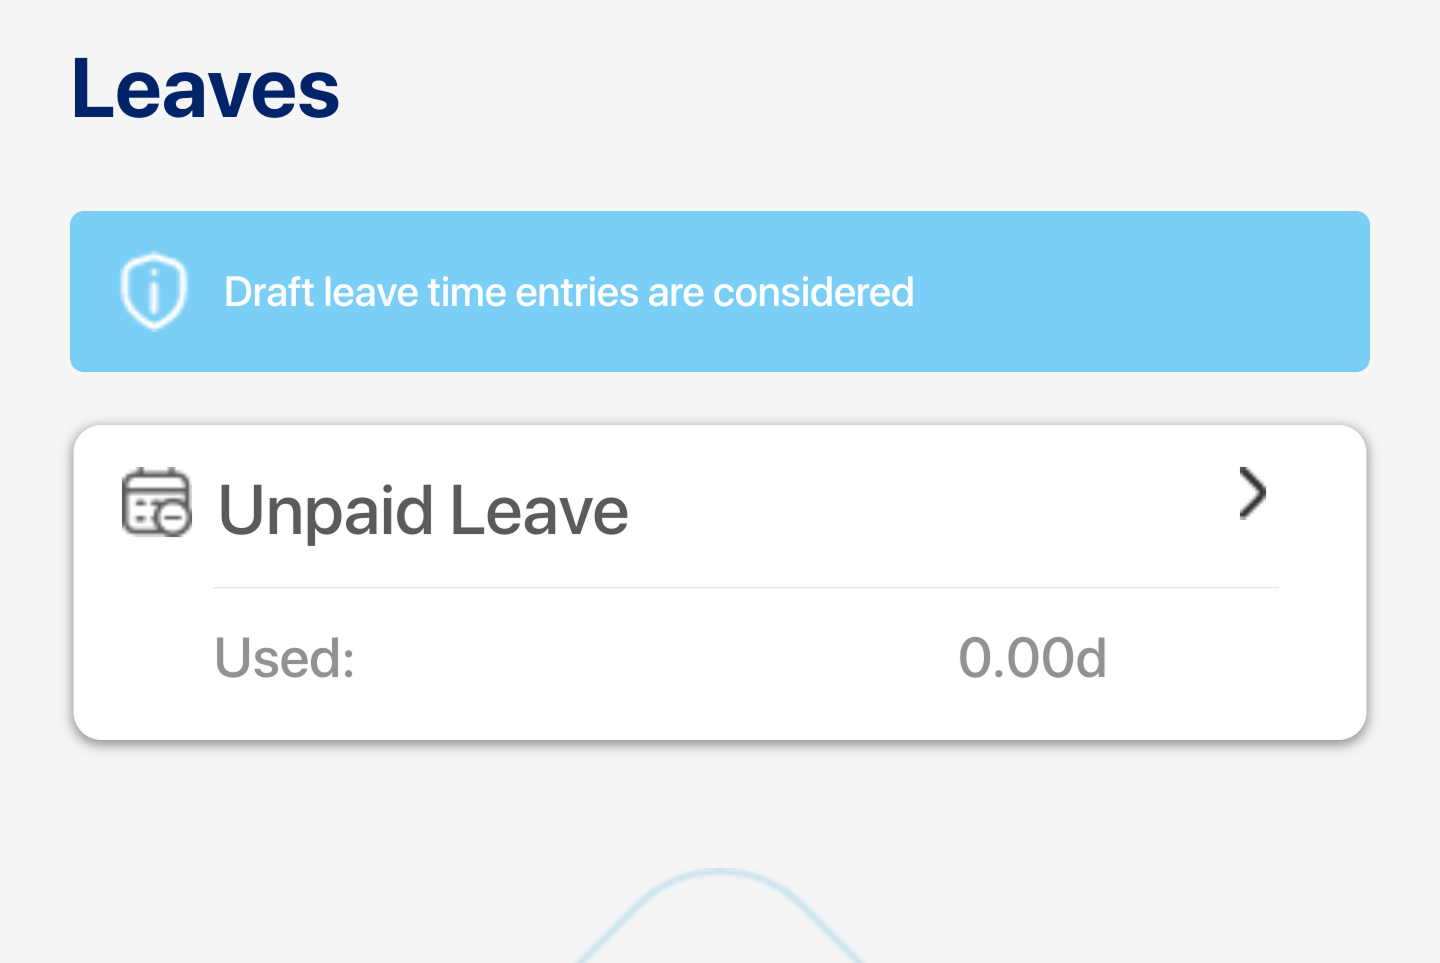
9. Leaves
Shows and allows editing of team members:
- Leave types
- Leave’s balance
- Shows Leave’s history
- Pending and approved leave requests
10. Reimbursements
Displays and allows to approve the team members:
- Reimbursement requests
- Pending, submitted, approved, and paid reimbursement requests
Work Schedules:
Let’s understand what the individual team member section covers:
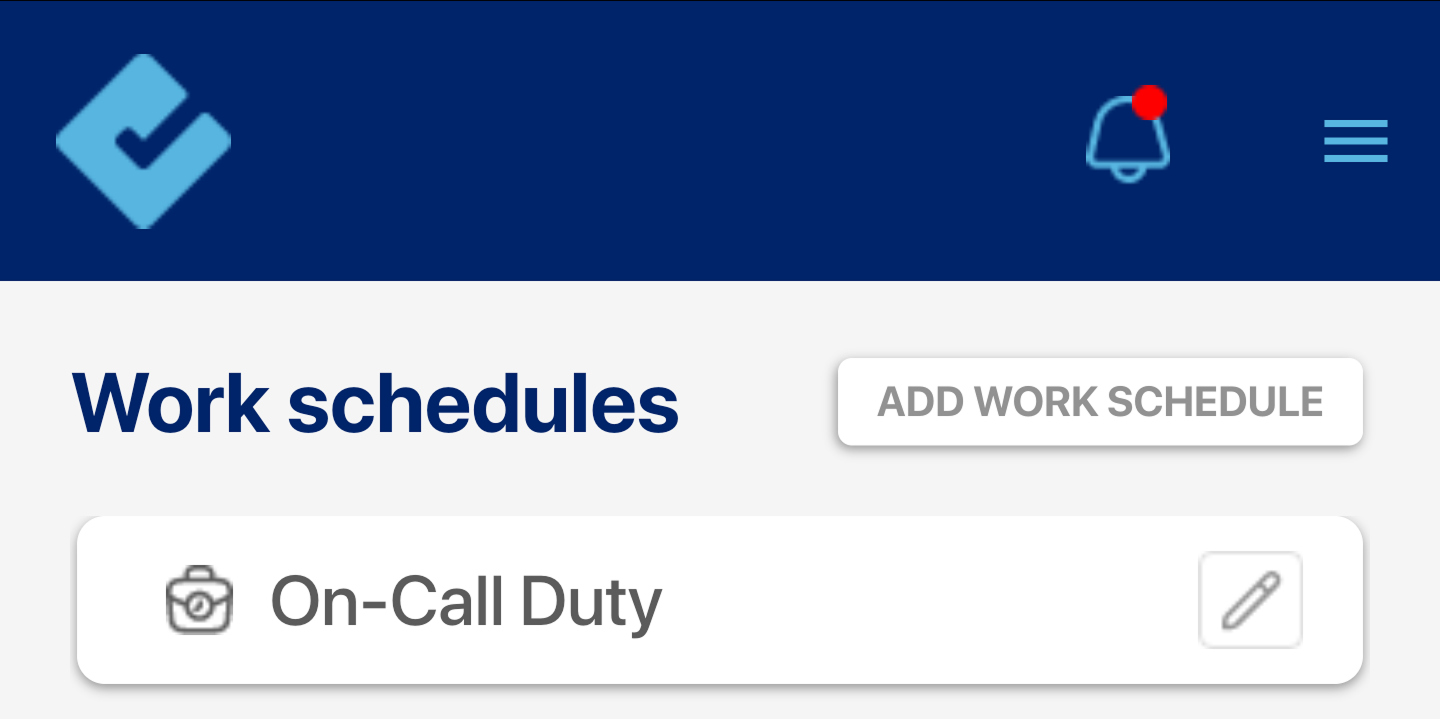
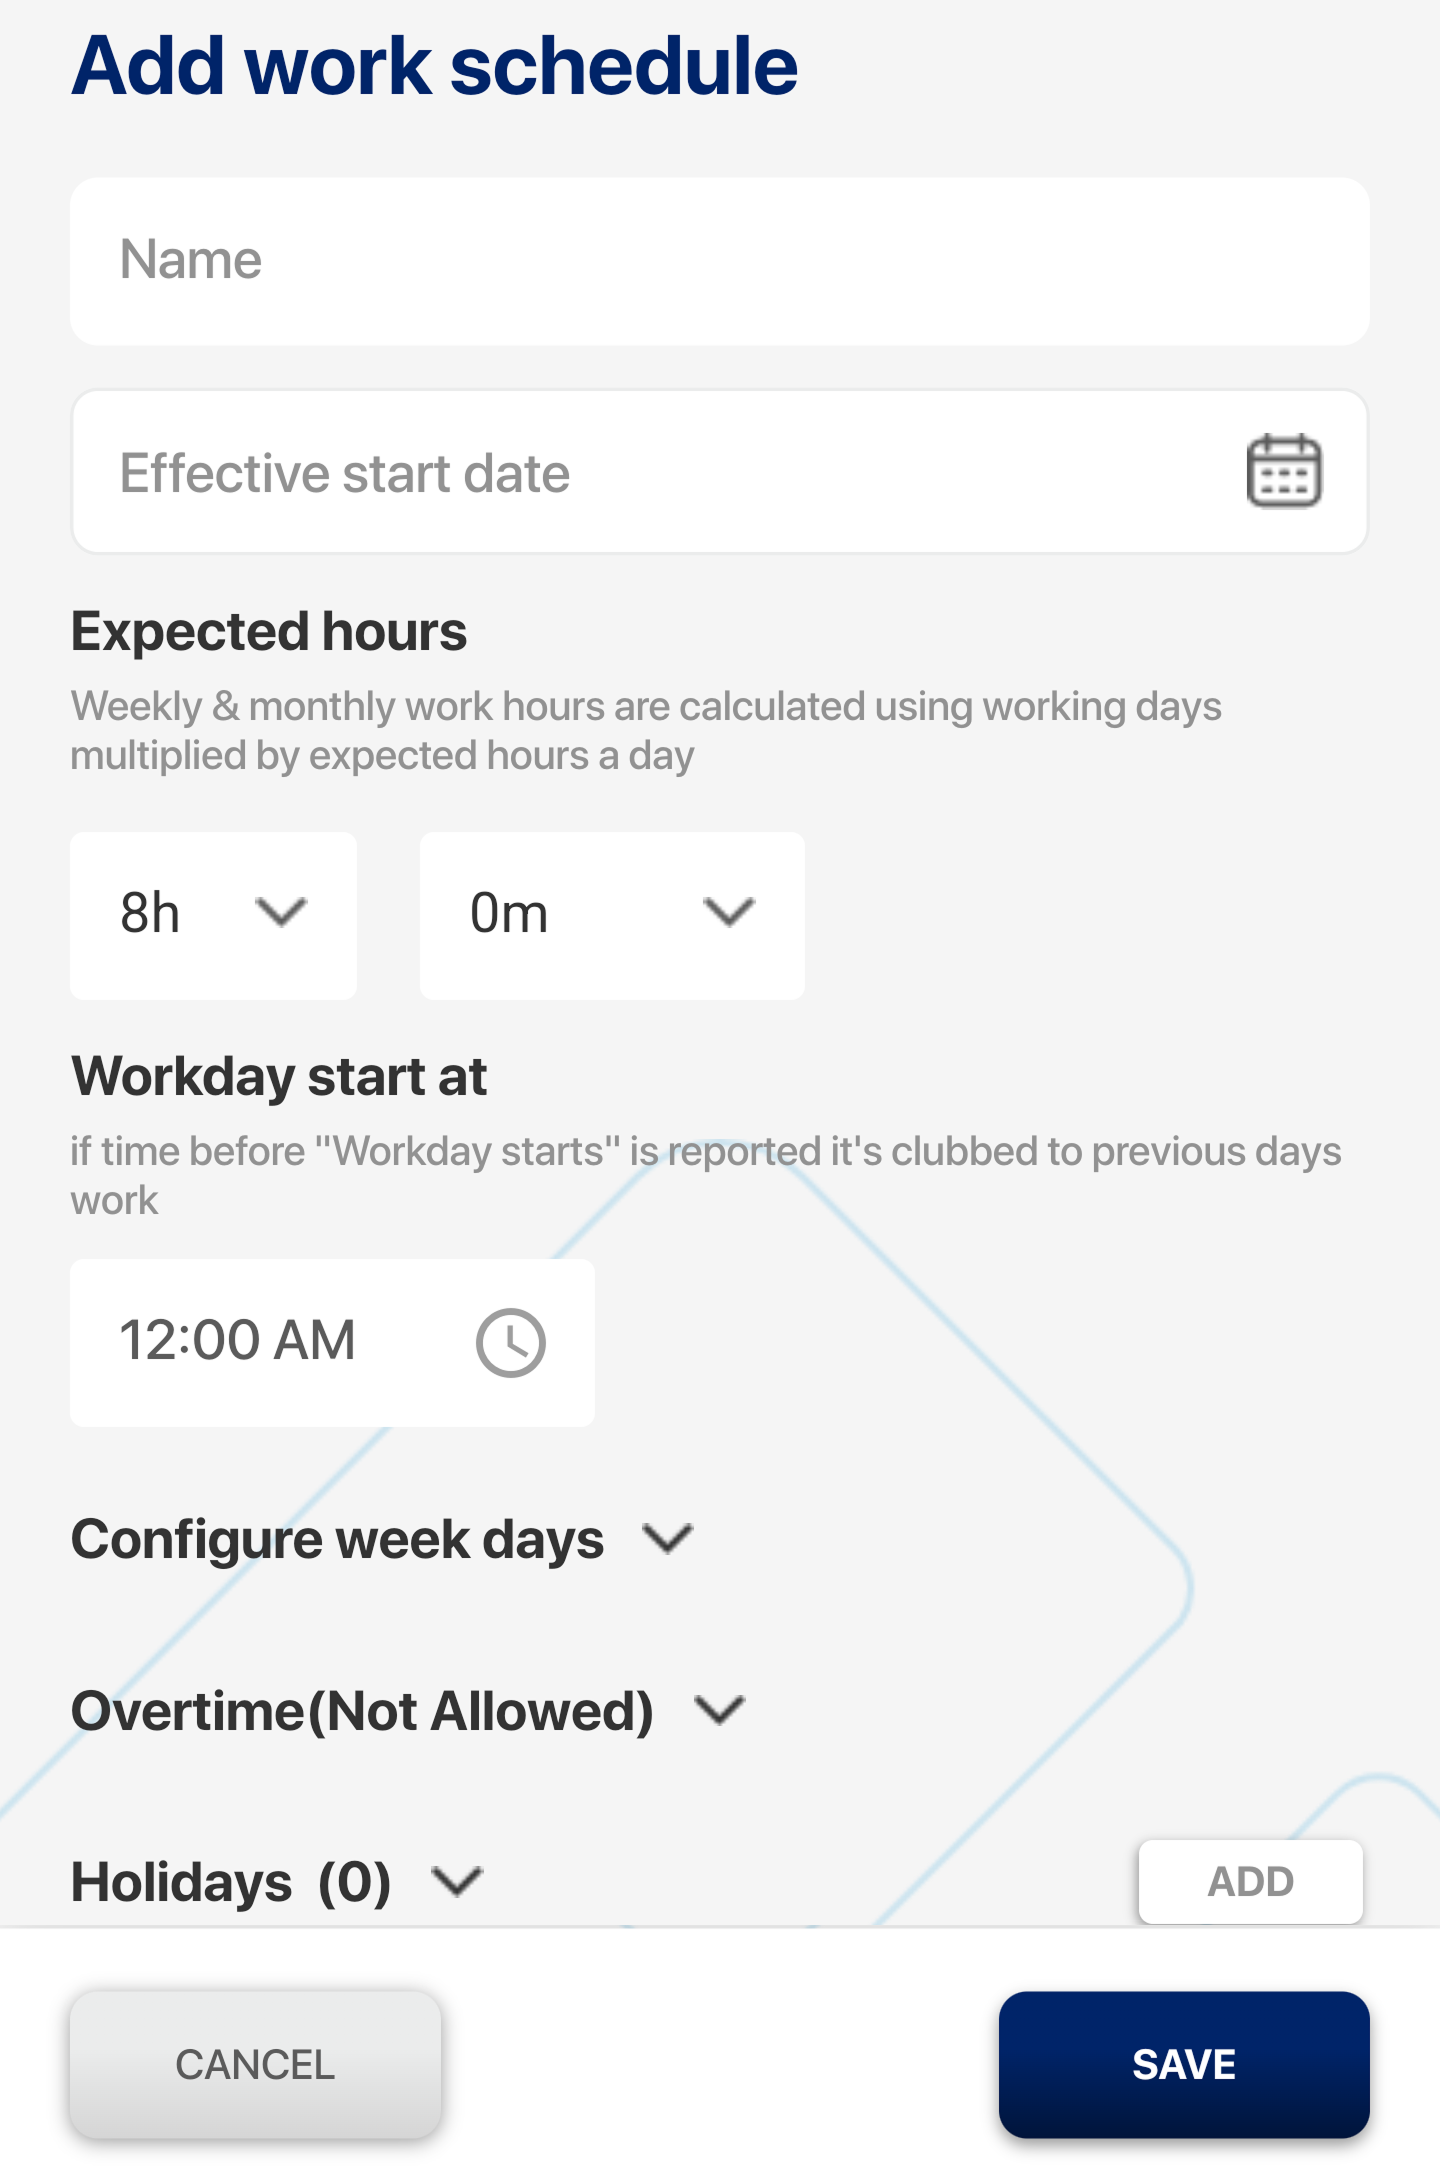
Adding a New Work Schedule in 2 Steps:
- Go to the “Add Work Schedule” section.
- Enter the required details:
- Work Schedule Name: Give the schedule a clear name.
- Effective Start Date: Select when the schedule begins.
- Daily Work Hours: Set the expected number of working hours per day.
- Work day start time
- Configure weekdays: Choose the working days in a week and define pay rates for different days.
- Configure overtime: like overtime policy, rounding off of overtime hours/minutes, start measuring overtime after defined minutes/hours, record overtime in increments of defined minutes/hours, and set the maximum limit for overtime
- Holidays: Add holidays by entering the date and name and defining whether they’re paid with the pay rate or unpaid.
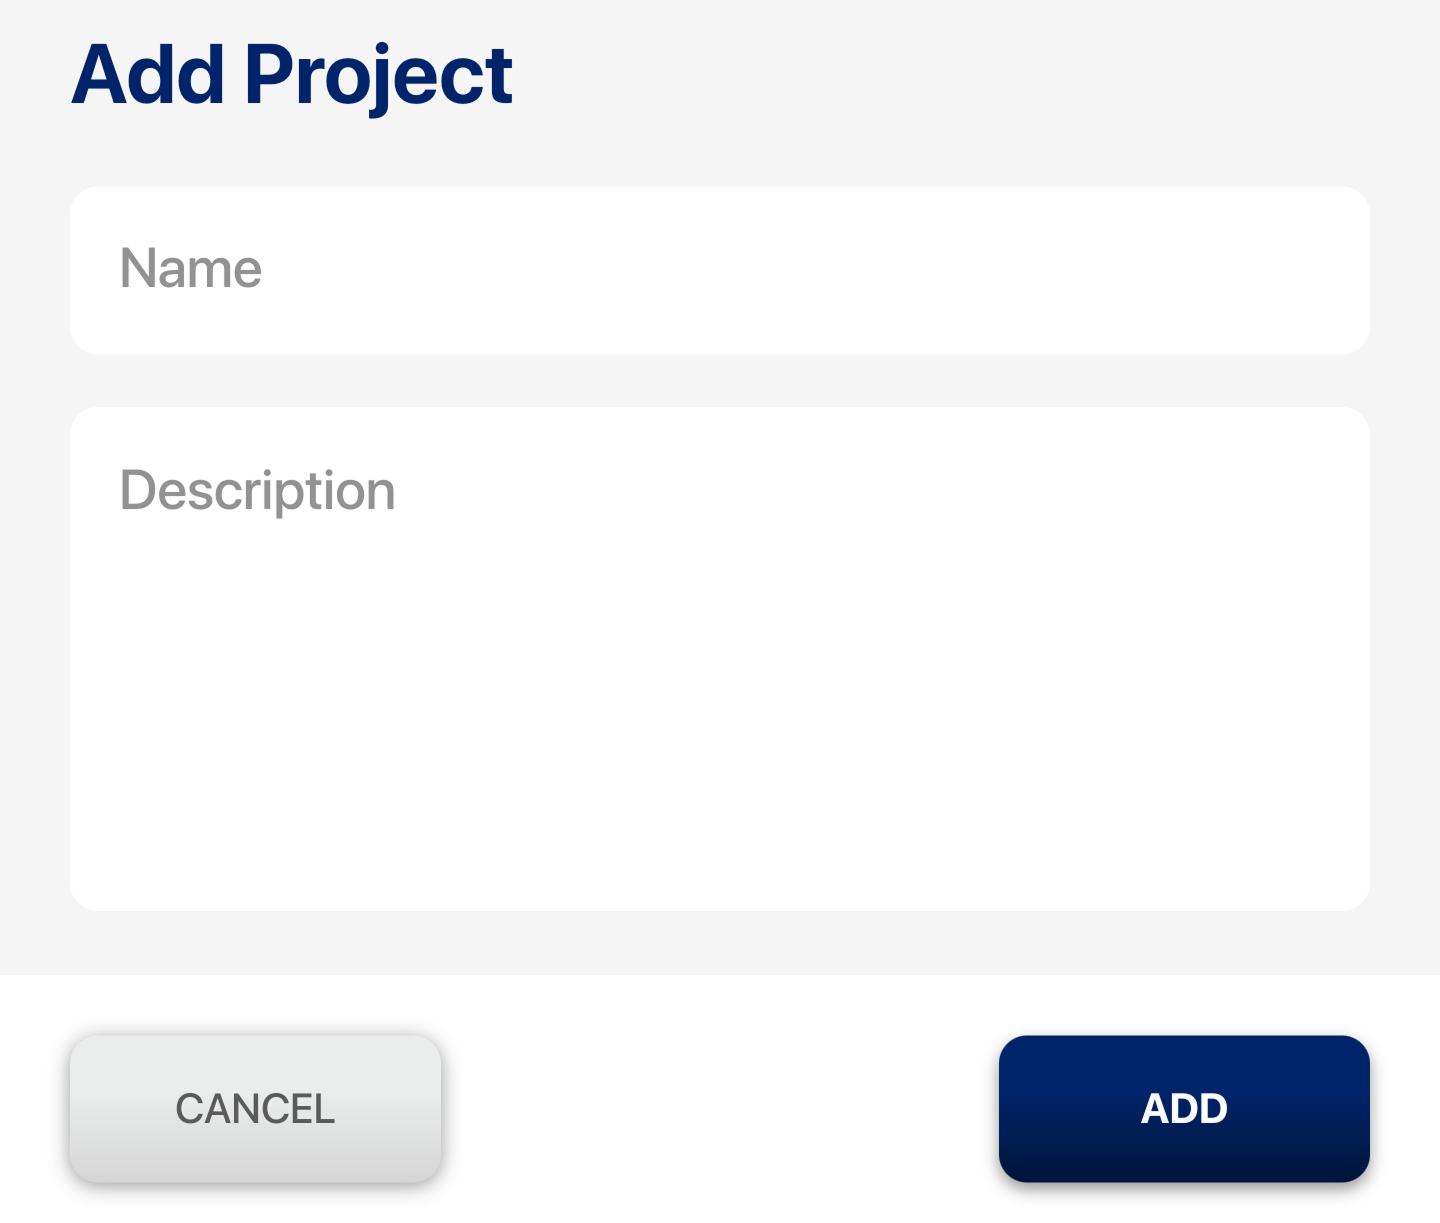
Projects:
The Projects feature allows you to create projects and tasks and work on multiple projects efficiently.
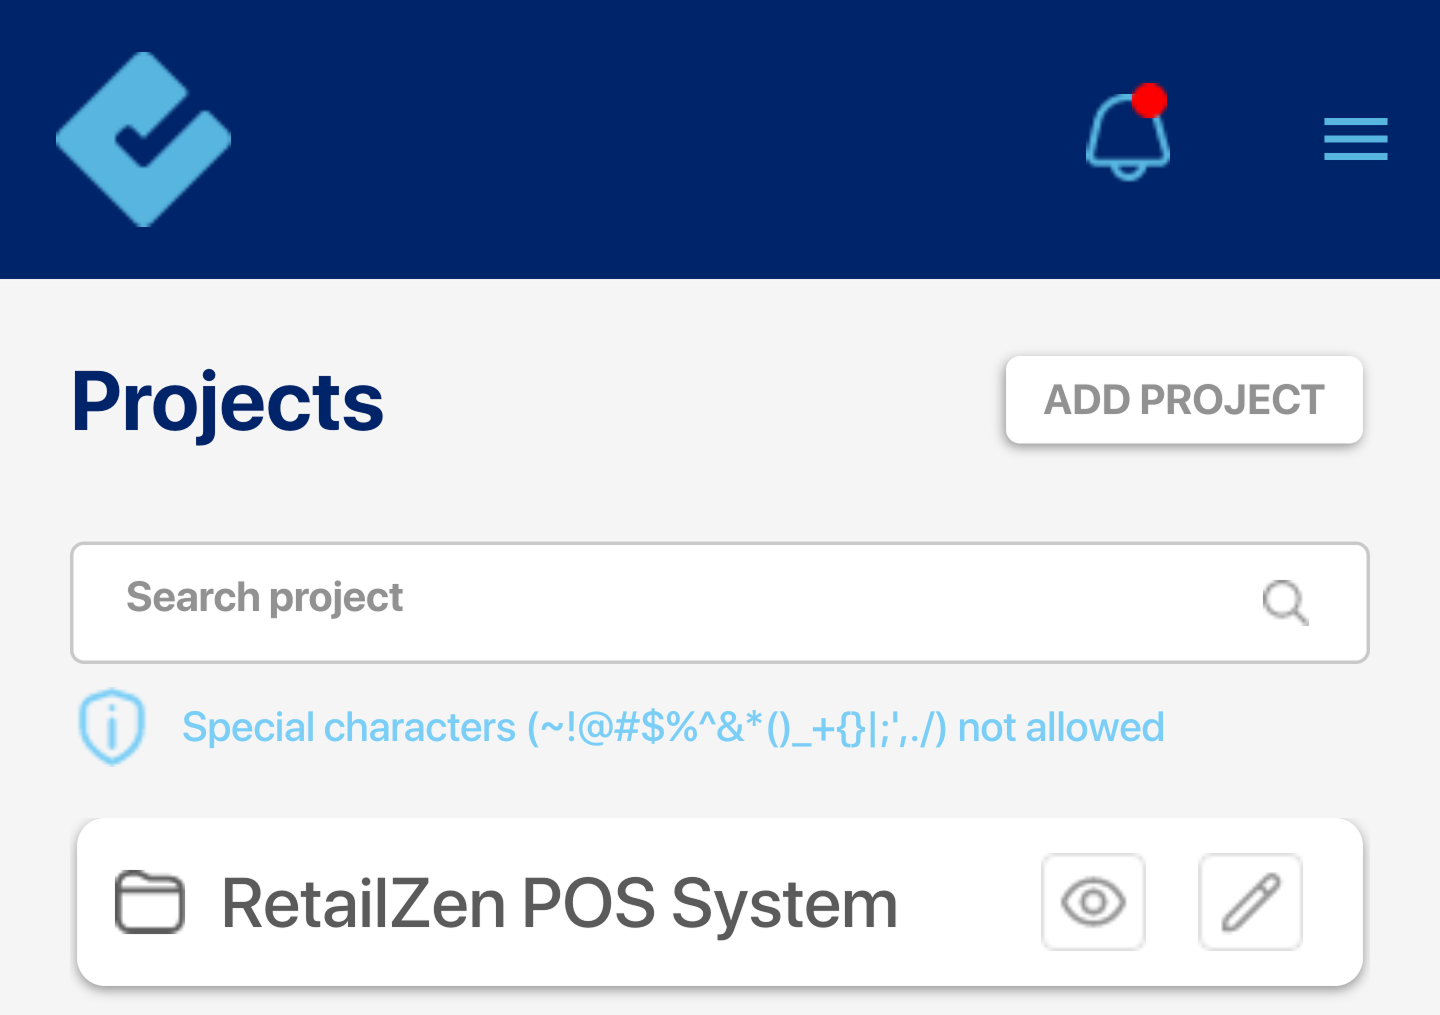
Adding a New Projects in 3 Steps:
- Click on the “Add Project” option.
- Fill out the form with details such as:
- Project Name, Project Description
- Save the project, then click the eye icon to proceed.
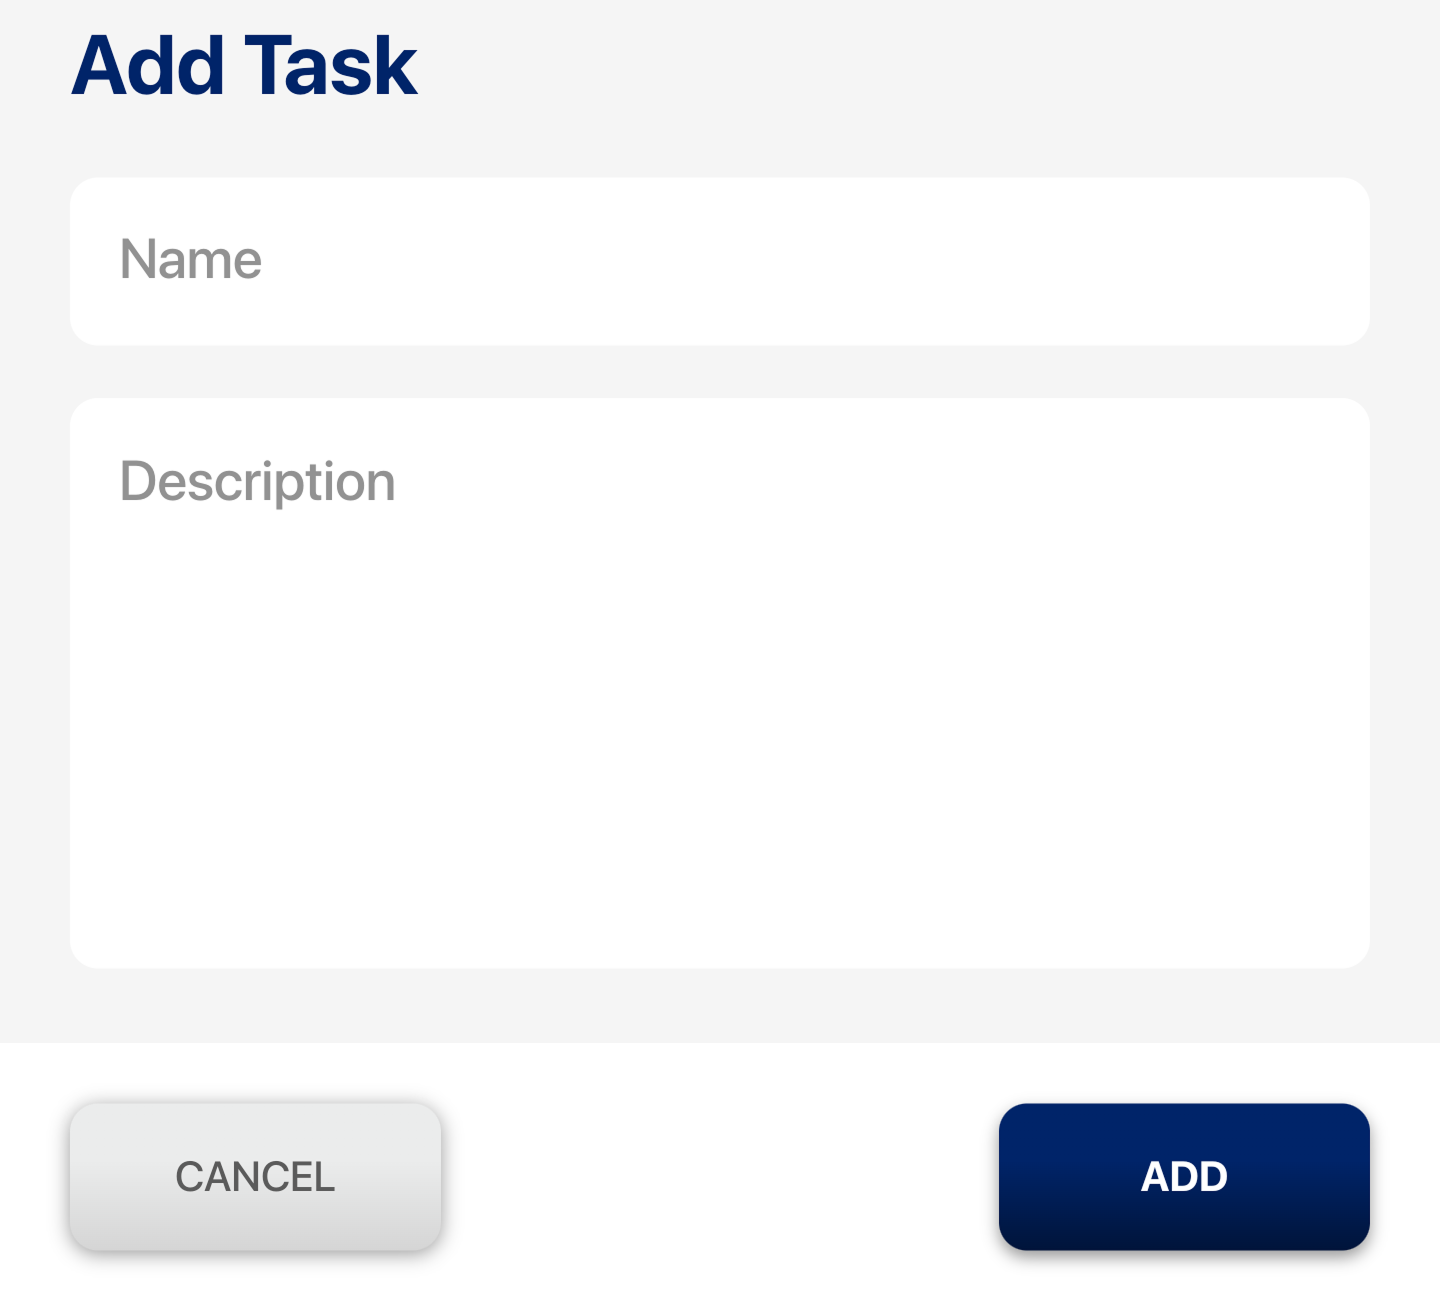
Adding a New Task to a Project in 4 Steps:
- Click on the “Add Task” option.
- Enter the task name and description.
- Save the task, which can be viewed with the eye icon.
- The project/task, once created, can be edited with the edit icon.
Project and Task Information
Projects and their associated tasks help streamline workflows and improve efficiency. A breadcrumb trail displays the current project and task, such as:
Project → attendance → daily attendance.
Time Entry Section
This section allows users to log the time spent on tasks and view the total time recorded.
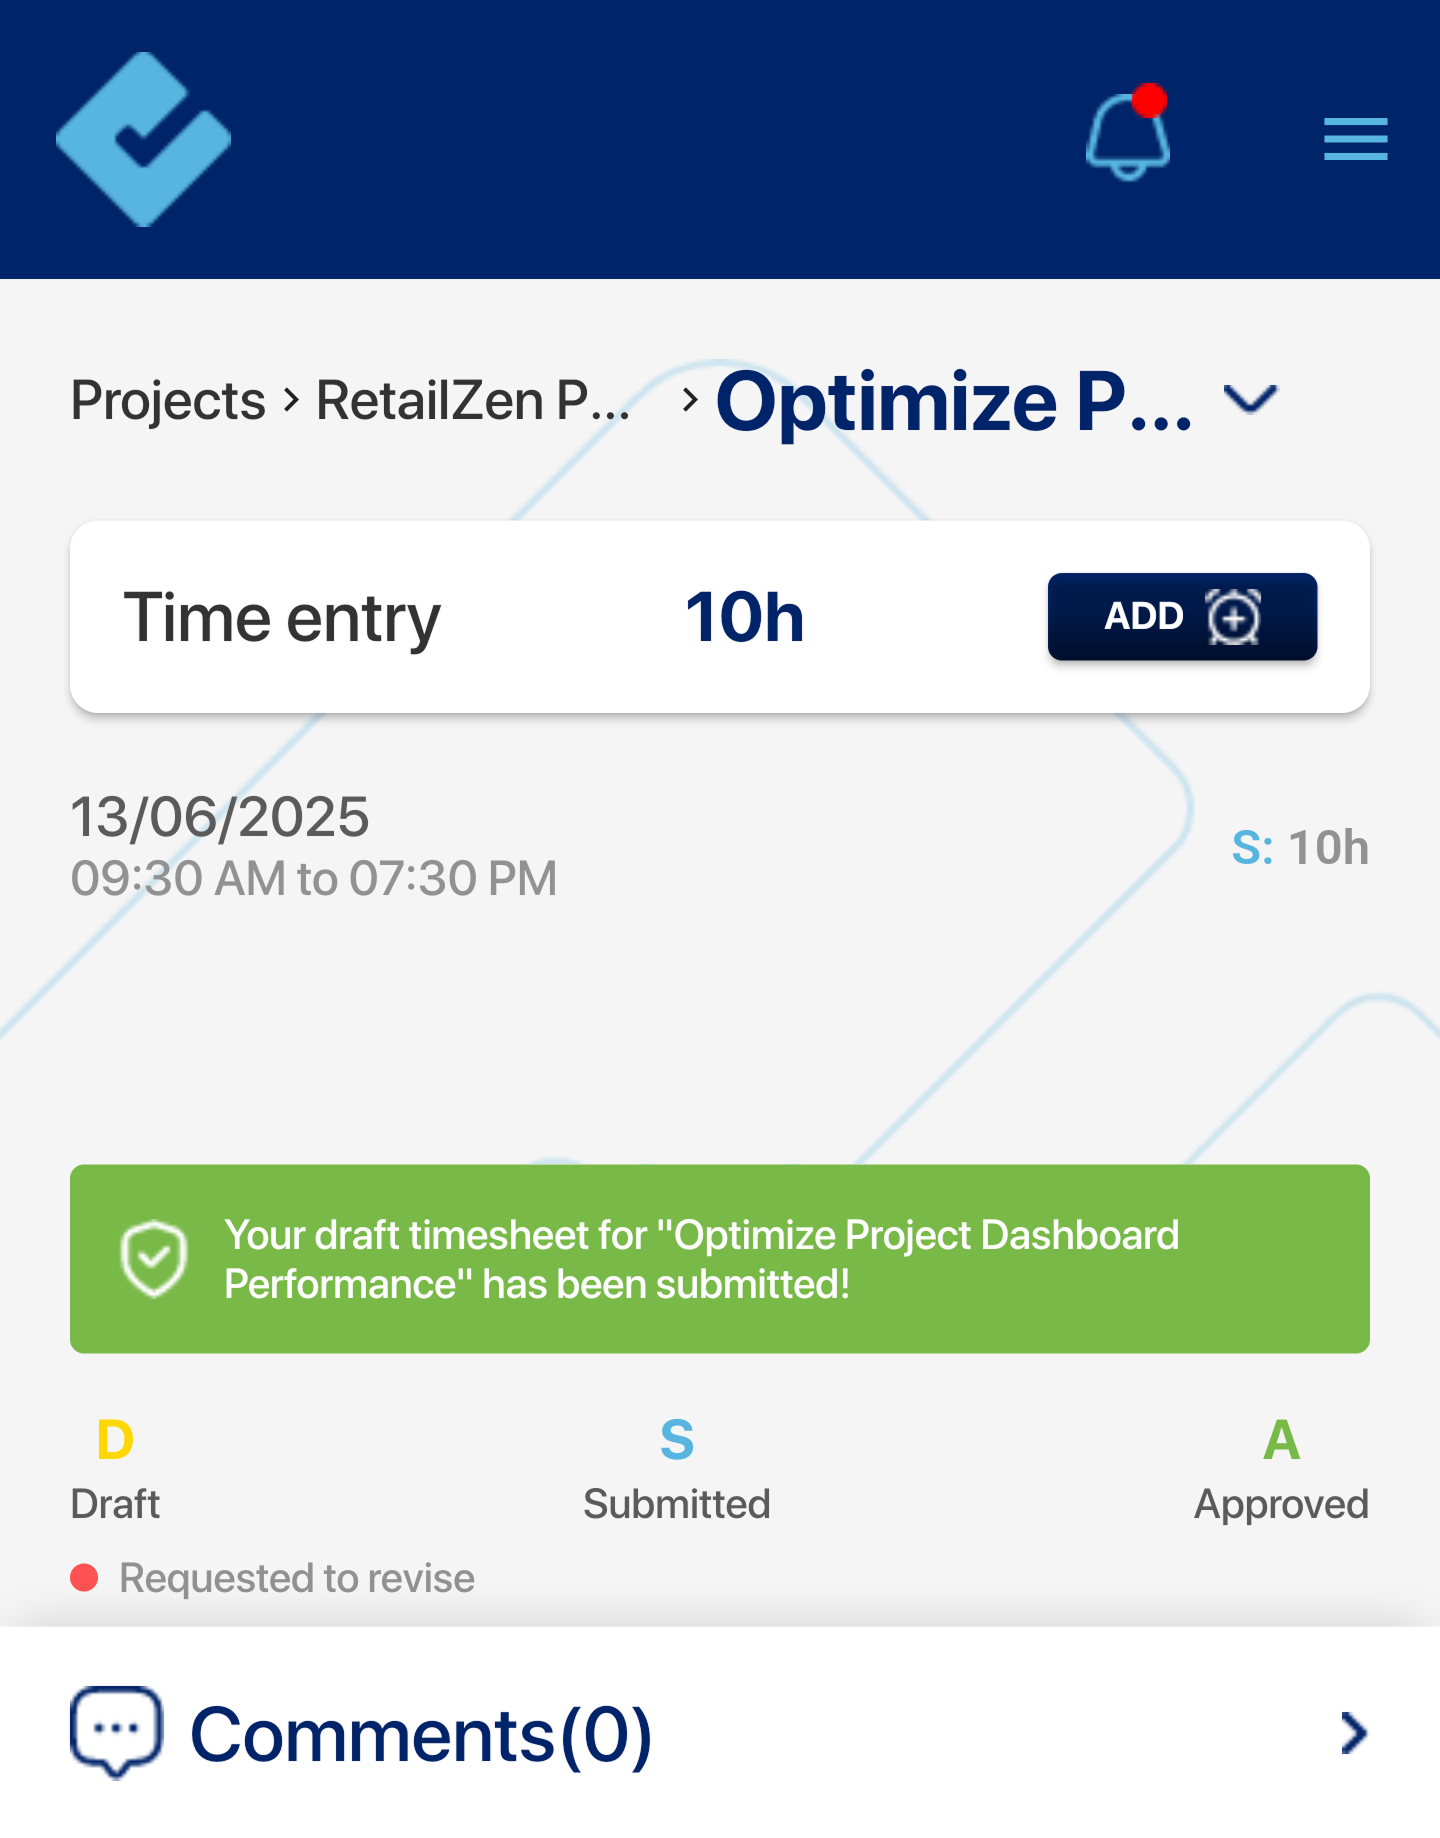
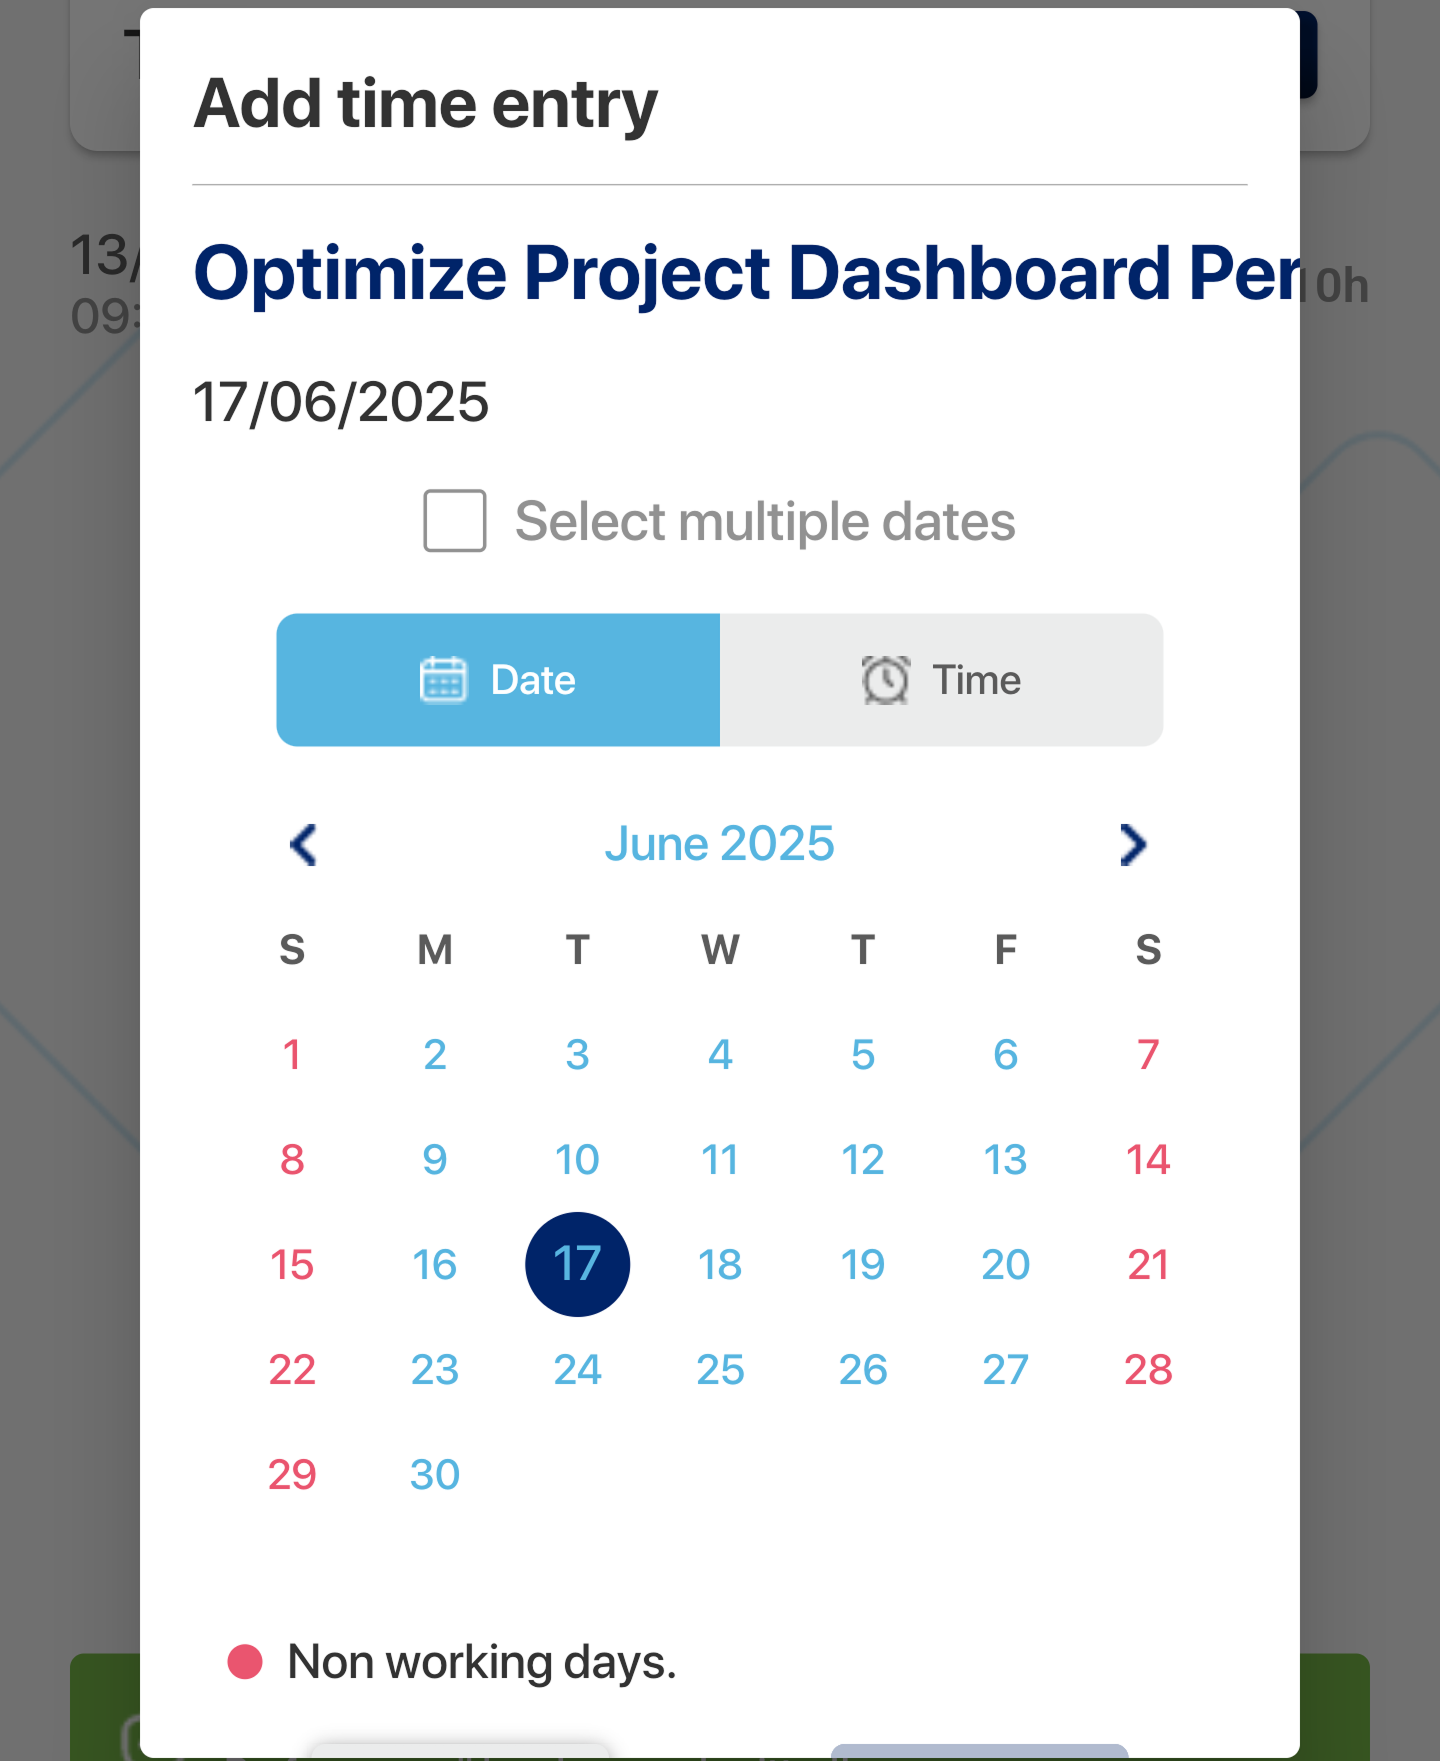
Adding a Time Entry in 2 Steps:
- Click on “Add Time Entry.”
- Enter the details:
- Date & Time
- Total Hours Worked
Time Entry Statuses
- D (Draft): The time entry is saved as a draft.
- S (Submitted): The time entry is submitted for approval.
- A (Approved): The entry has been approved.
- Requested to Revise: Sent by HR or management for corrections.
Note:
- Save, Edit, Delete the entry as needed until the entry is in Draft Status.
- Once the entry is submitted, changes cannot be made until the Management or HR request to revise it.
Important Note:
- Task-Specific Comments: These comments are specific to the current task and are not visible for other tasks.
- Public Readability: Anyone with access to the task can read the comments.
This feature allows for collaboration and communication within the team regarding specific tasks.

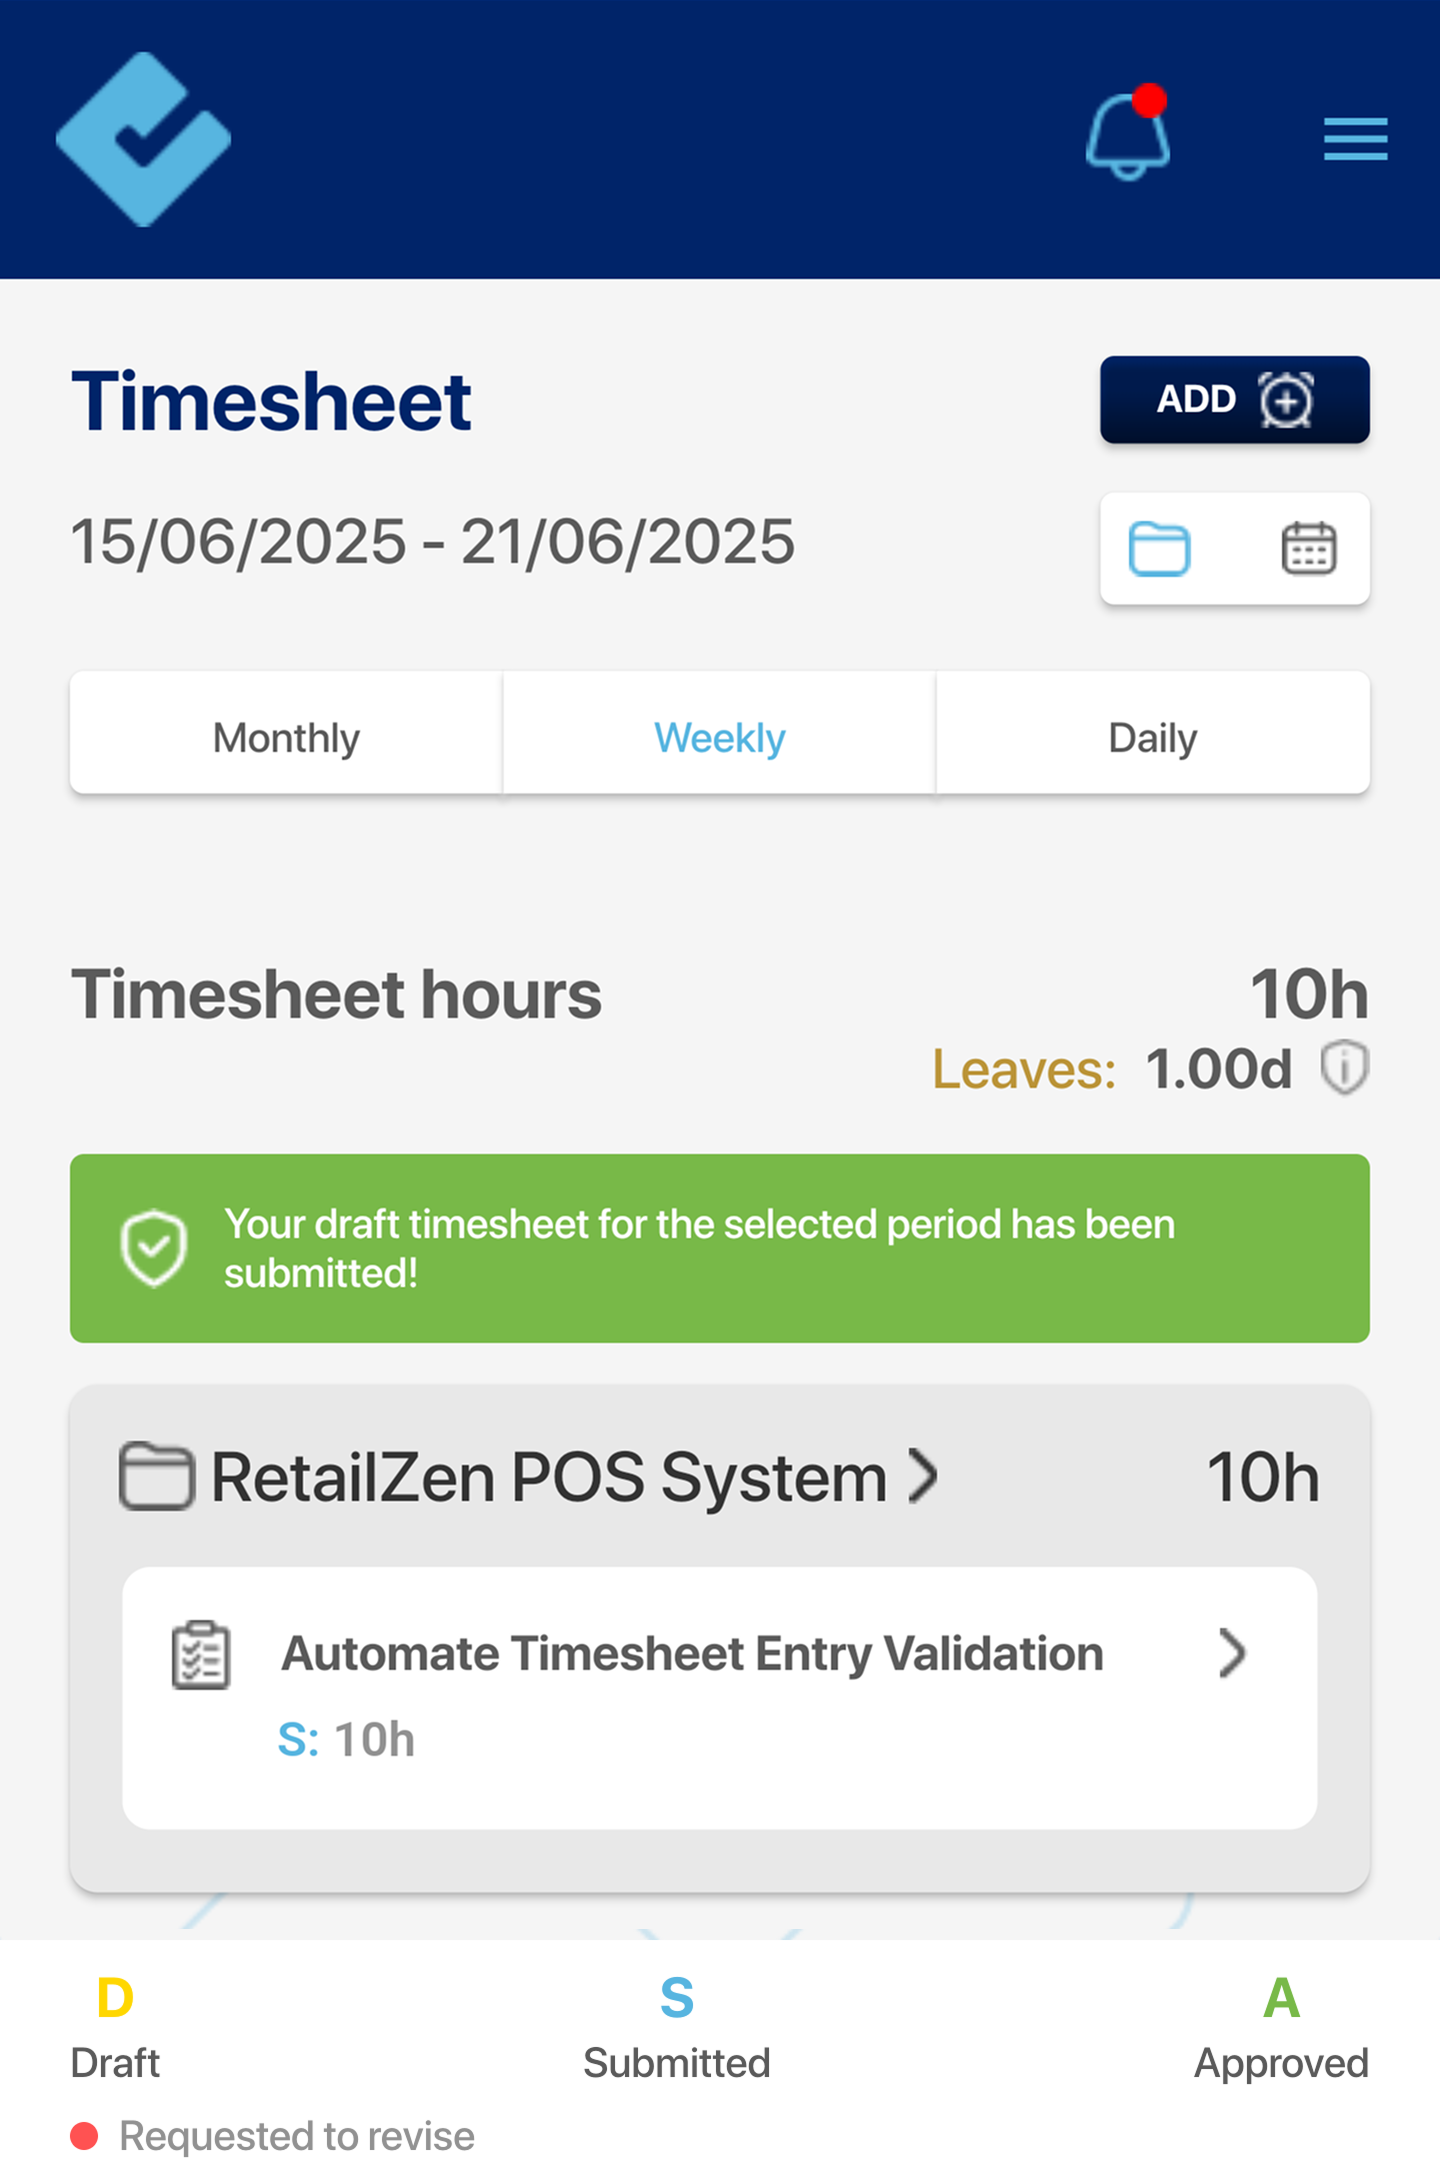
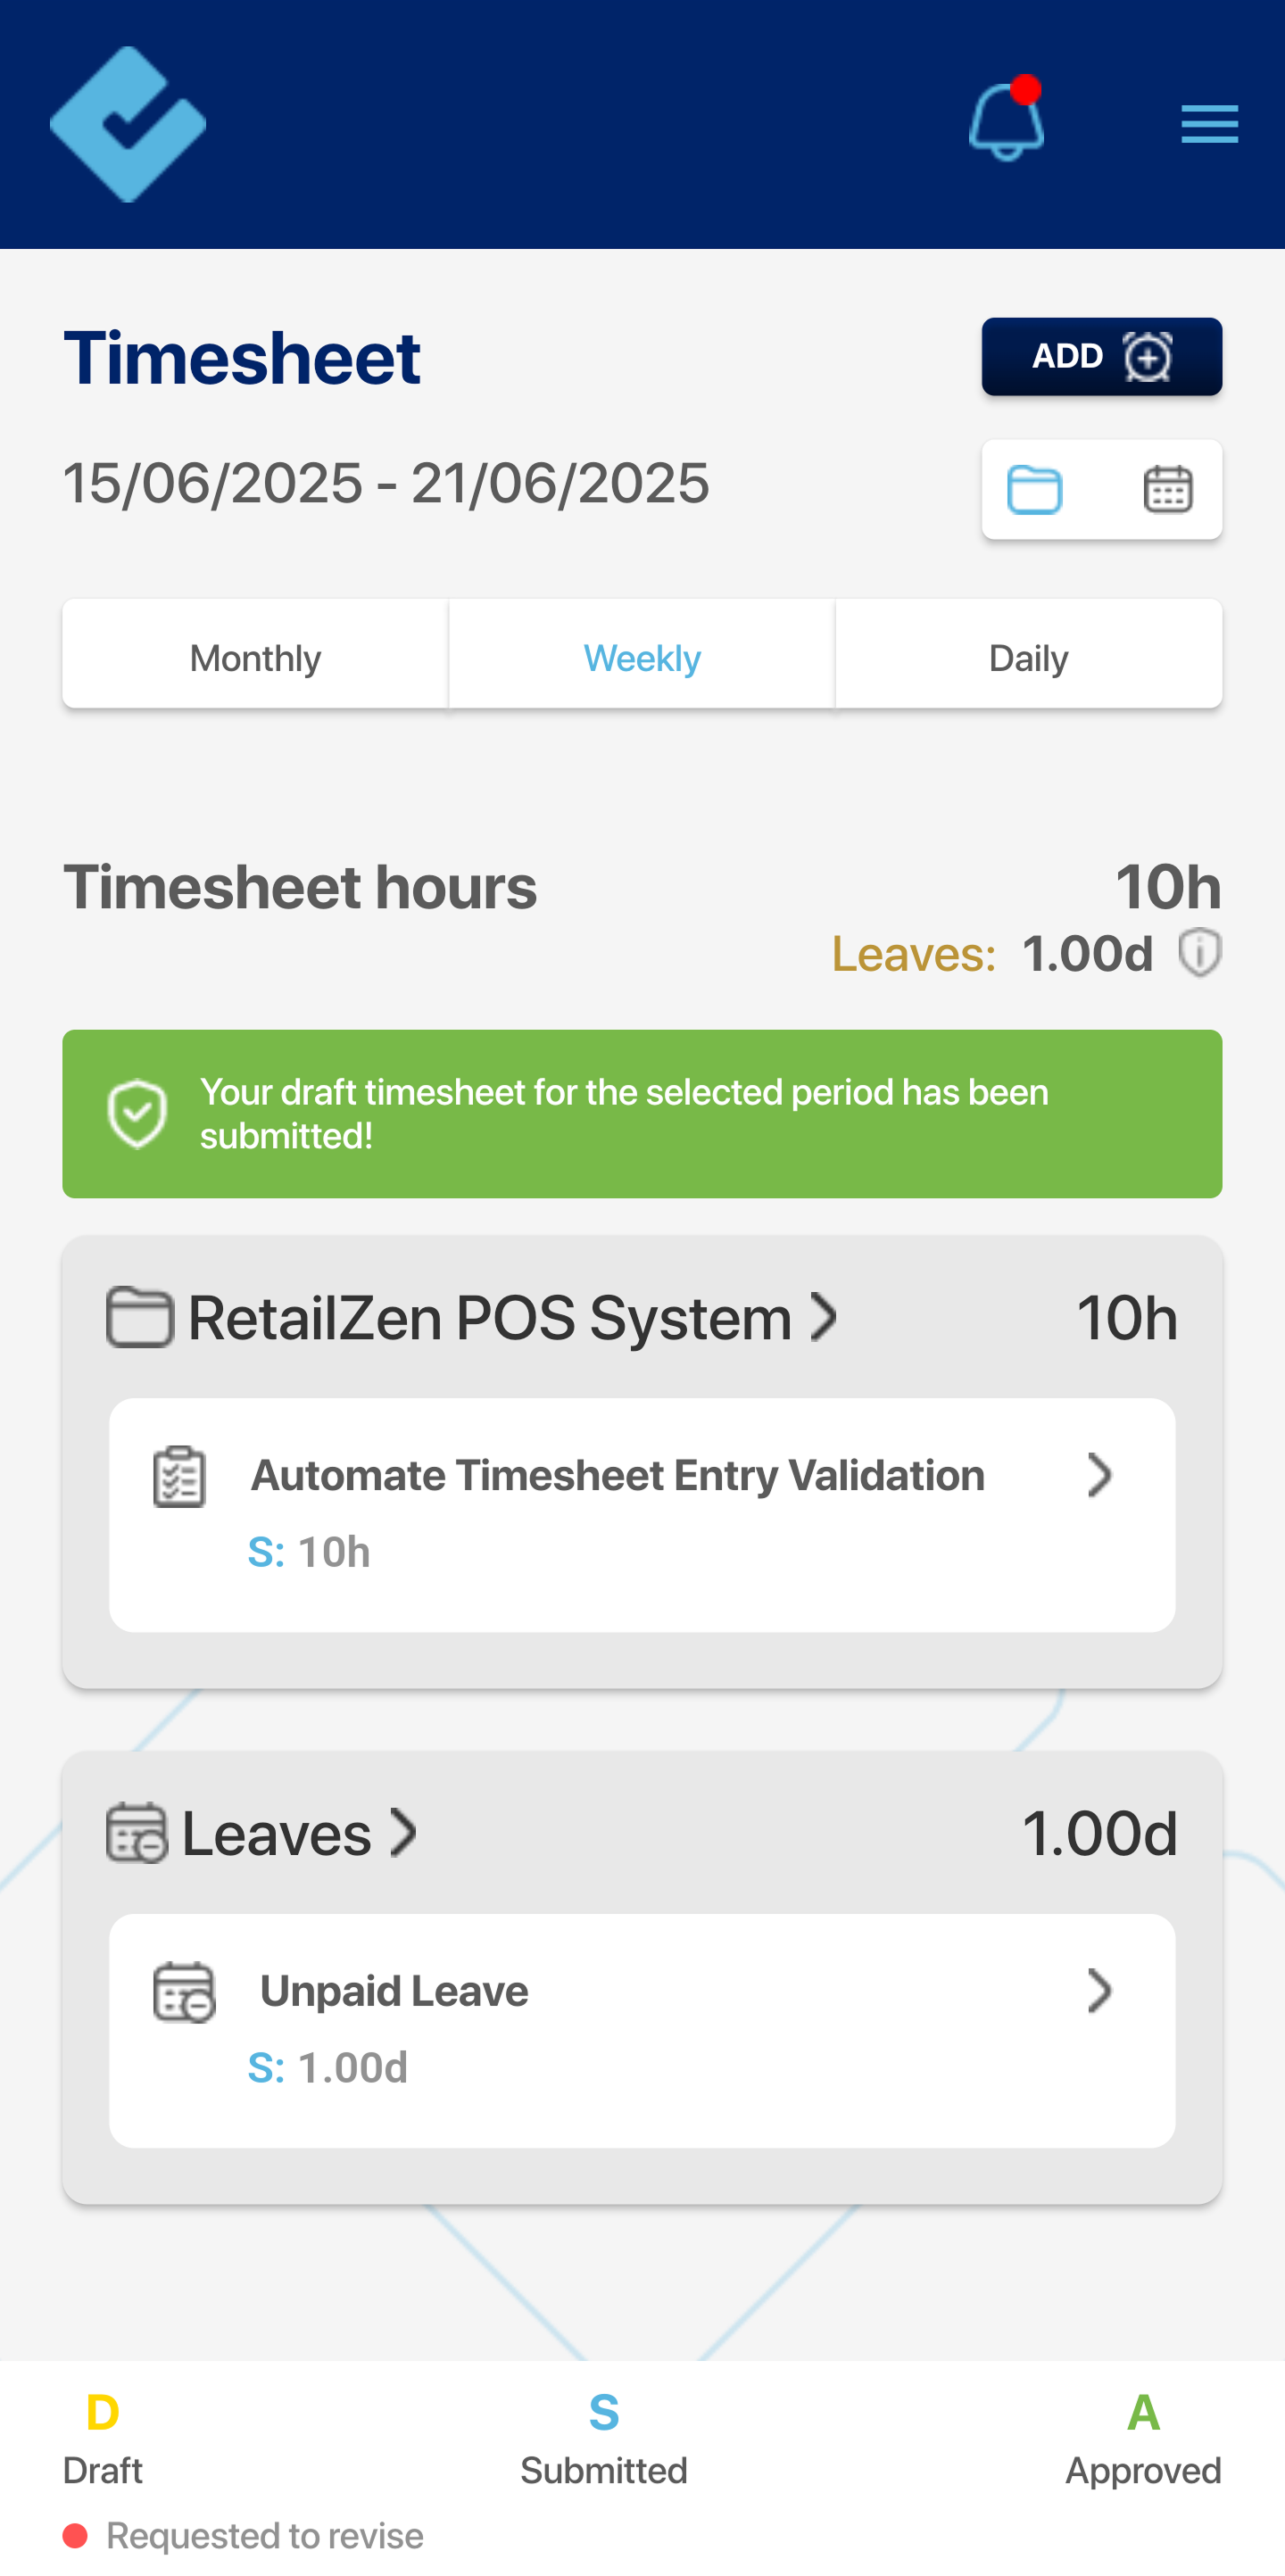
My Timesheet:
This section allows the admin to log working hours for their task.
Timesheet Features
- Add: Users can add a new time entry for one or multiple dates.
- Date Range: Displays the time frame (e.g., Sun, 08/12/2024 – Sat, 14/12/2024) for which you want to view the time entries in daily/weekly or monthly format.
- Timesheet Hours: Reflects total hours logged within the selected timeframe.
Task Breakdown
Displays the project and associated tasks within a time entry.
Task Status
- D: Draft
- S: Submitted
- A: Approved
- Requested to Revise: Sent when a time entry needs correction.
Approvals:
Timesheet Approval
This section allows the approval of the reportees’ timesheets.
Let’s break down things for you:
The date range simply shows the current date range for the timesheet being viewed or approved.
- Tab bar: allows the user to switch between views based on monthly, weekly, or daily.
Team members list:
- Shows the list of all the reportees.
- This sign ( > ) will take you to the attendance details of the particular team member.
Timesheet hours refer to the total number of working hours they spend, for example, 10h.
This feature allows for collaboration and communication within the team regarding specific tasks.
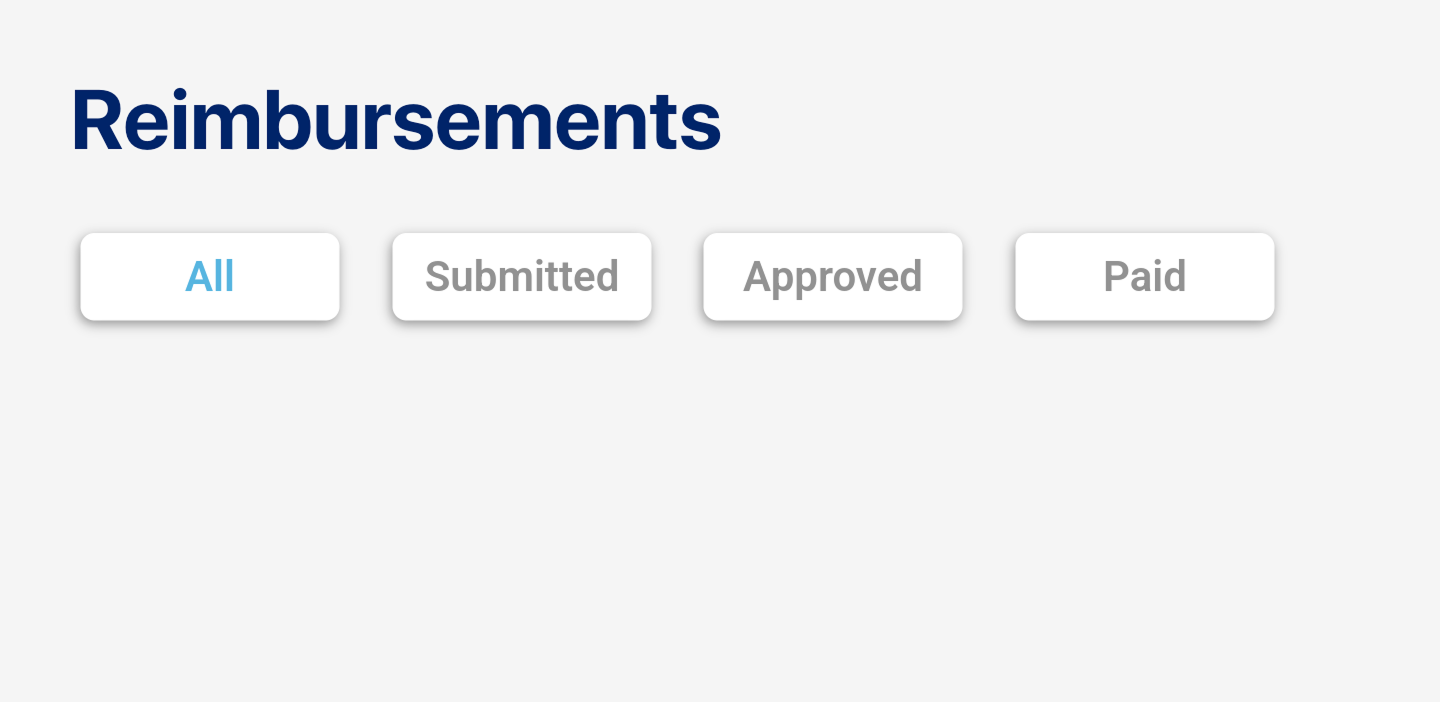
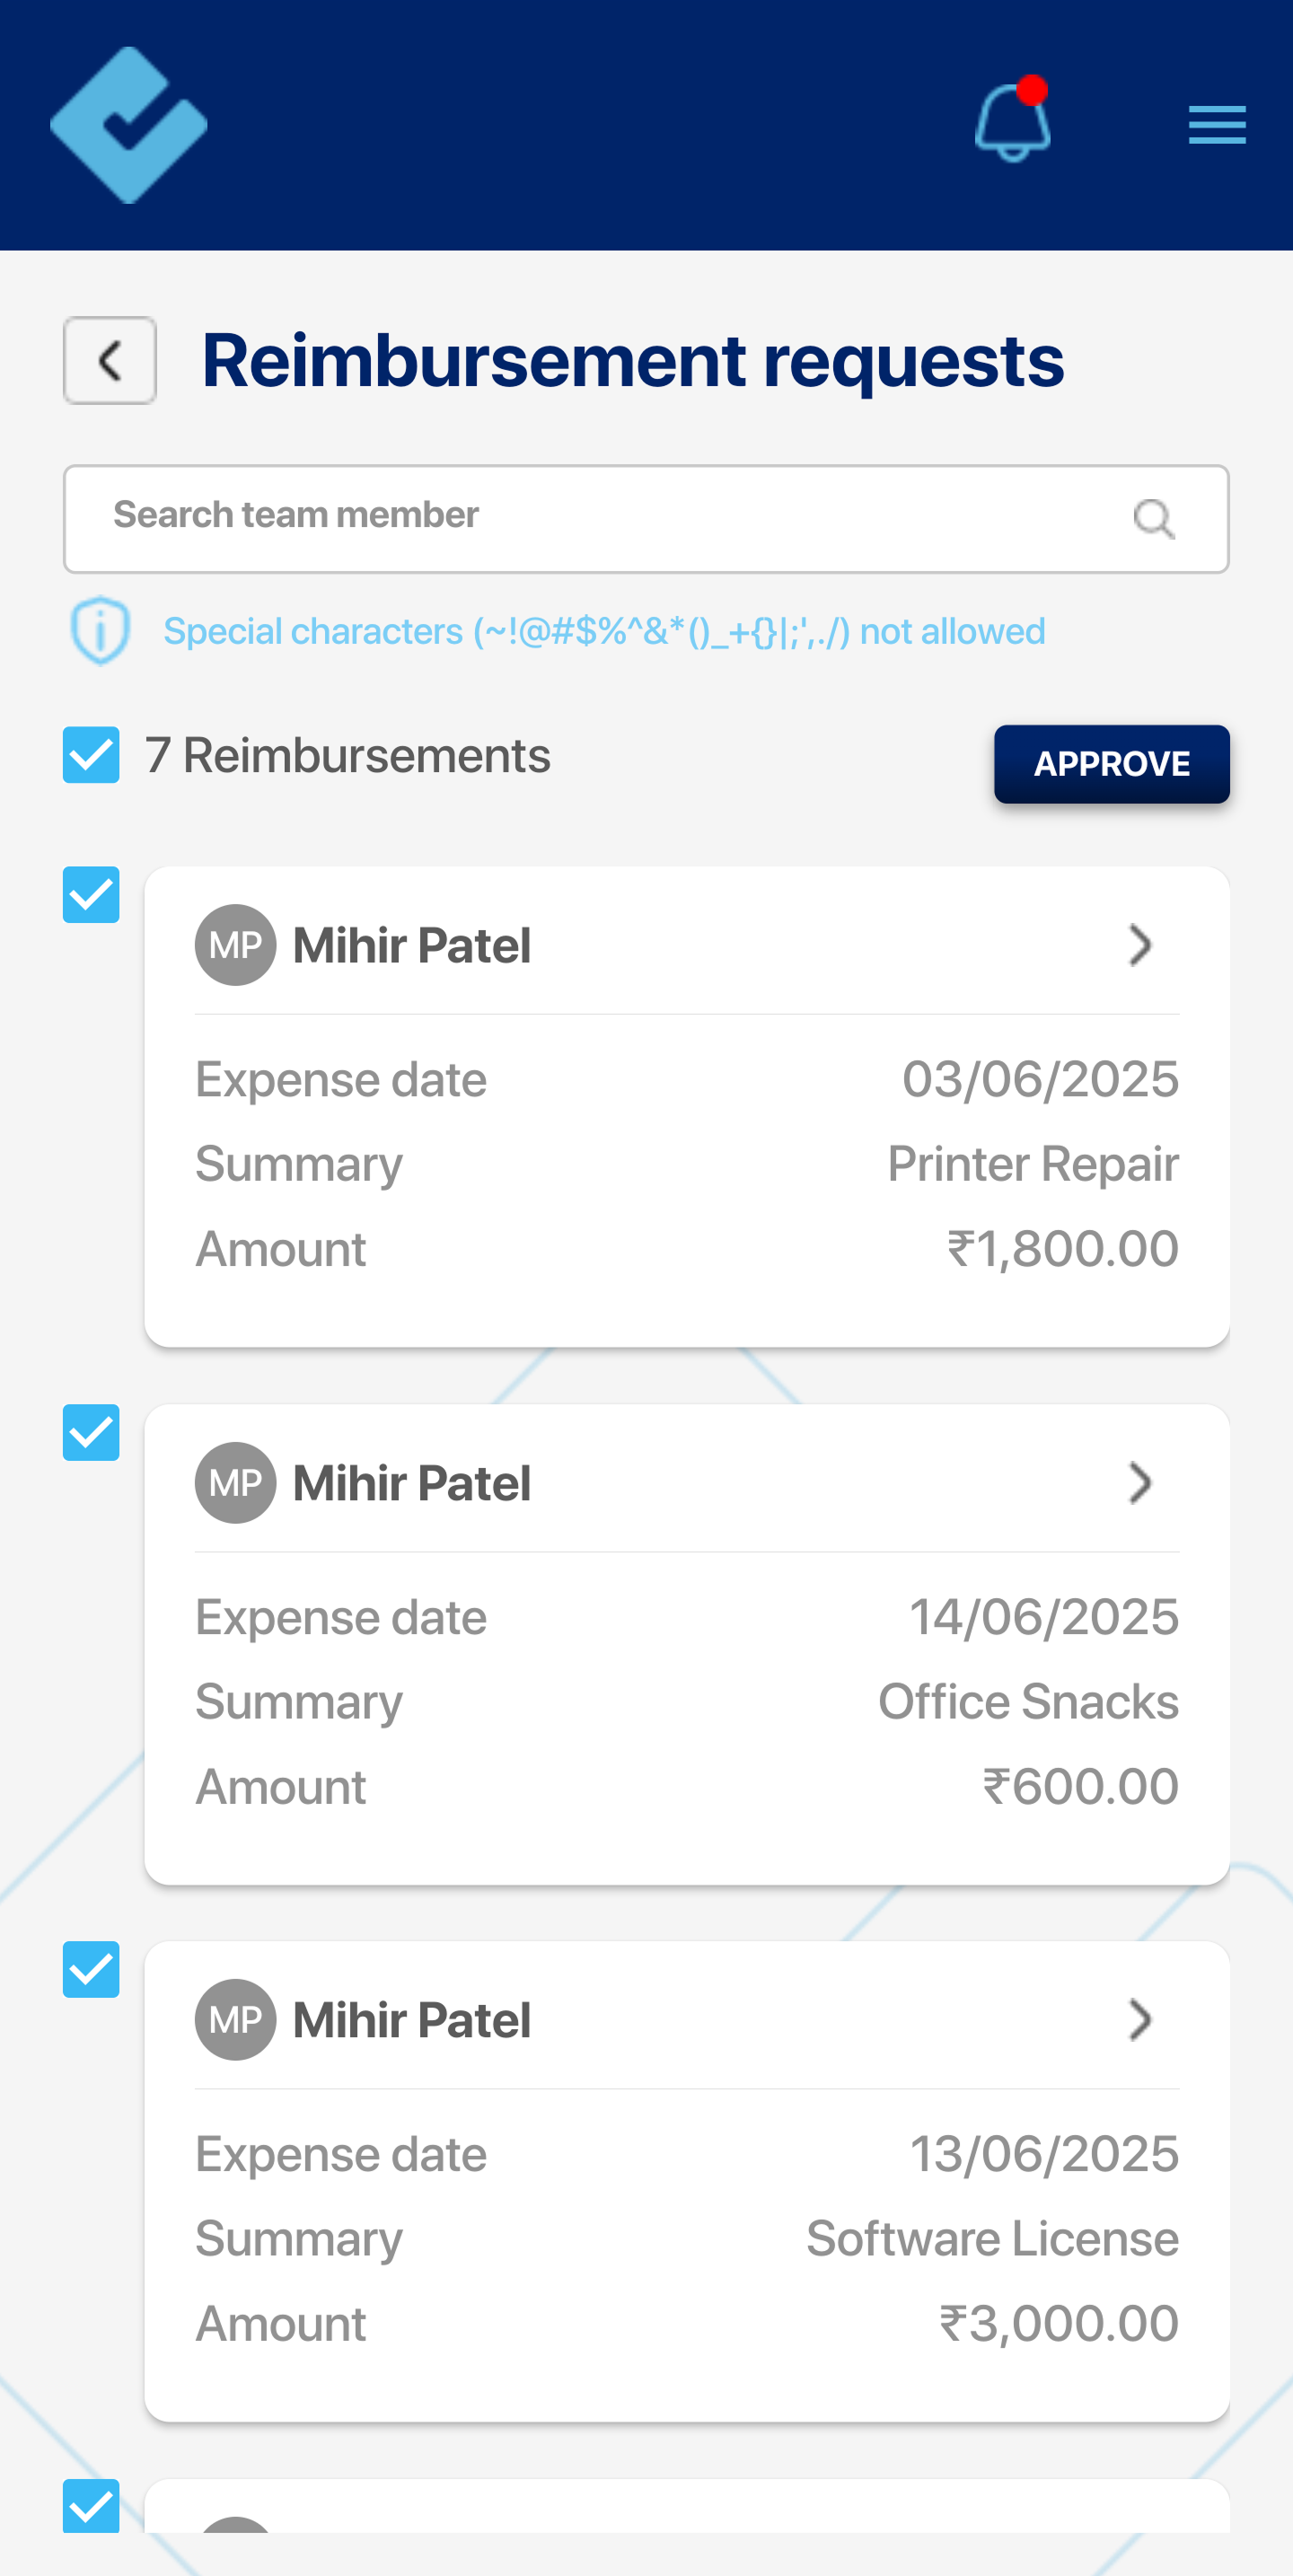
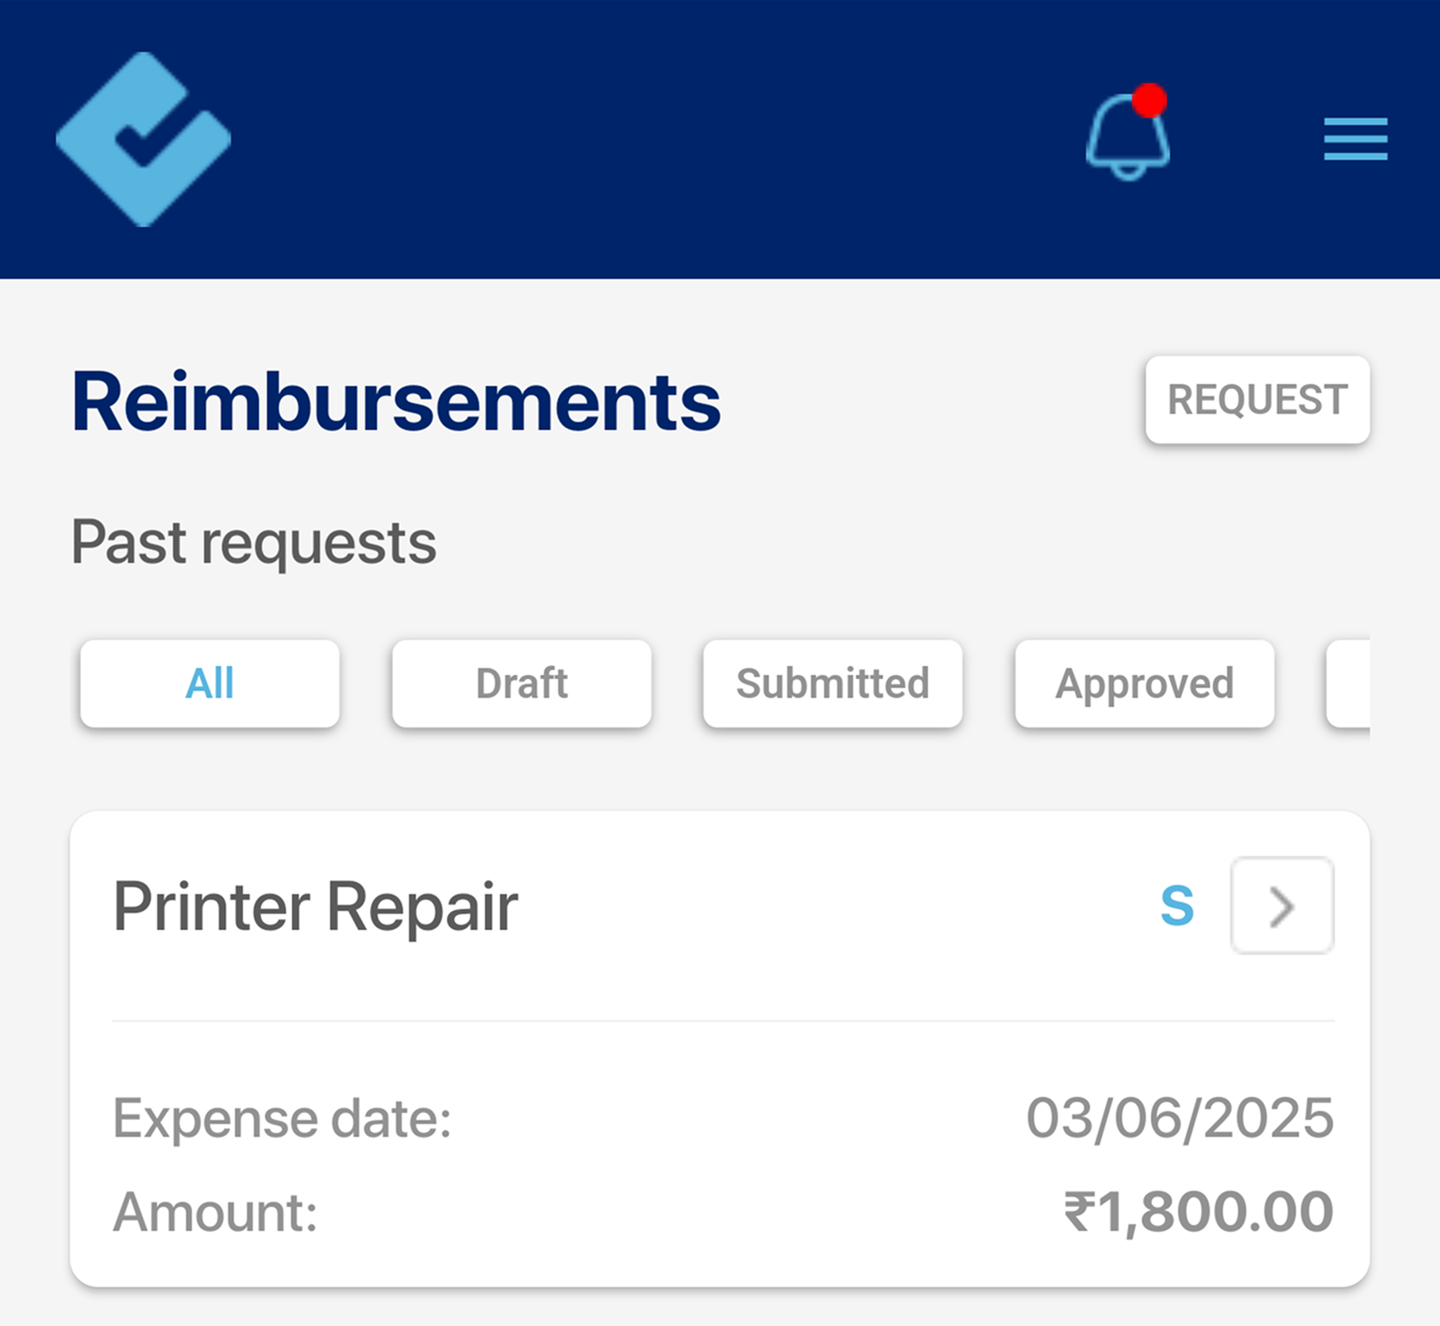
Reimbursement Approval:
This feature allows for the approval of reimbursement requests for all or selected employees.
The image displays several key options:
The date range simply shows the current date range for the timesheet being viewed or approved.
- 4 Reimbursements: Indicates the total number of reimbursement requests.
- Approve: This button approves the selected reimbursement requests.
Example:
- Mihir Patel: Displays the name of the team member who submitted the request.
- Summary: Shows the description of the specific item being reimbursed (e.g., “Printer Repair” as shown in the above image).
- Amount: Displays the requested reimbursement amount (₹1800.00).
- Arrow: Clicking on this arrow reveals further details of the reimbursement request such as Expense date, submission date, approval date, payment date, amount and other details.
IT Declarations/Proof of Investments:
This feature allows the IT declarations of all employees.
If the approval is pending, a blue icon will appear next to the employee’s name.
This sign ( > ) navigates you to open the details of the particular employee.
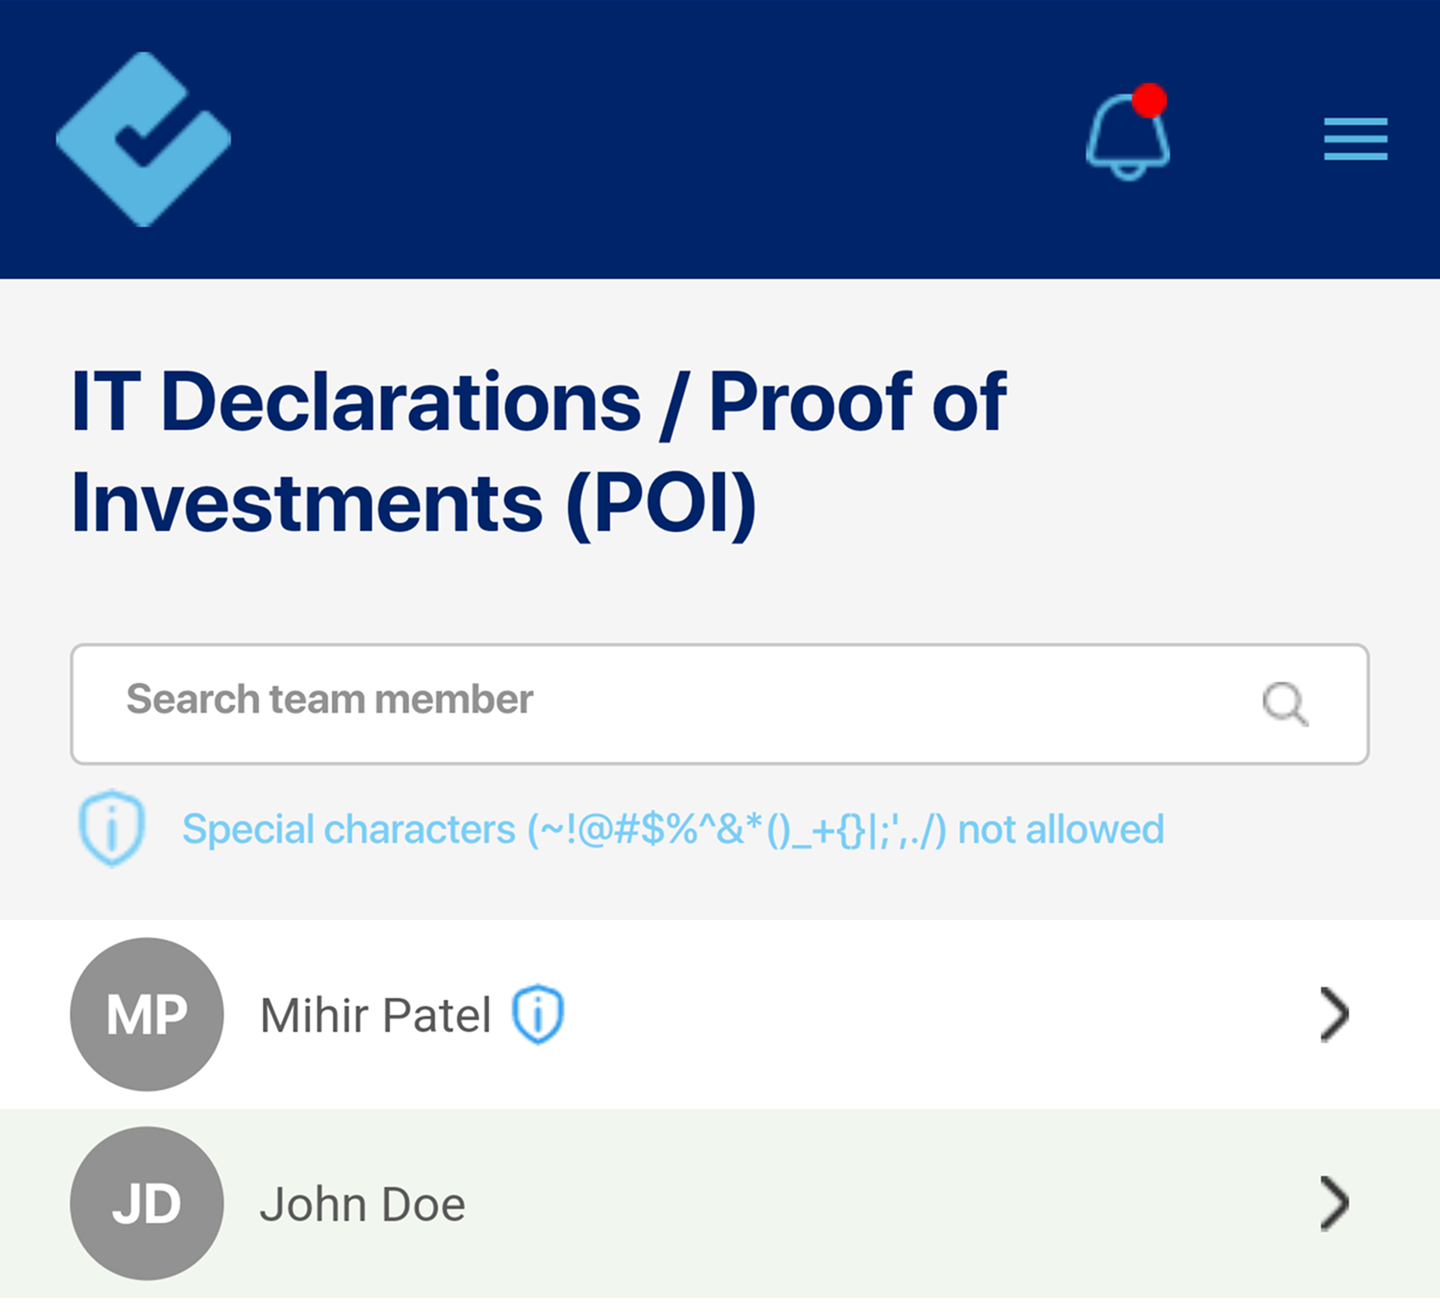
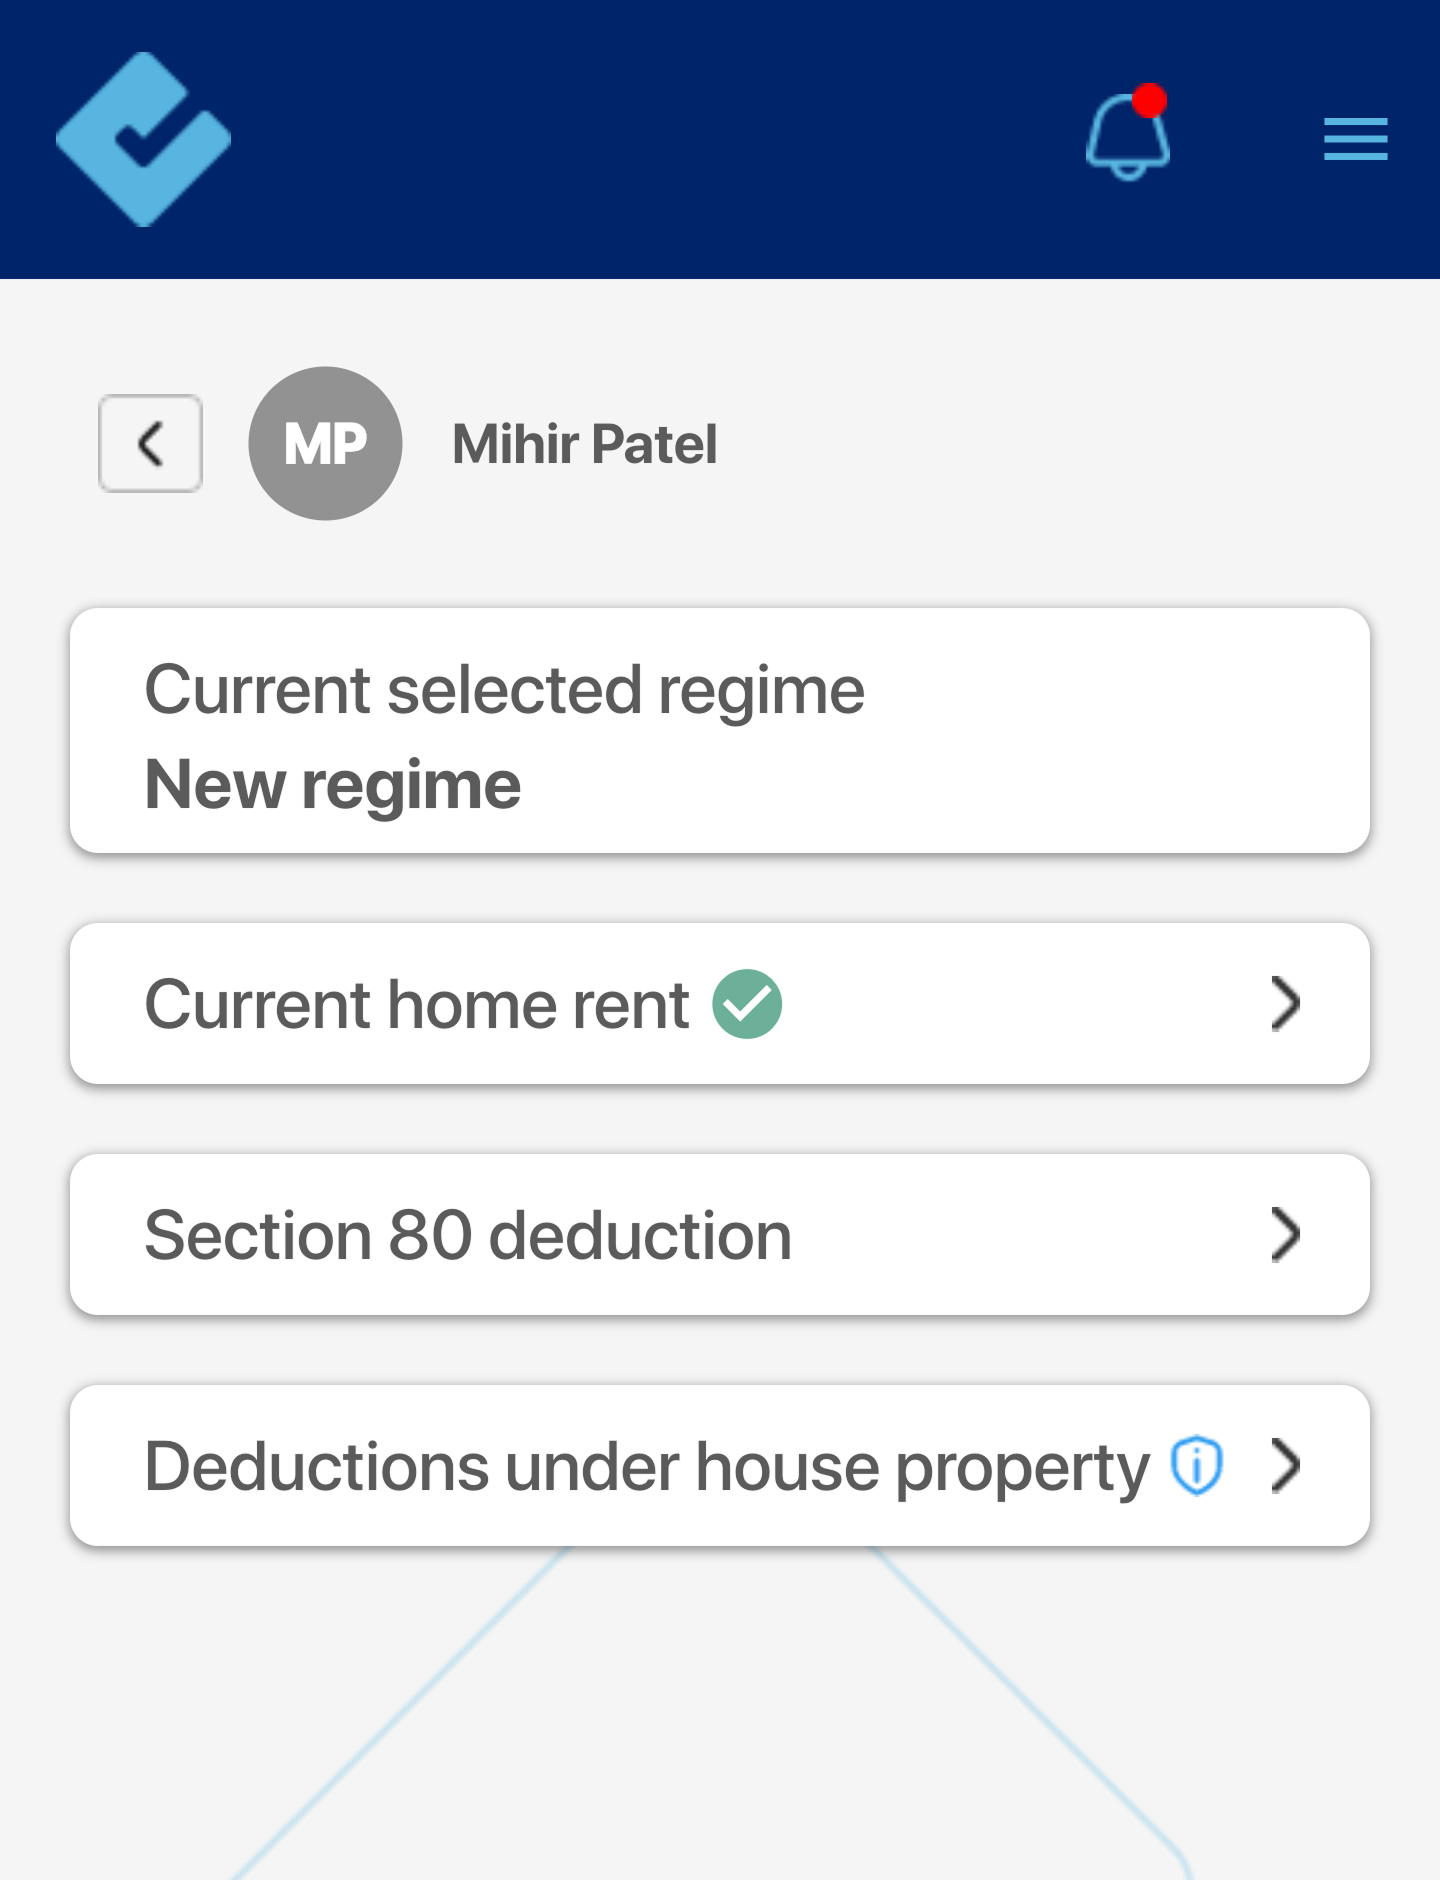
IT Declaration Options:
- Current selected regime: Represents the tax regime selected by the employees.
- Current home rent: Allows the approver to view the details related to current home rent for tax deductions.
The blue icon next to sections indicates that the team member has submitted their IT declaration / proof of investments for approval.
Below we have taken an example of Current home rent where we have approval options. All the sections will have the same approval options.
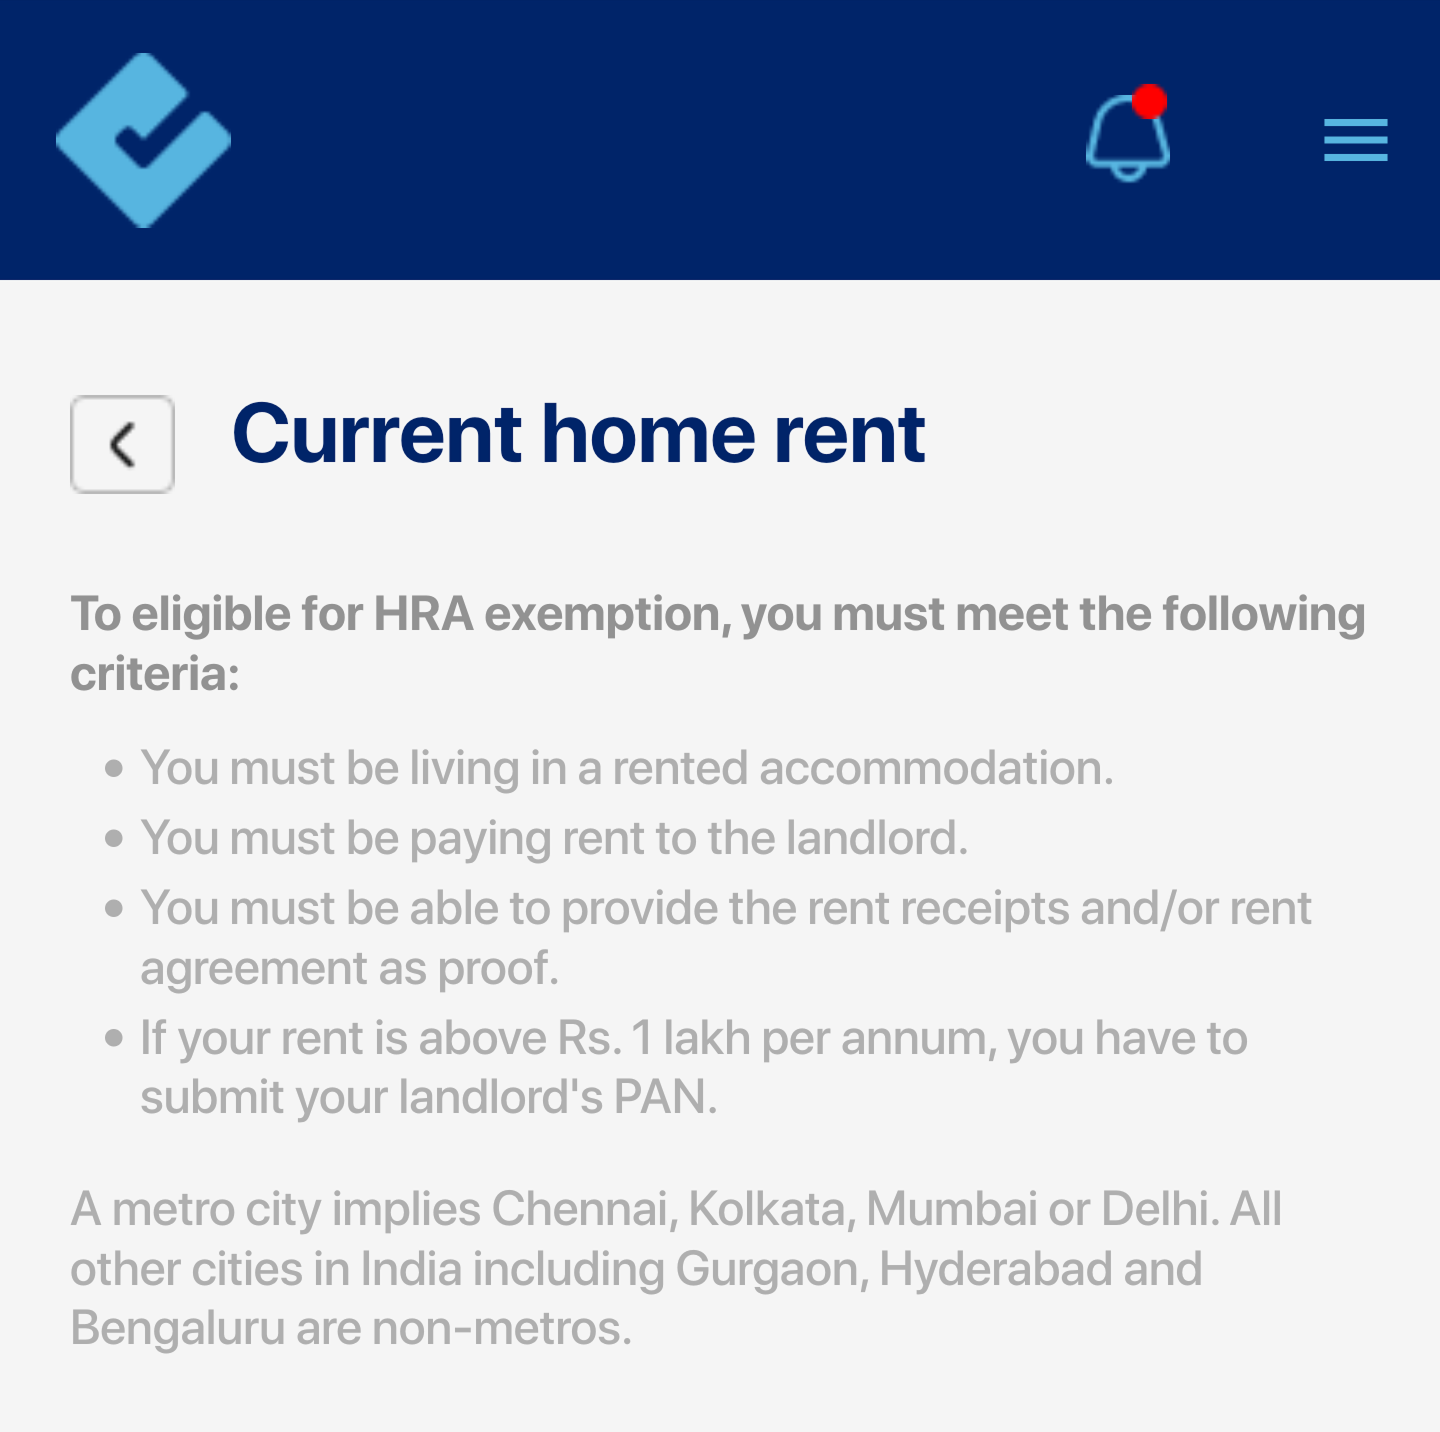
Current home rent:
This indicates that the current screen is related to reviewing a team member’s current home rent declaration.
Eligibility Criteria:
The screen displays the eligibility criteria for HRA exemption, including the requirement to live in rented accommodation, provide rent receipts, and submit the landlord’s PAN if the rent exceeds Rs. 1 lakh per annum.
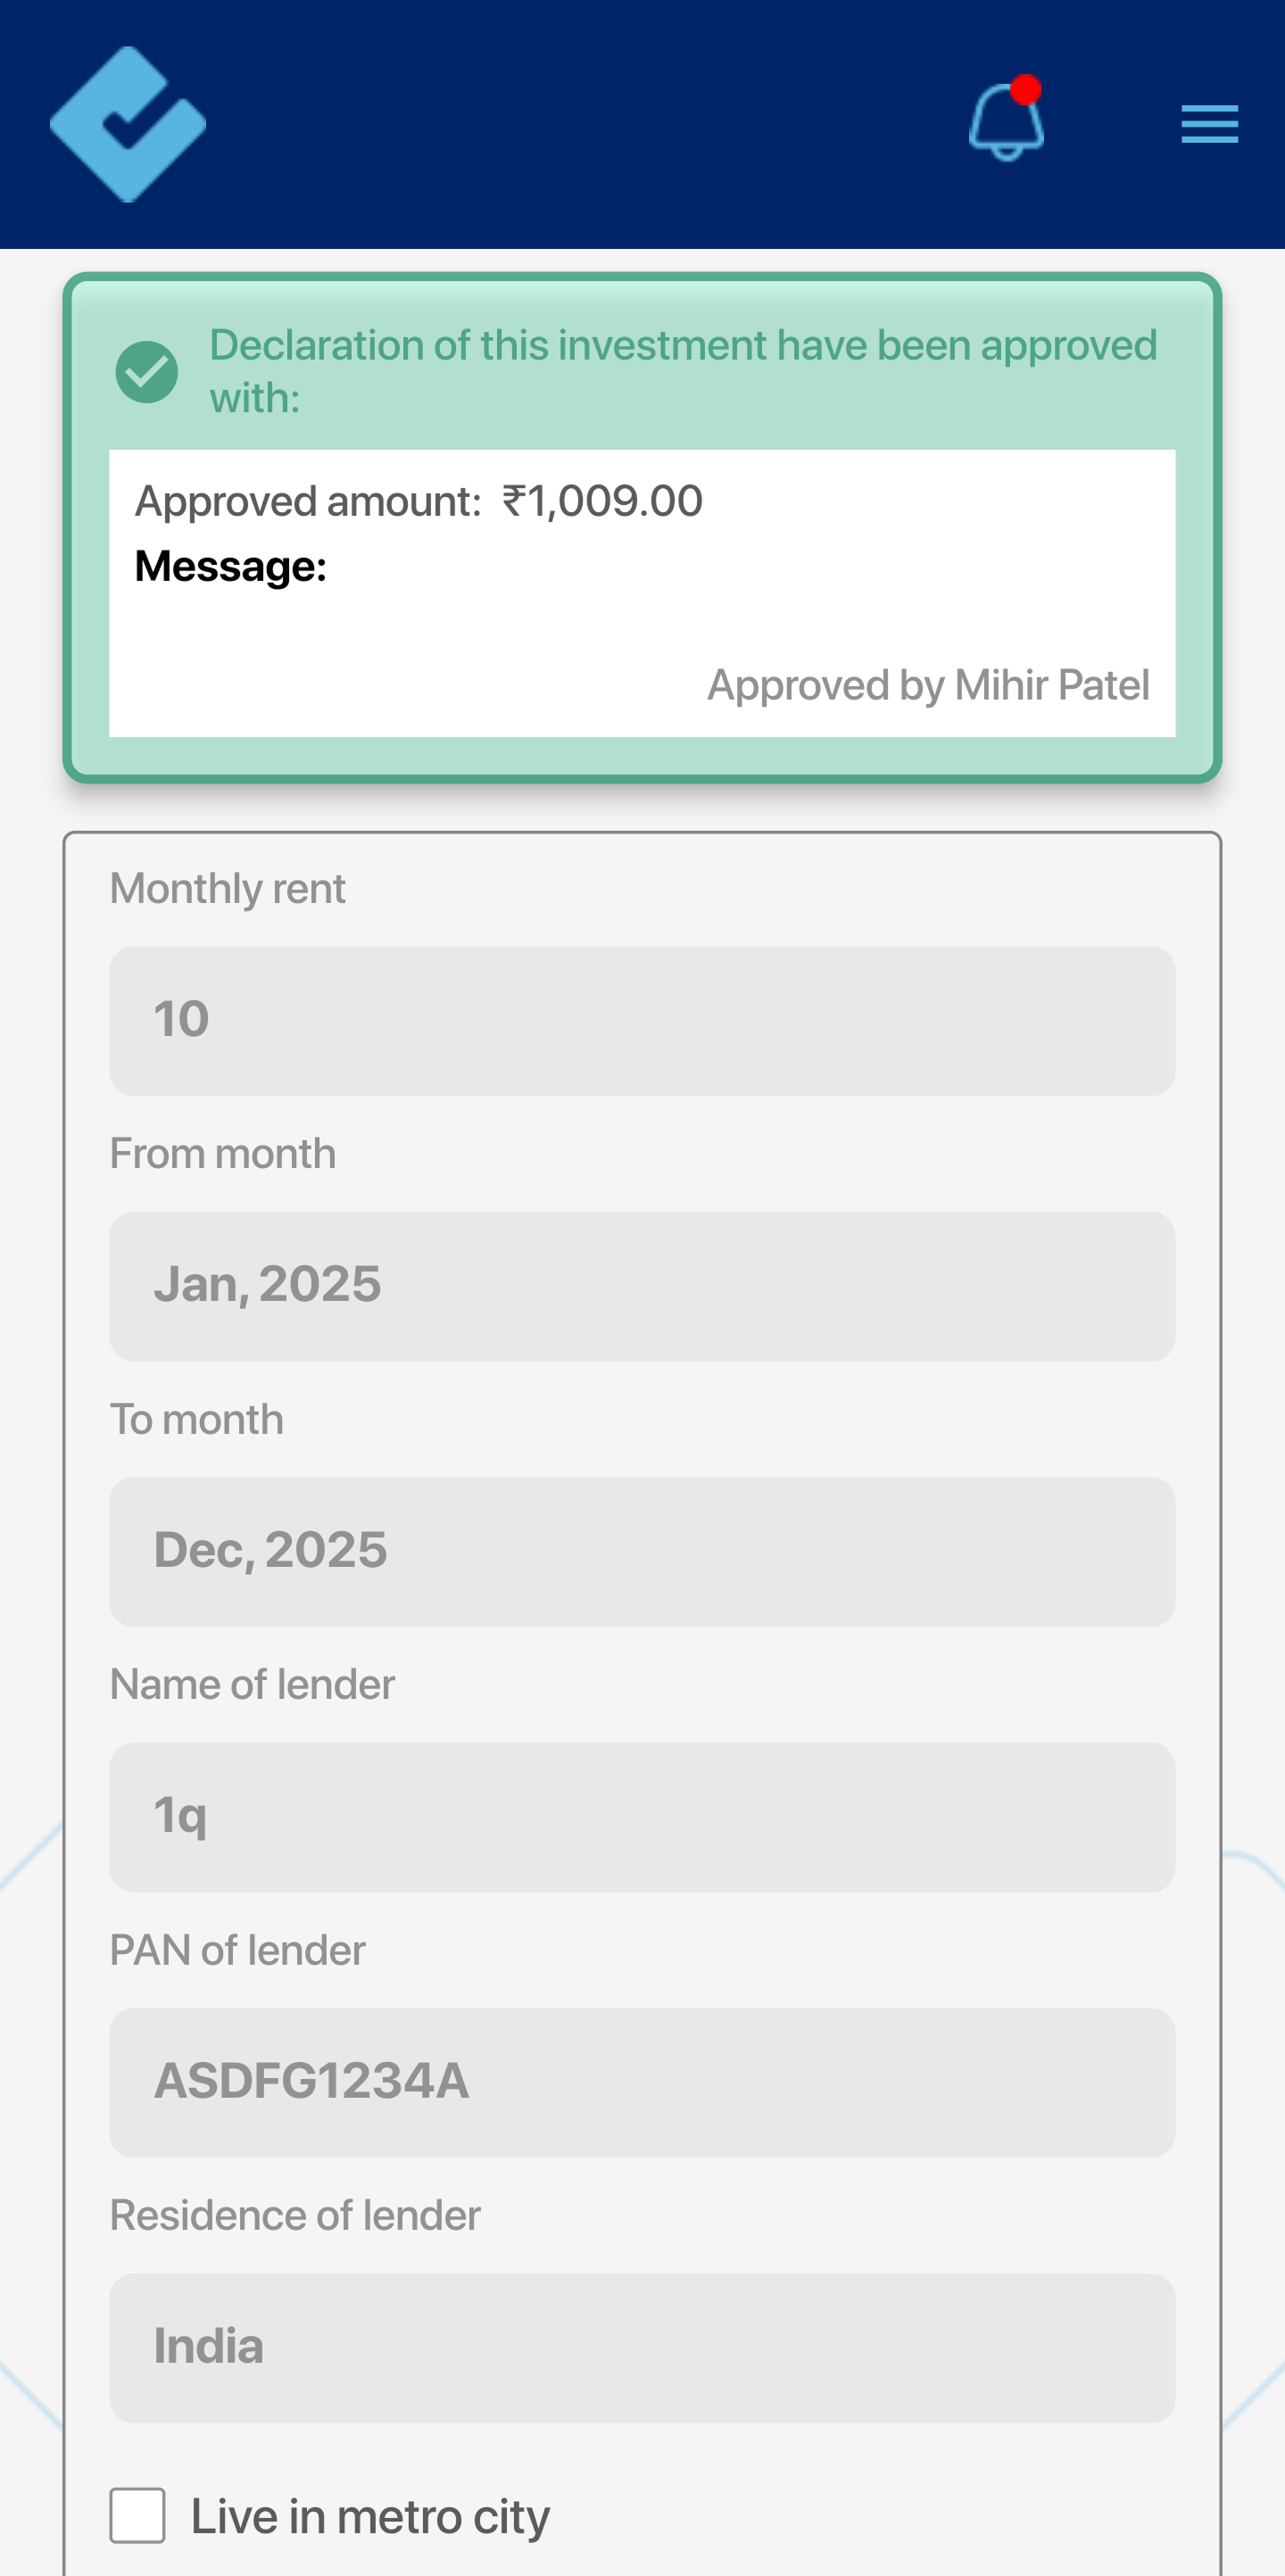
Pending Approval:
This indicates that the current home rent declaration is pending approval.
Approval Options:
- Approved amount: This field allows the user to enter the approved amount and that will be considered for Net Salary Calculation.
- Message: This field allows the user to add a message for getting clarity from the team members if needed.
- Further action needed: The user can select “Yes” or “No” to indicate if further action is required from the team member.
- APPLY: This button allows the user to submit the approval decision.
- Rent Details
- Monthly rent: This displays the monthly rent amount declared by the team member.
- From month: This displays the start month of the rent period.
- To month: This displays the end month of the rent period.
- Name of lender: This displays the name of the landlord.
- PAN of lender: This displays the PAN of the landlord.
- Residence of lender: This displays the country of the landlord.
- Live in metro city: The checkbox indicates whether the team member lives in a metro city.
Section 80 deduction:
In a similar way you can approve these also.
Deductions under house property:
In a similar way you can approve these also.
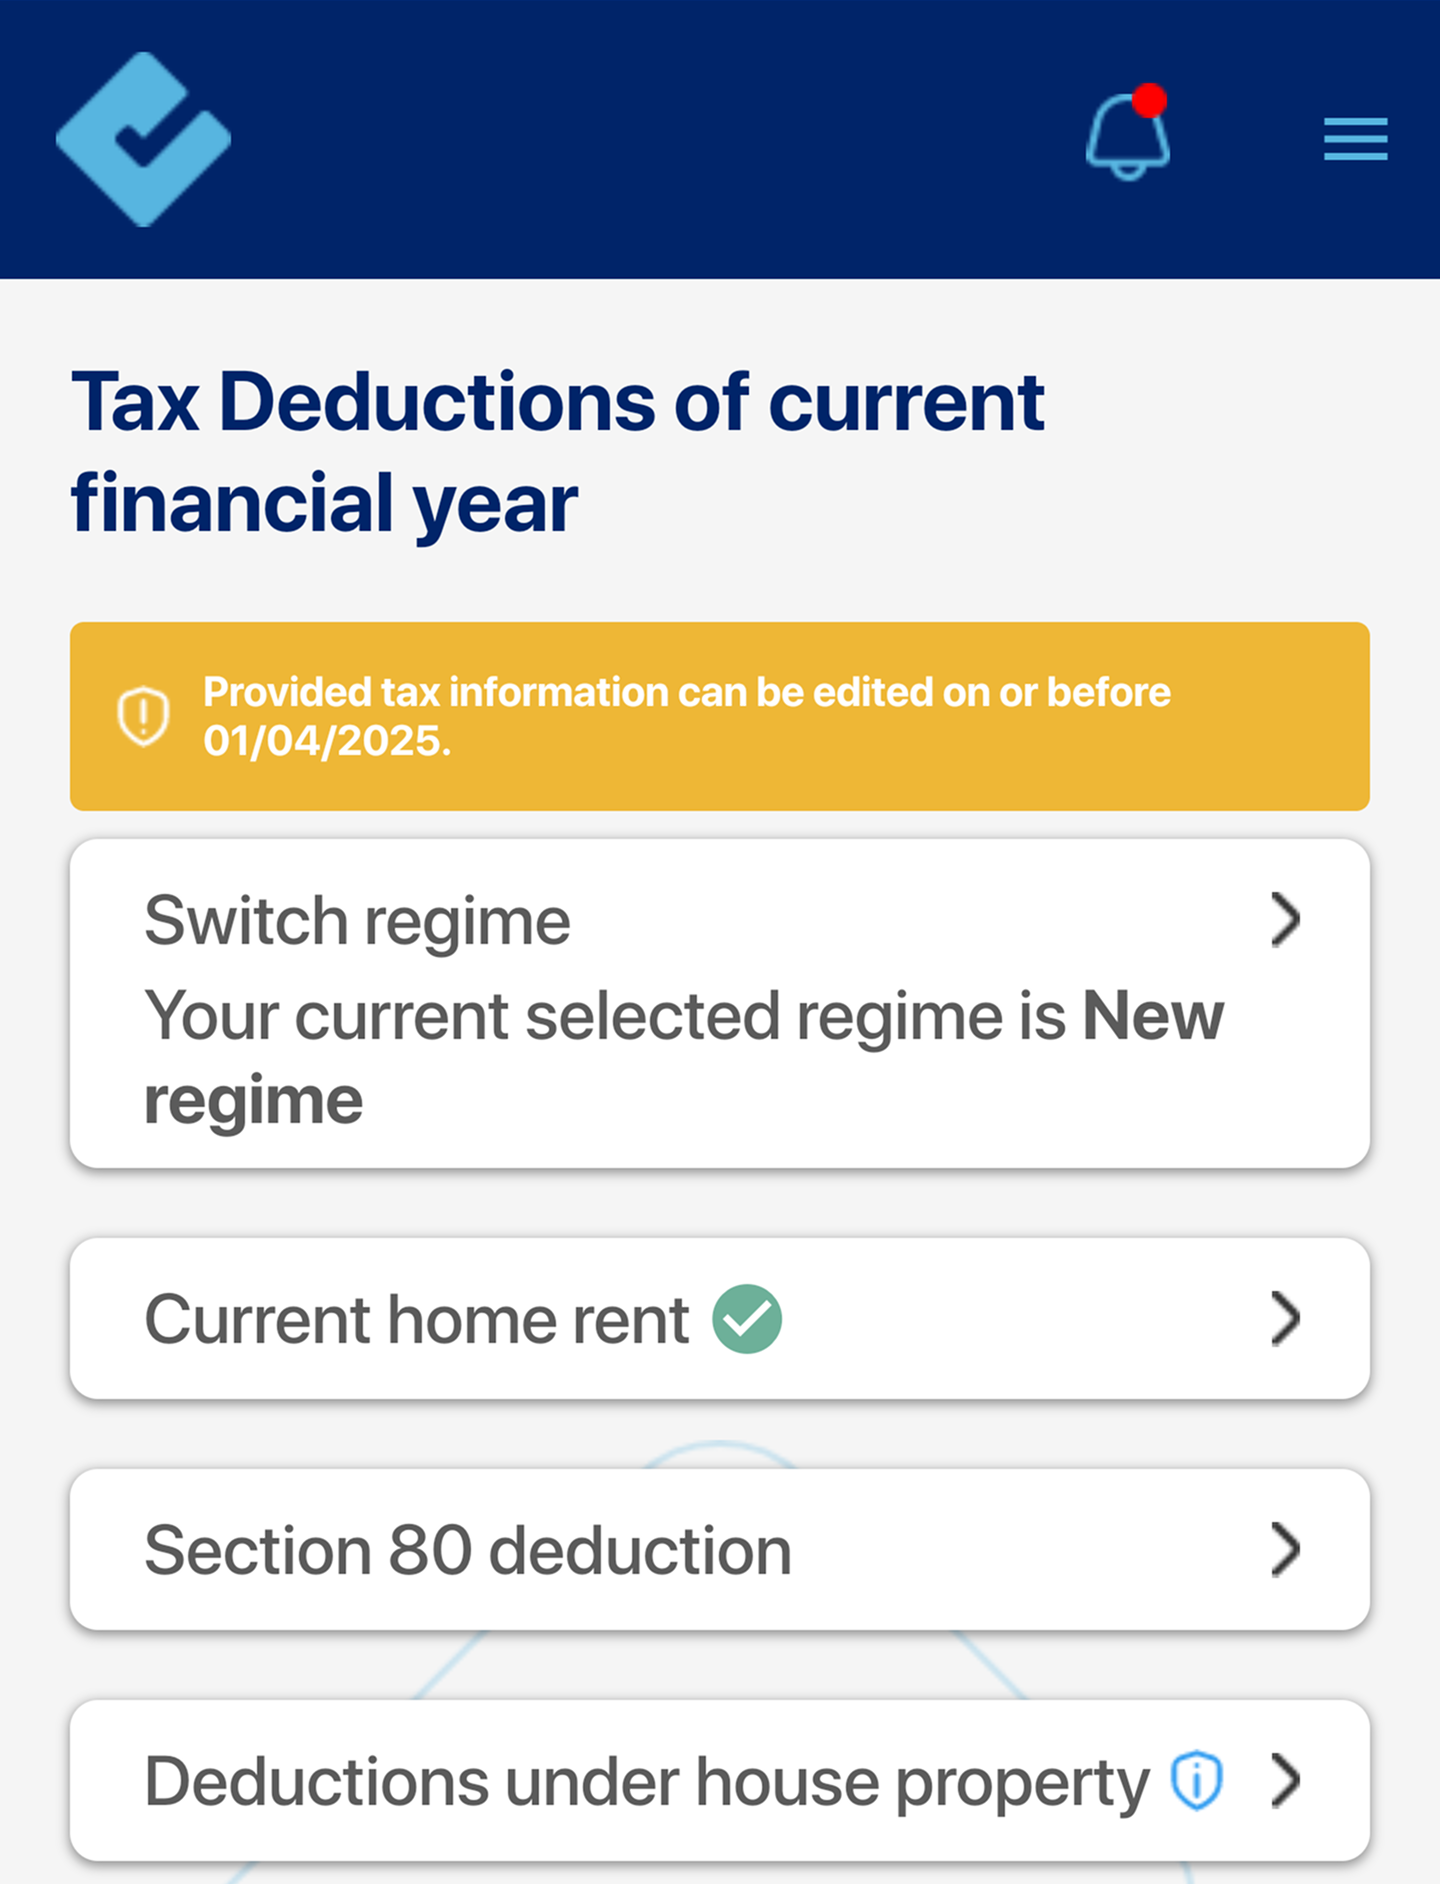
Tax Deductions:
Tax Deductions of current financial year: Allow admins to declare tax deductions of their own.
Switch regime:
Enables admins to switch between old and new tax regimes.
Current home rent:
AMH can enter home rent details for tax deductions
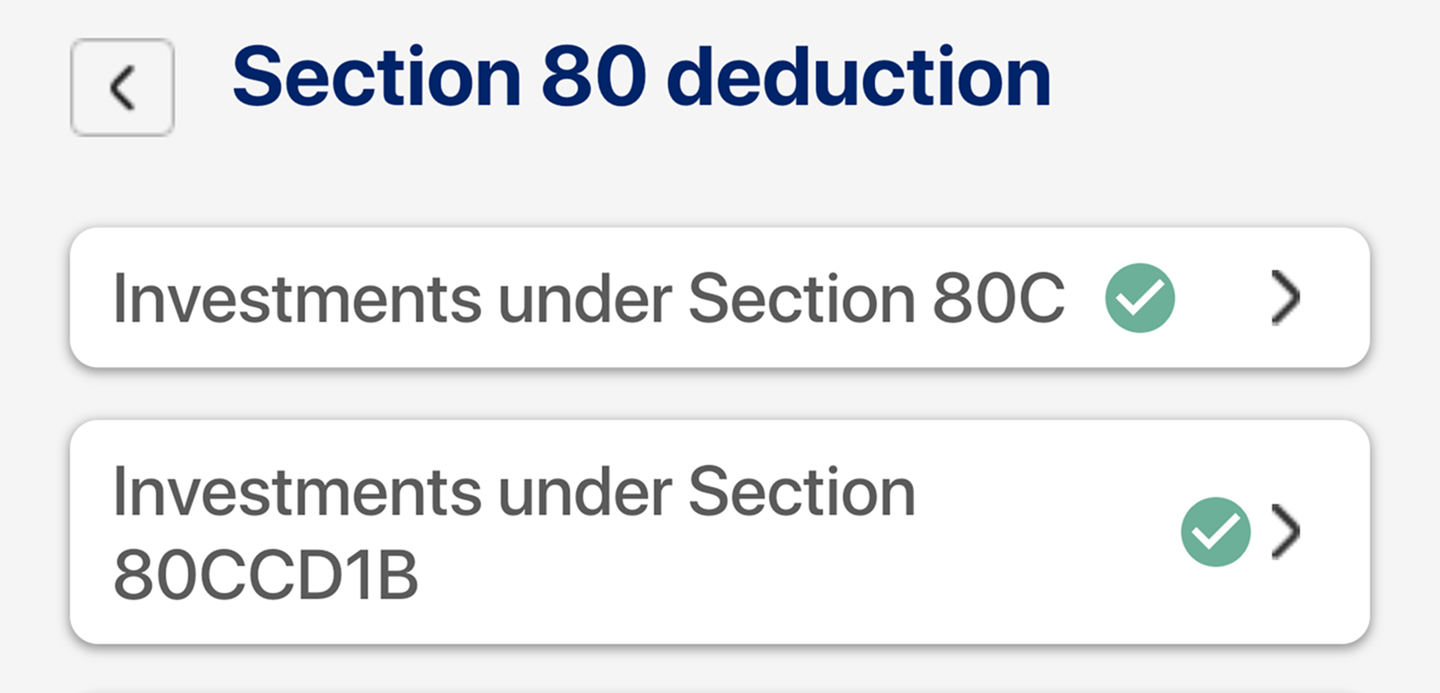
Section 80 deduction:
This option allows the AMH to claim deductions under Section 80 of the Income Tax Act.
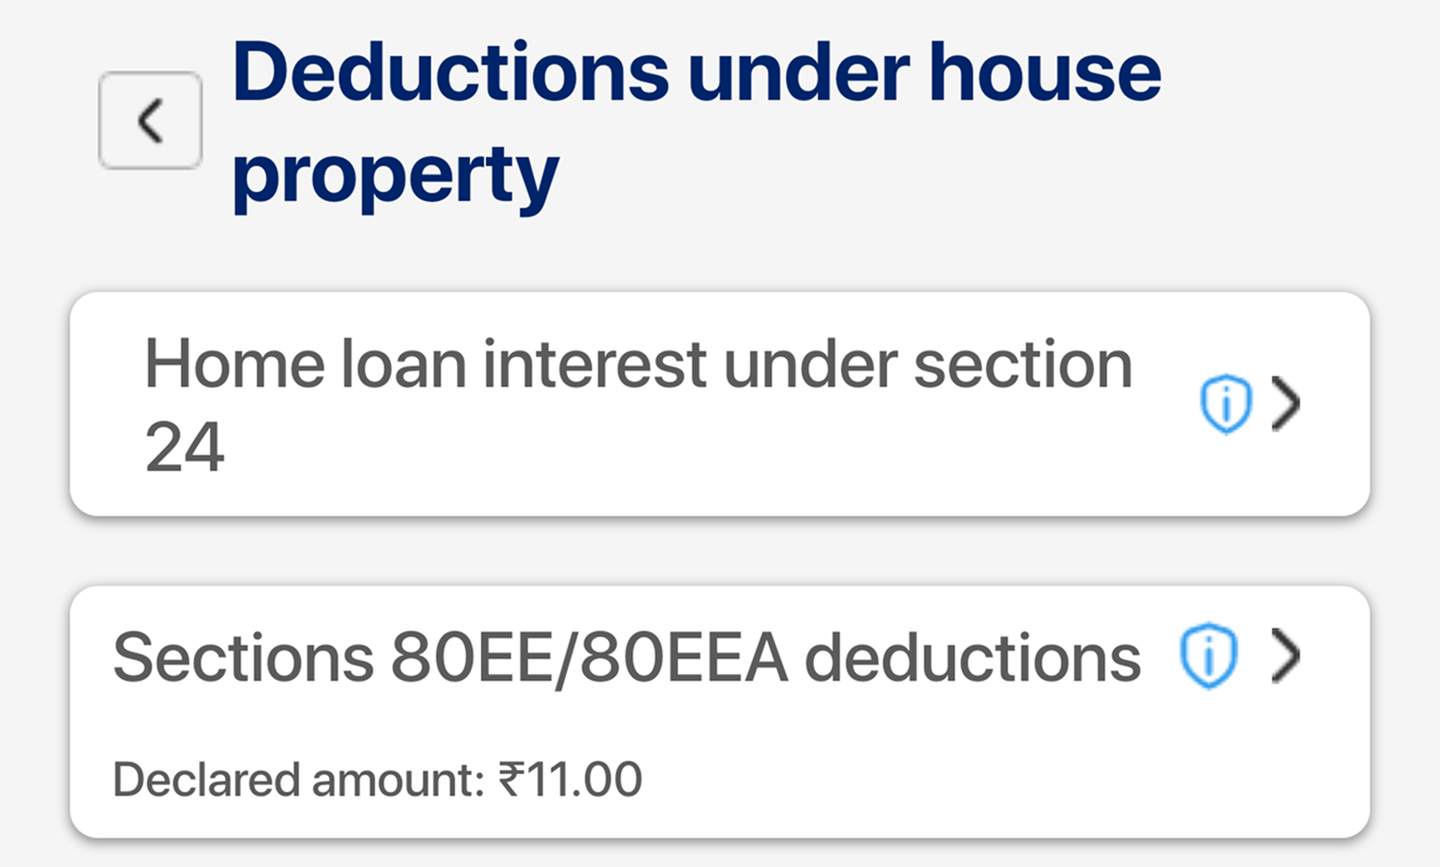
Deductions under house property:
Allows AMH to approve house property-related deductions.
Payrolls/Payments:
This is where admins can access, initiate and complete the payroll and reimbursements process.
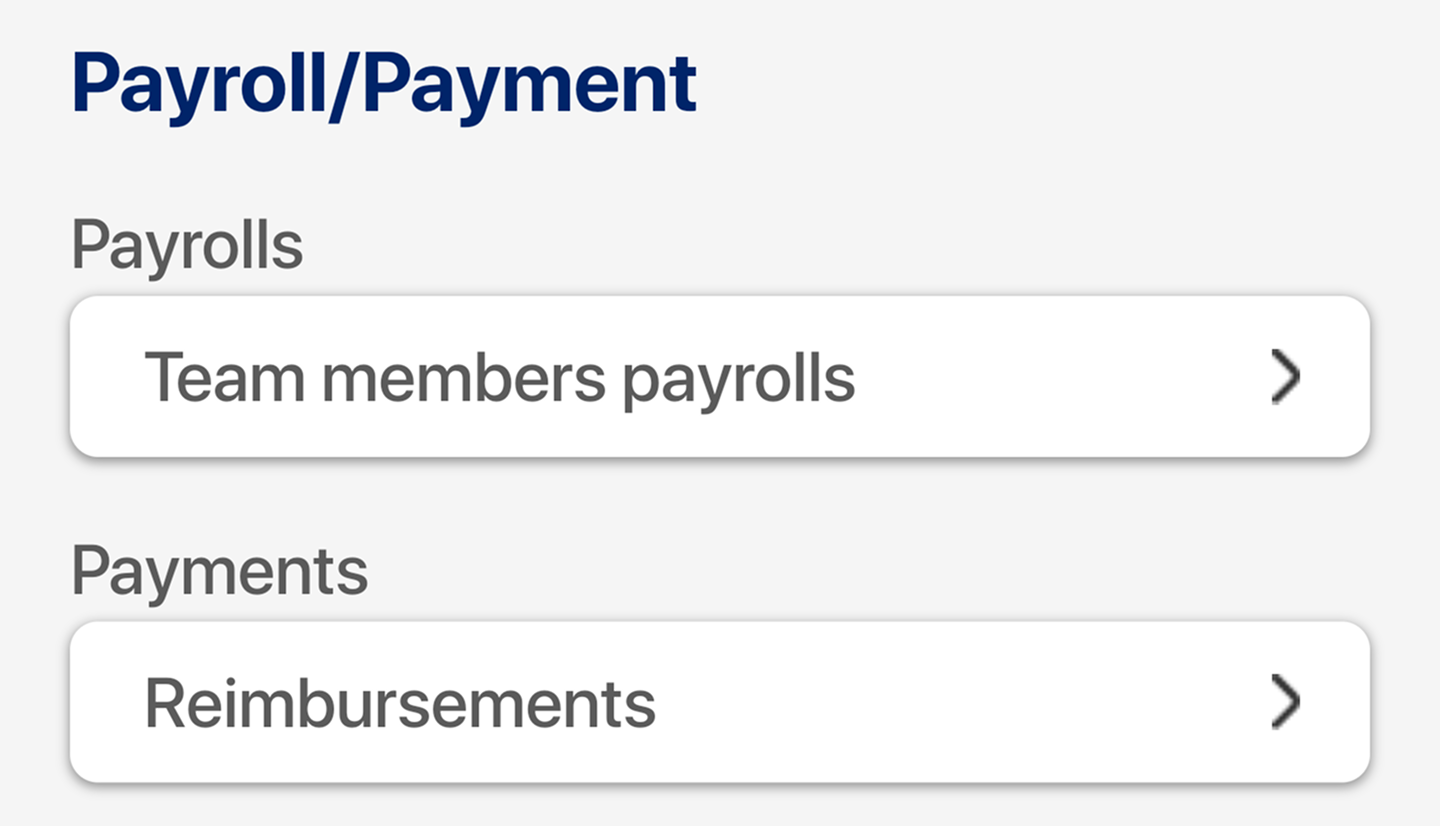
Payrolls:
With payrolls, you can select a month and initiate the payroll process.
You can also check past payrolls.

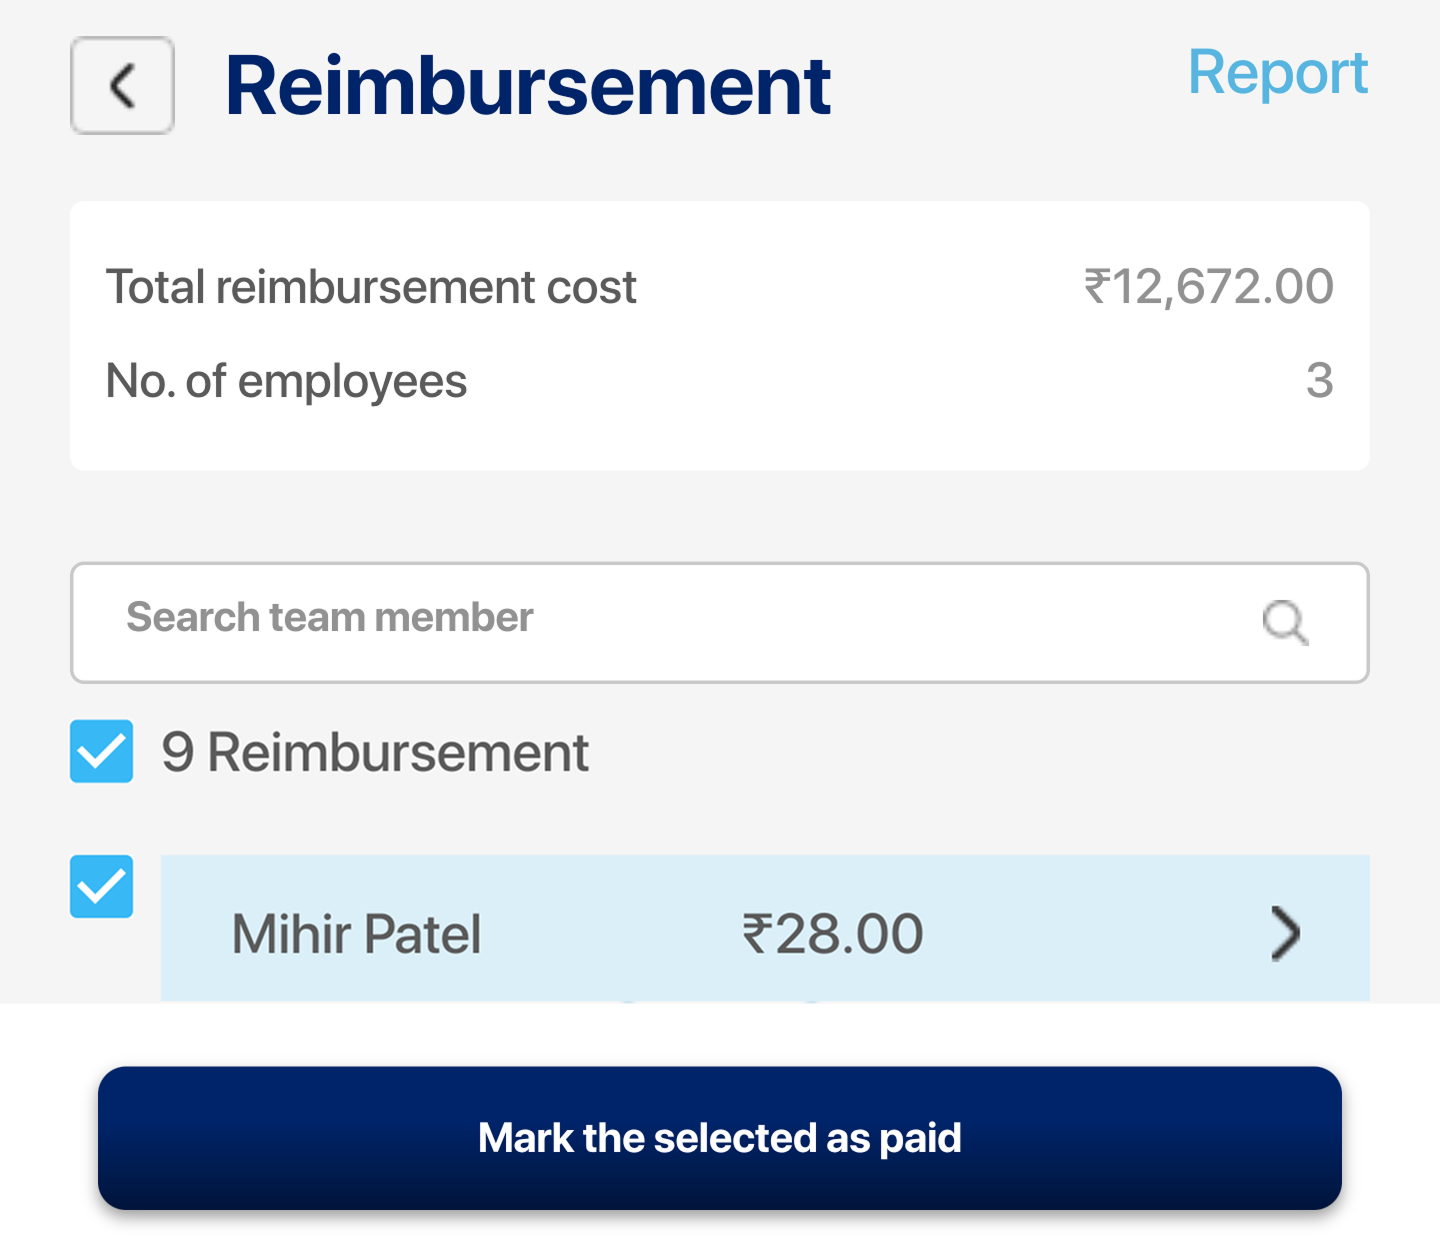
Reimbursement:
You can pay and mark selected or all team members reimbursement requests as paid with click of a button here.
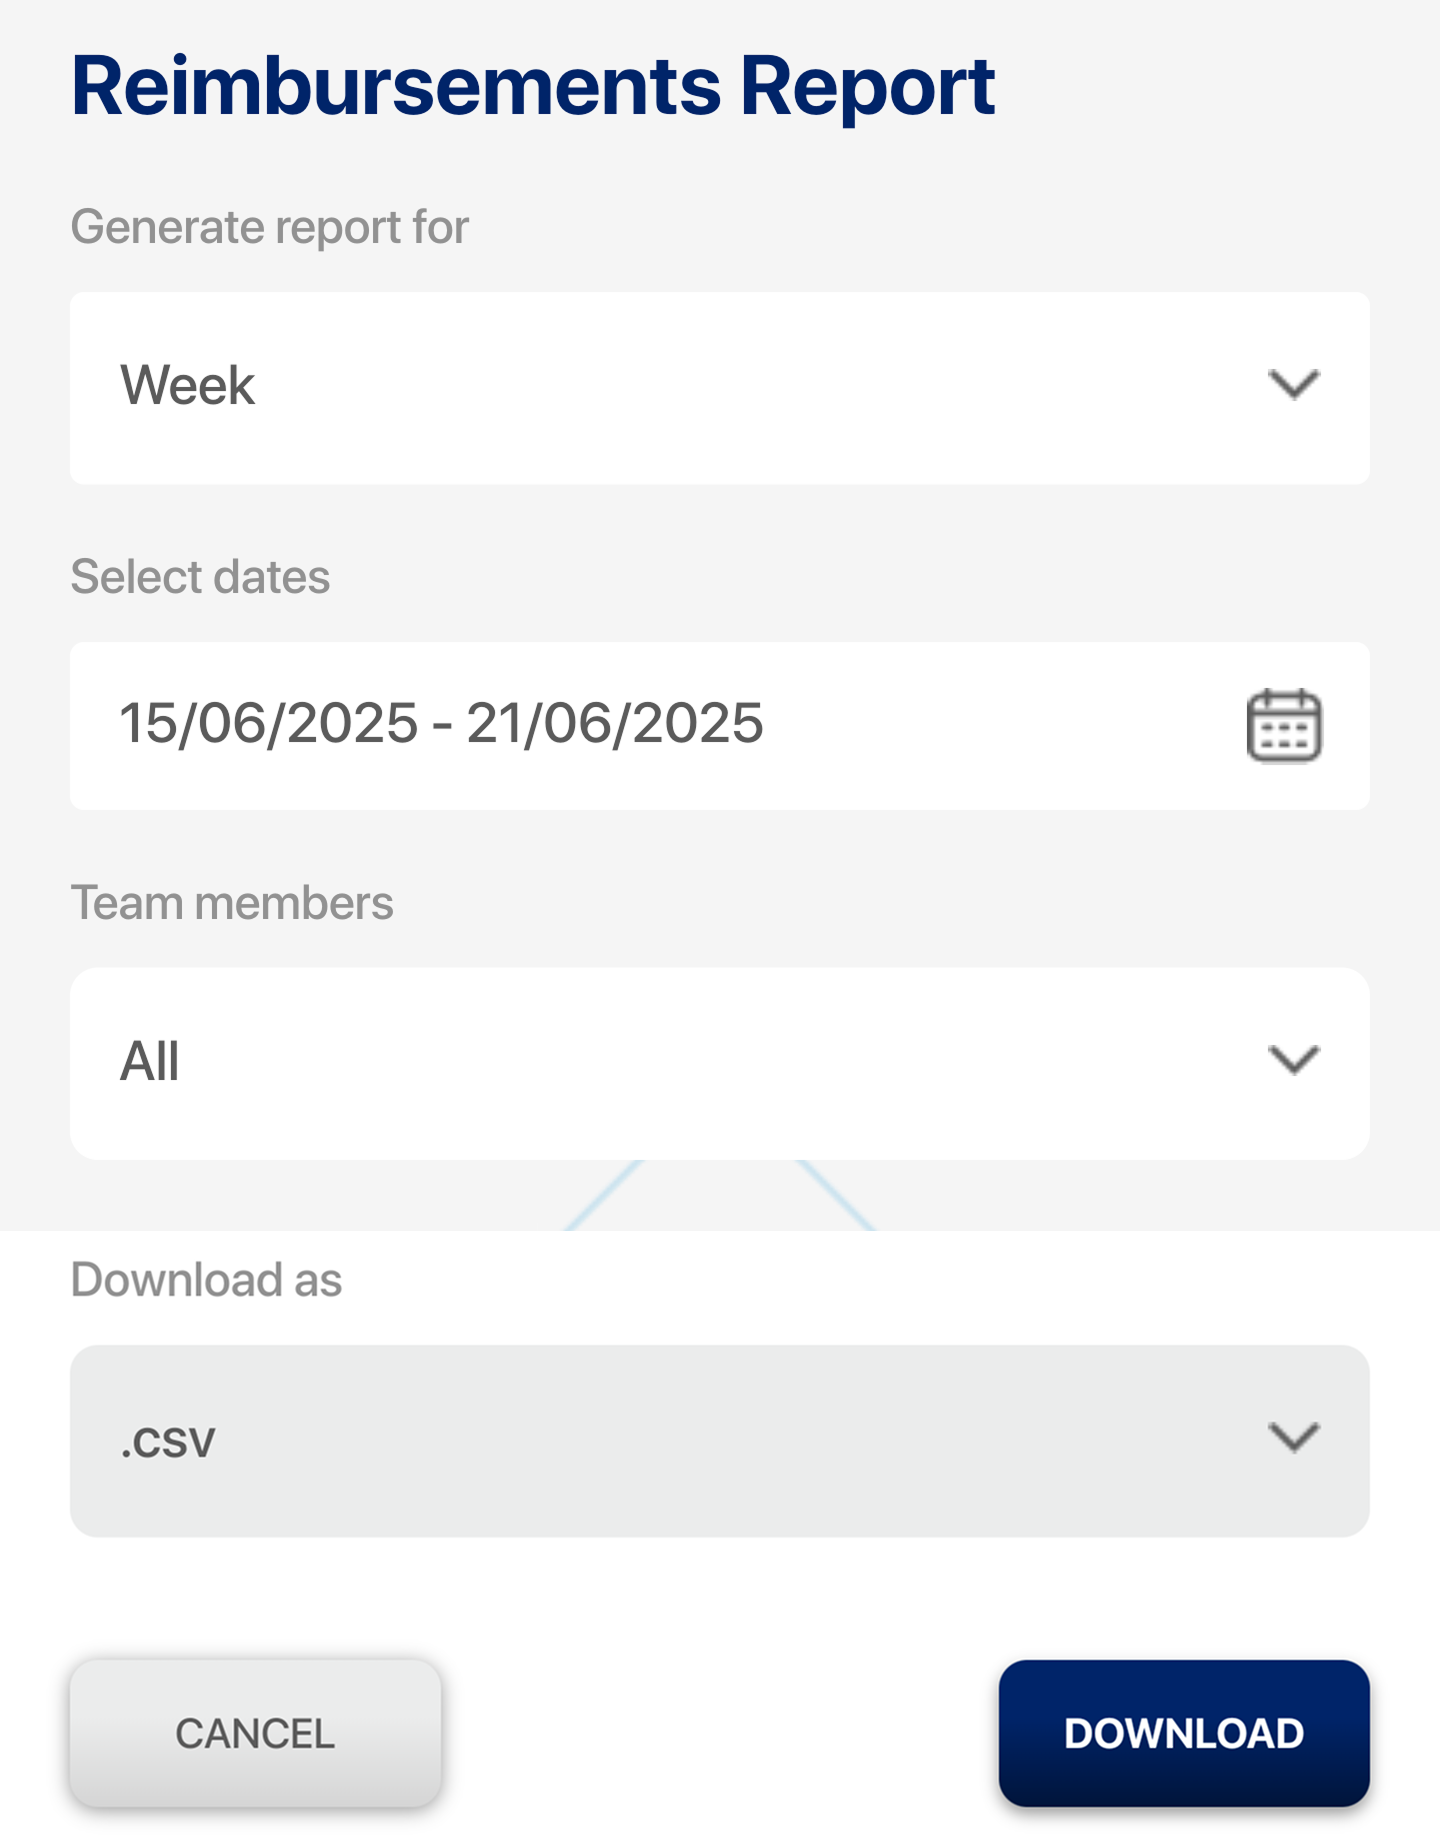
Reimbursement Report:
Report of reimbursements can be generated.
Generate a report in 3 steps:
- Click on the report option.
- Fill out the form as per your needs—monthly or weekly.
- You can apply it to all employees or a specific employee.
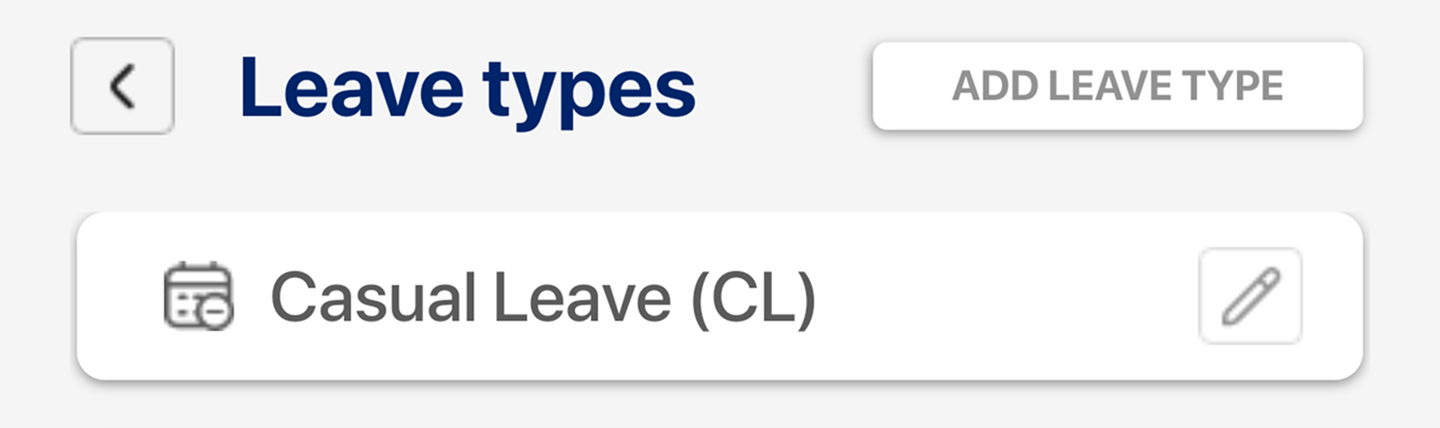
Leave Management:
This feature allows you to define leave types, modify balances, and track leave records.
Various leave types can be added or customized.
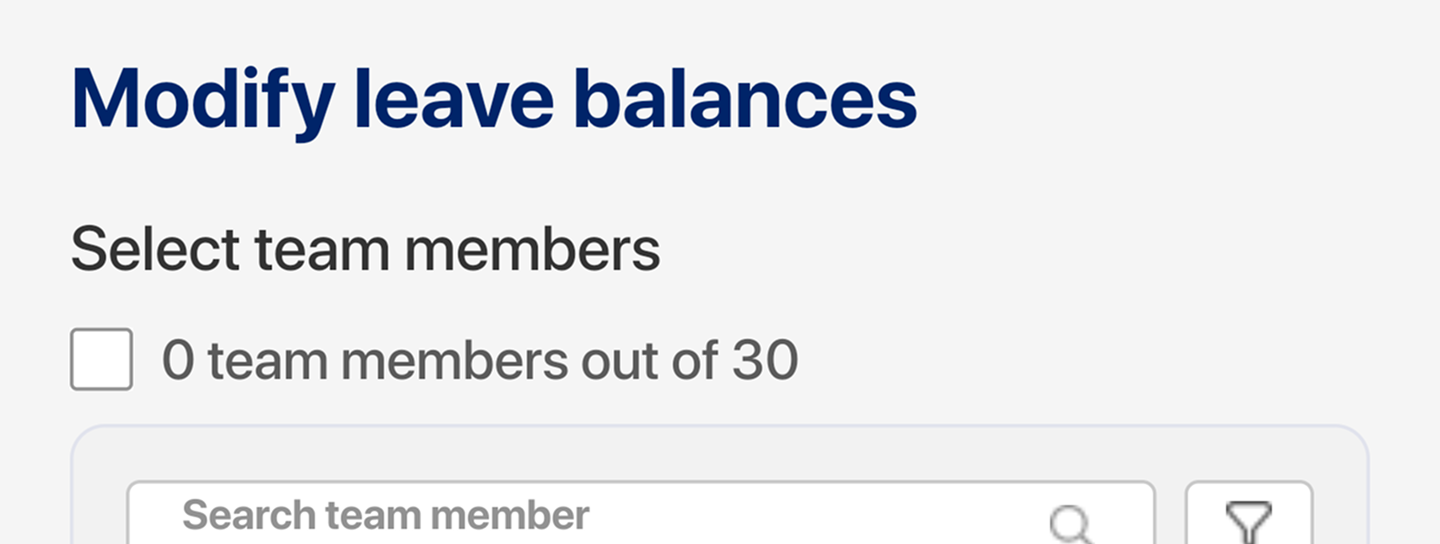
Modify Leave Balance: Adjust employees’ leave balances as needed.
Submit leave requests and view past leaves.

Leave Types:
Various leave types can be added or customized.
Modify Leave Balance:
Adjust employees’ leave balances as needed.
My Leaves
Submit leave requests and view past leaves.

Payroll Management:
Allow you to define salary structures and set tax information finalization dates.
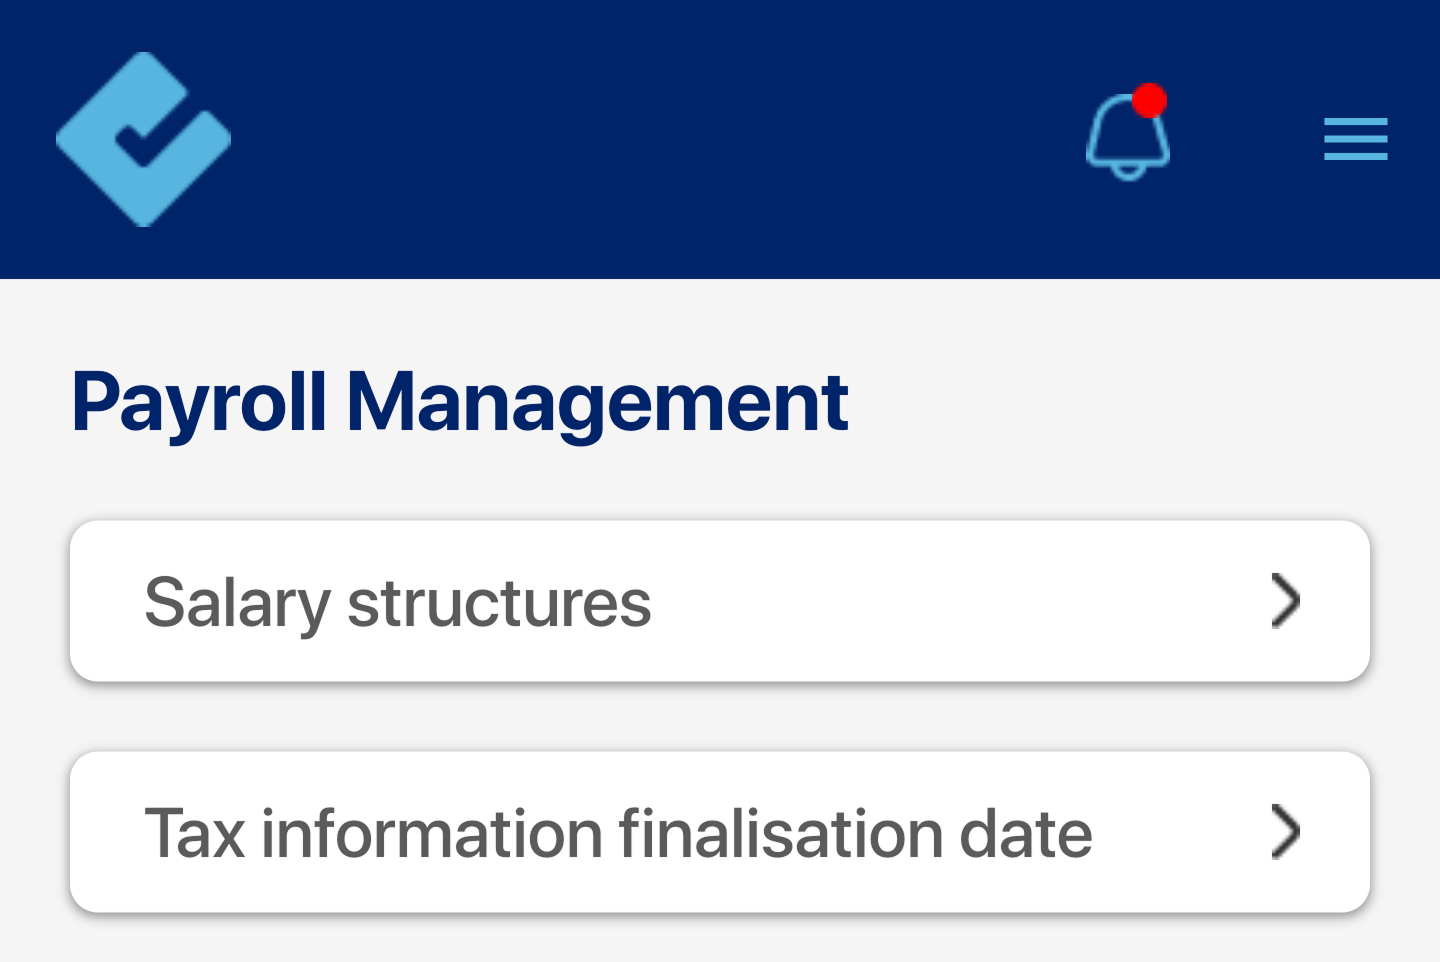
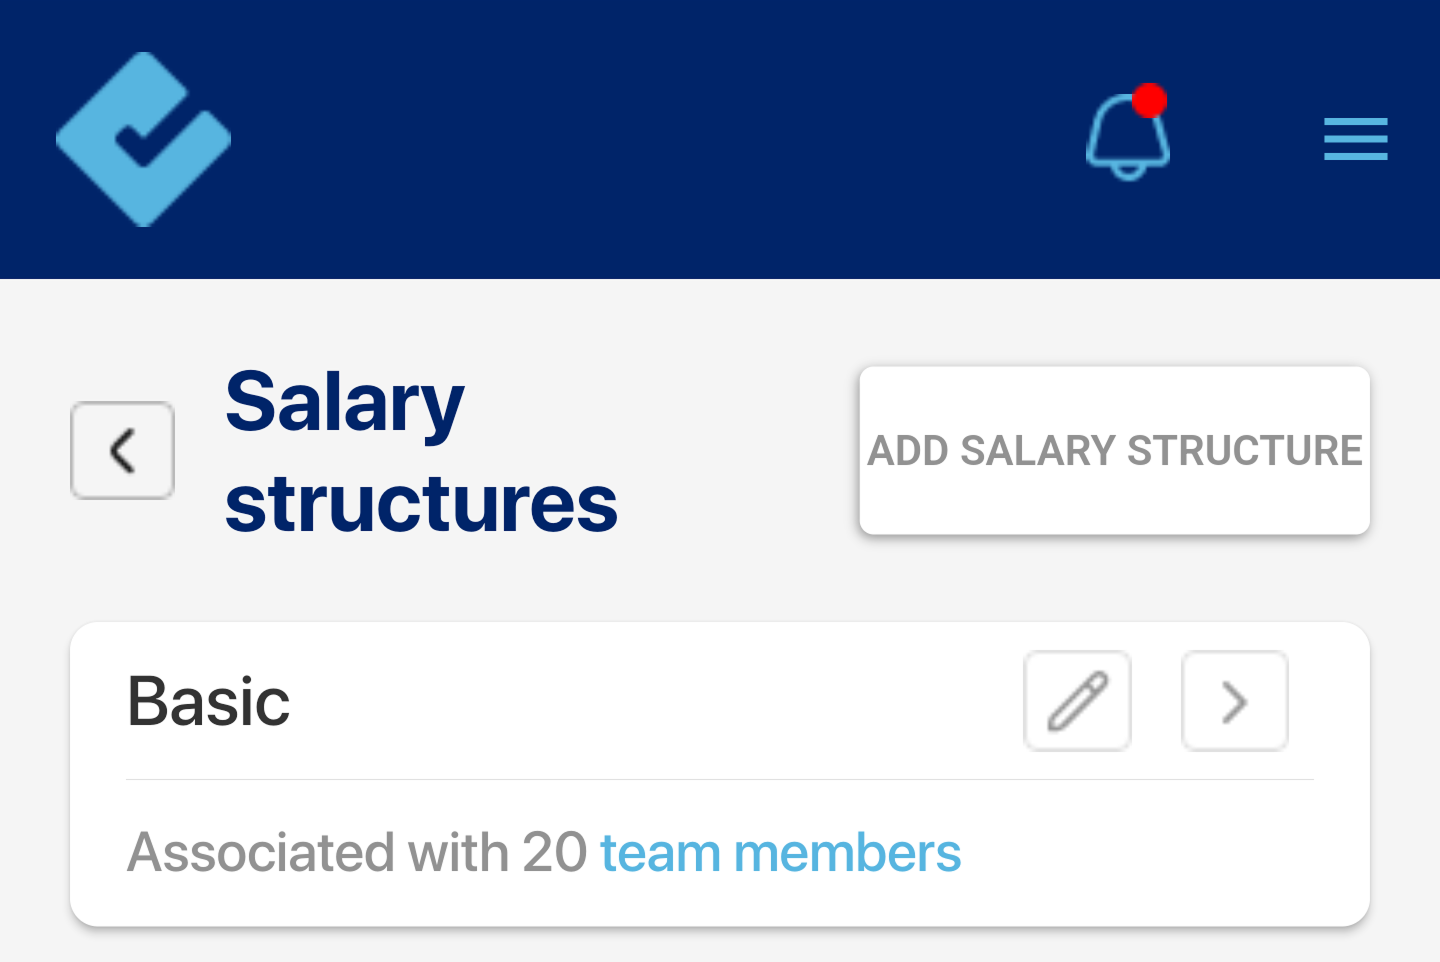
Salary Structure:
You can add a new earning component using the Add New Earning option. Various options are available, such as Basic, HRA, and more.
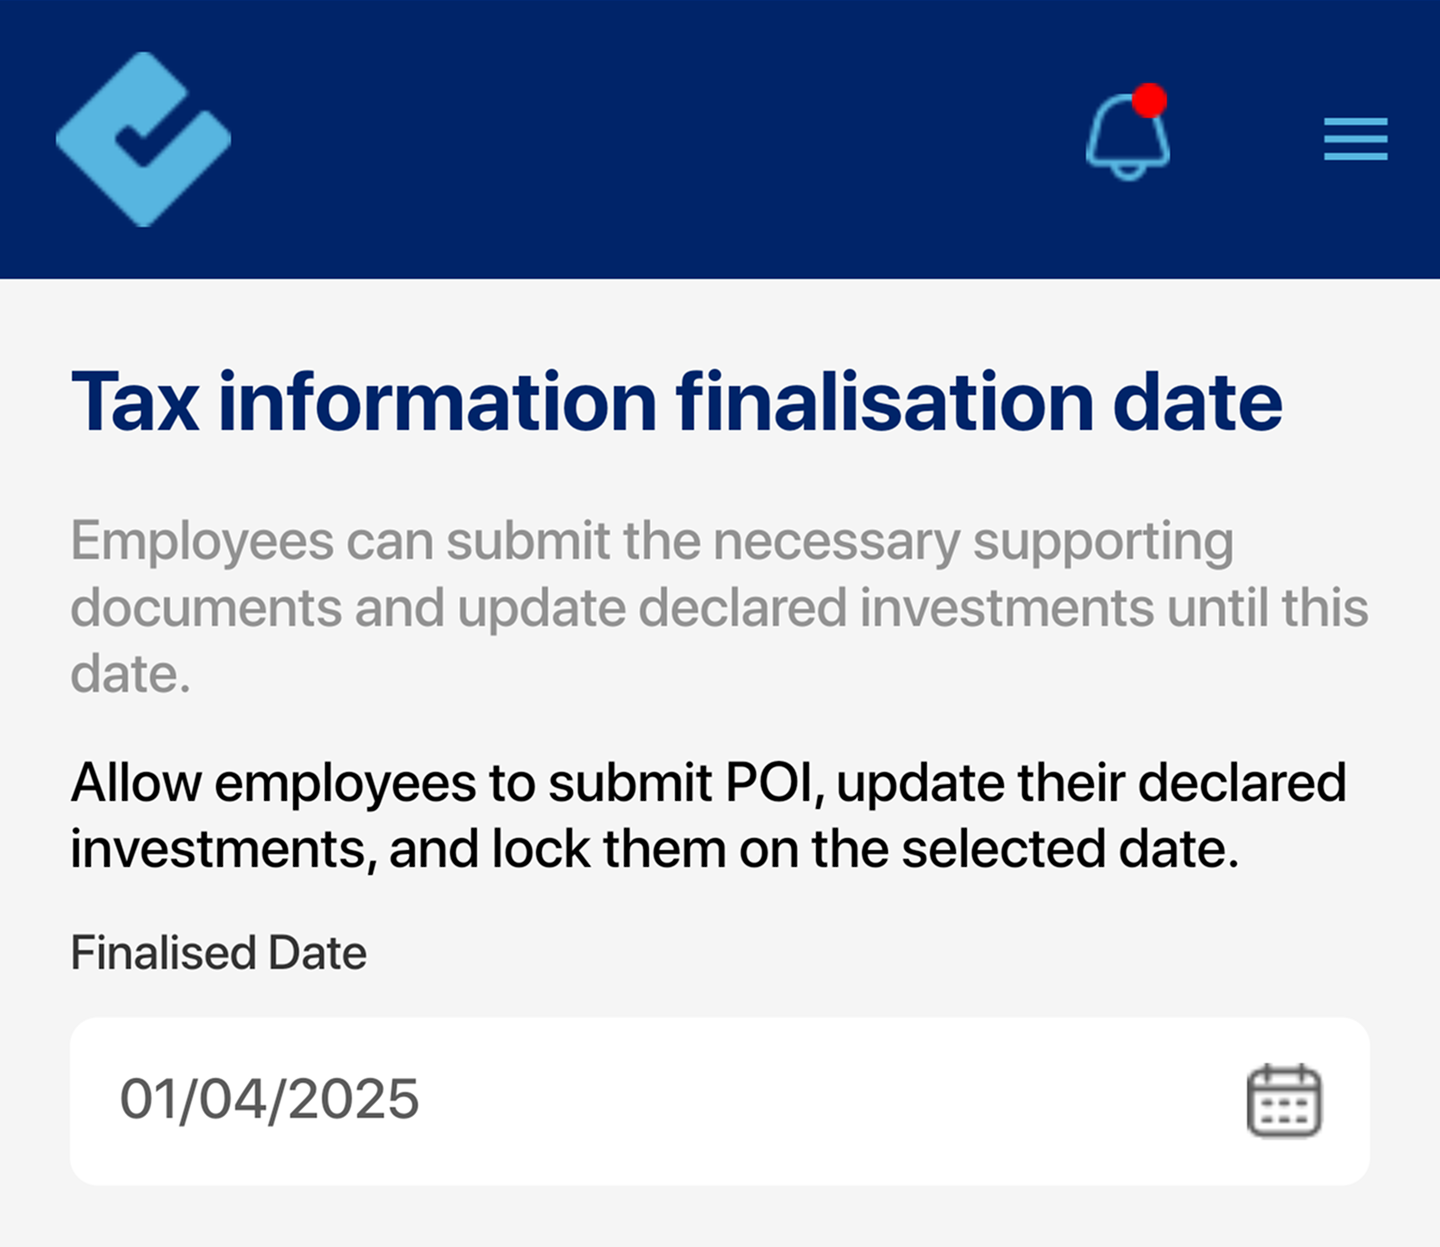
Tax Information Finalization Date:
Set the deadline for employees to submit the required documents.
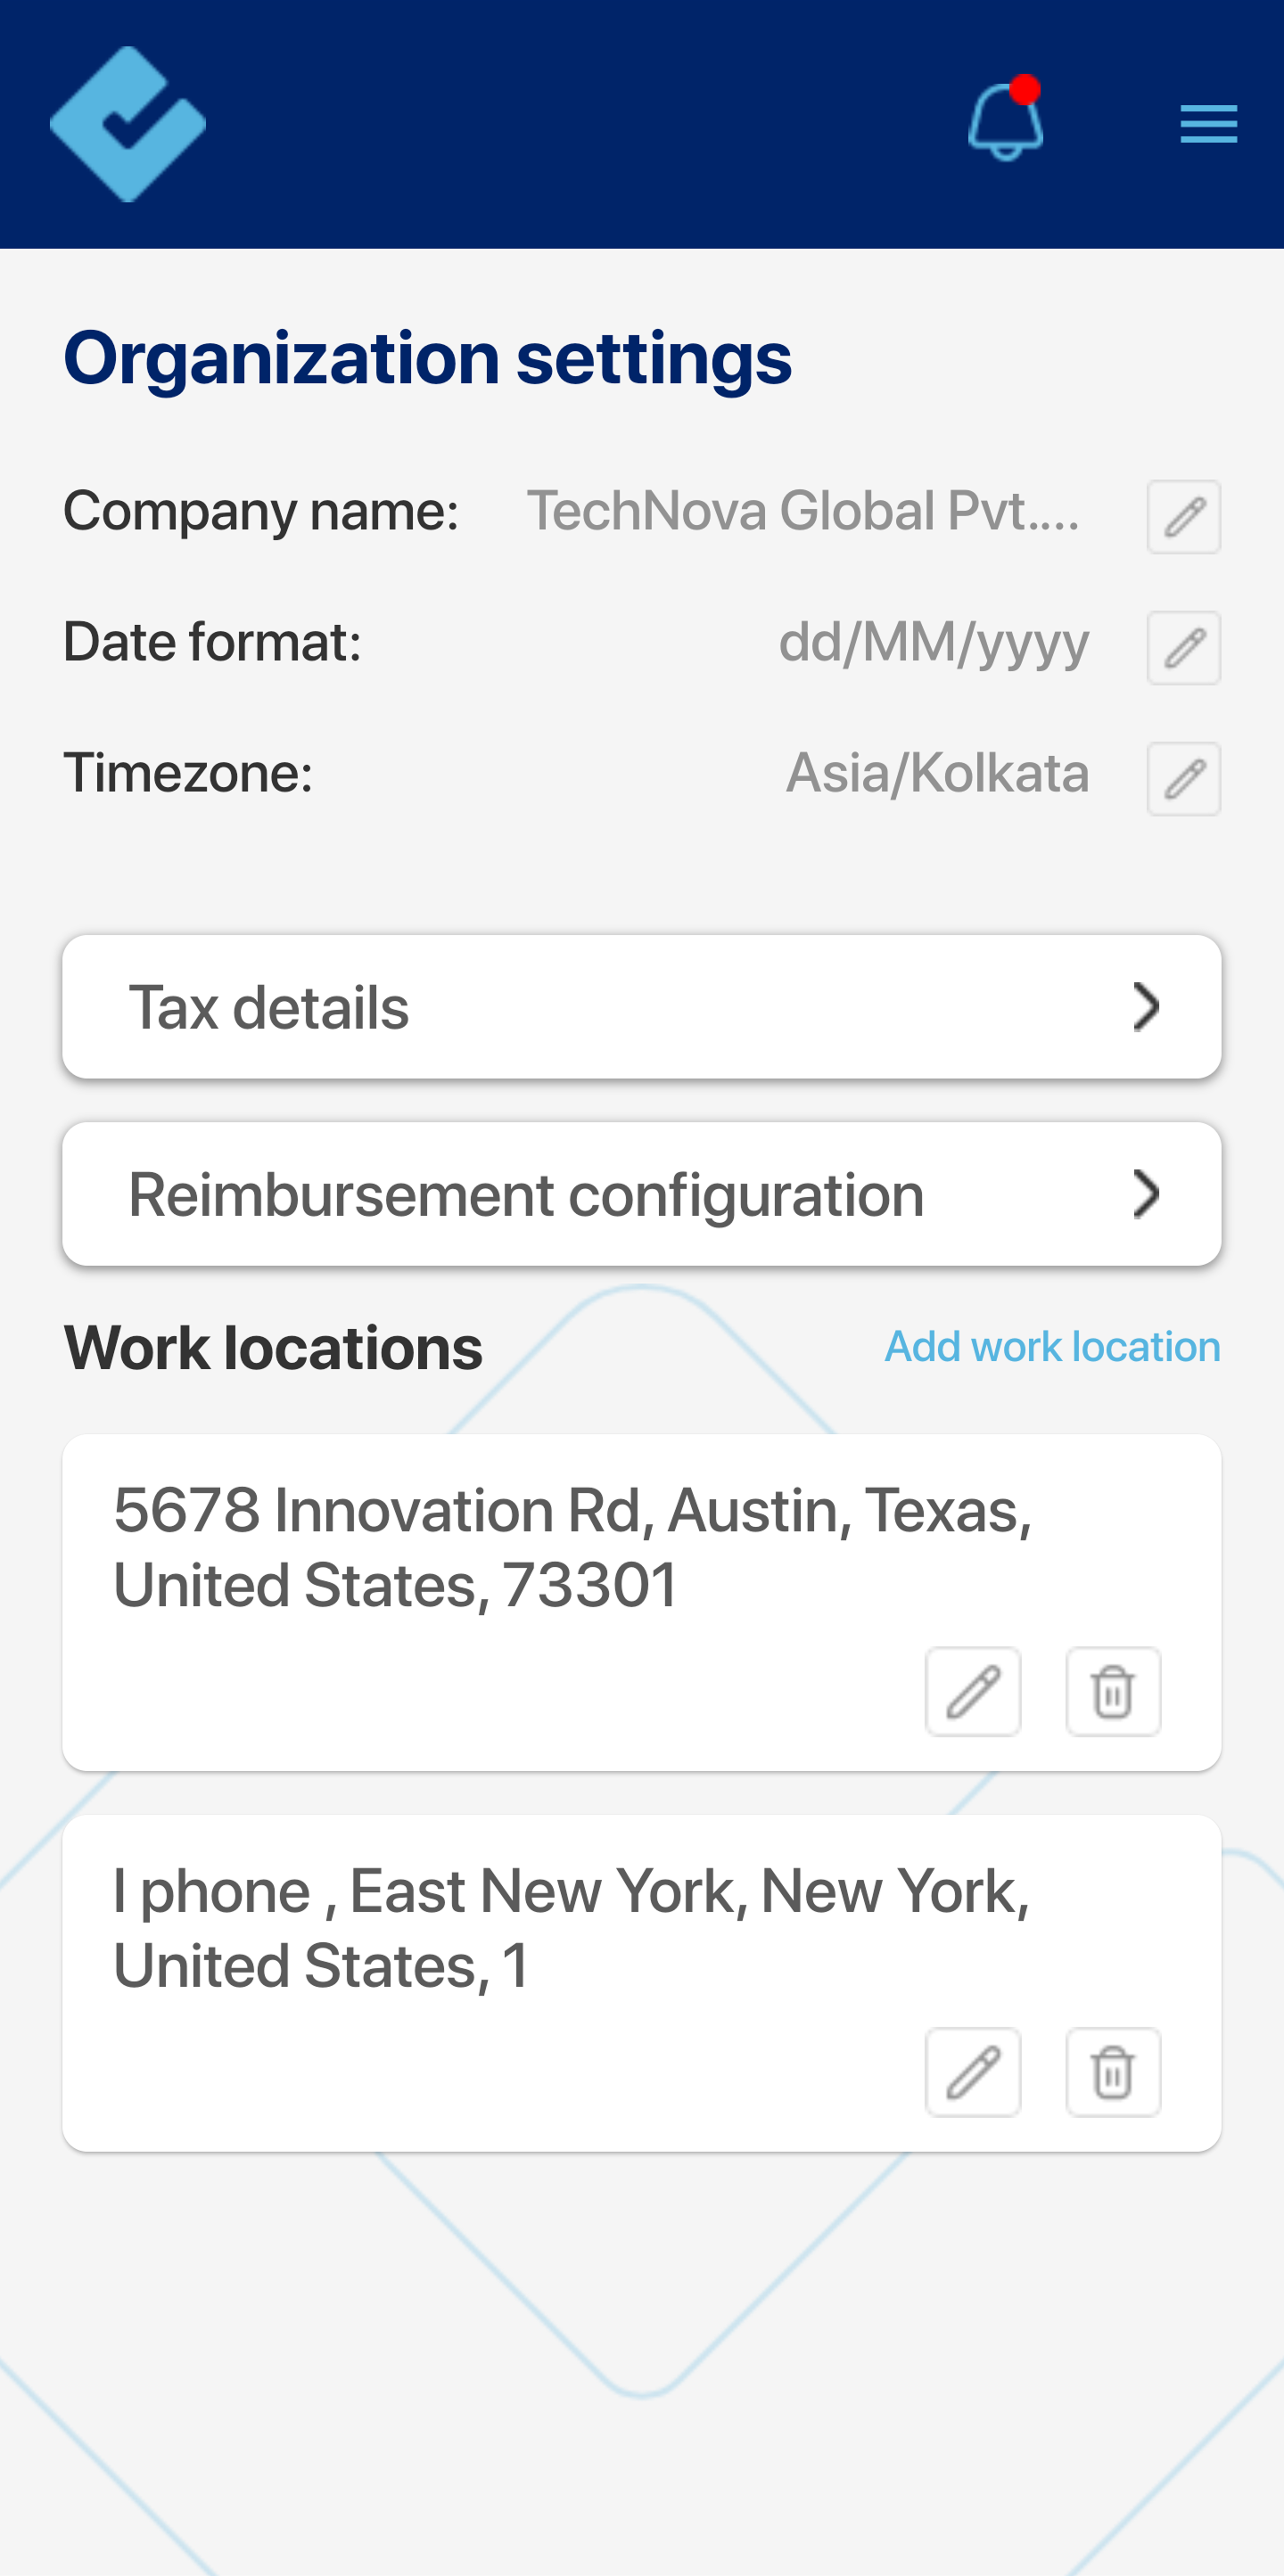
Organization Settings:
Admins can update and configure organization details such as:
- Company Name, Date Format, Timezone, Work Locations
Tax details and reimbursement can be configured in this section.
The Work Location section allows you to add and edit the organization’s locations. Multiple locations can be added easily.
Tax details display tax-related information such as PAN number, TAN number, GST number, company type (LLP, etc.), and registered business address.
The Reimbursements Configuration allows you to set the monthly reimbursement cutoff date. For example, reimbursements submitted after the 20th to be considered in the next cycle.
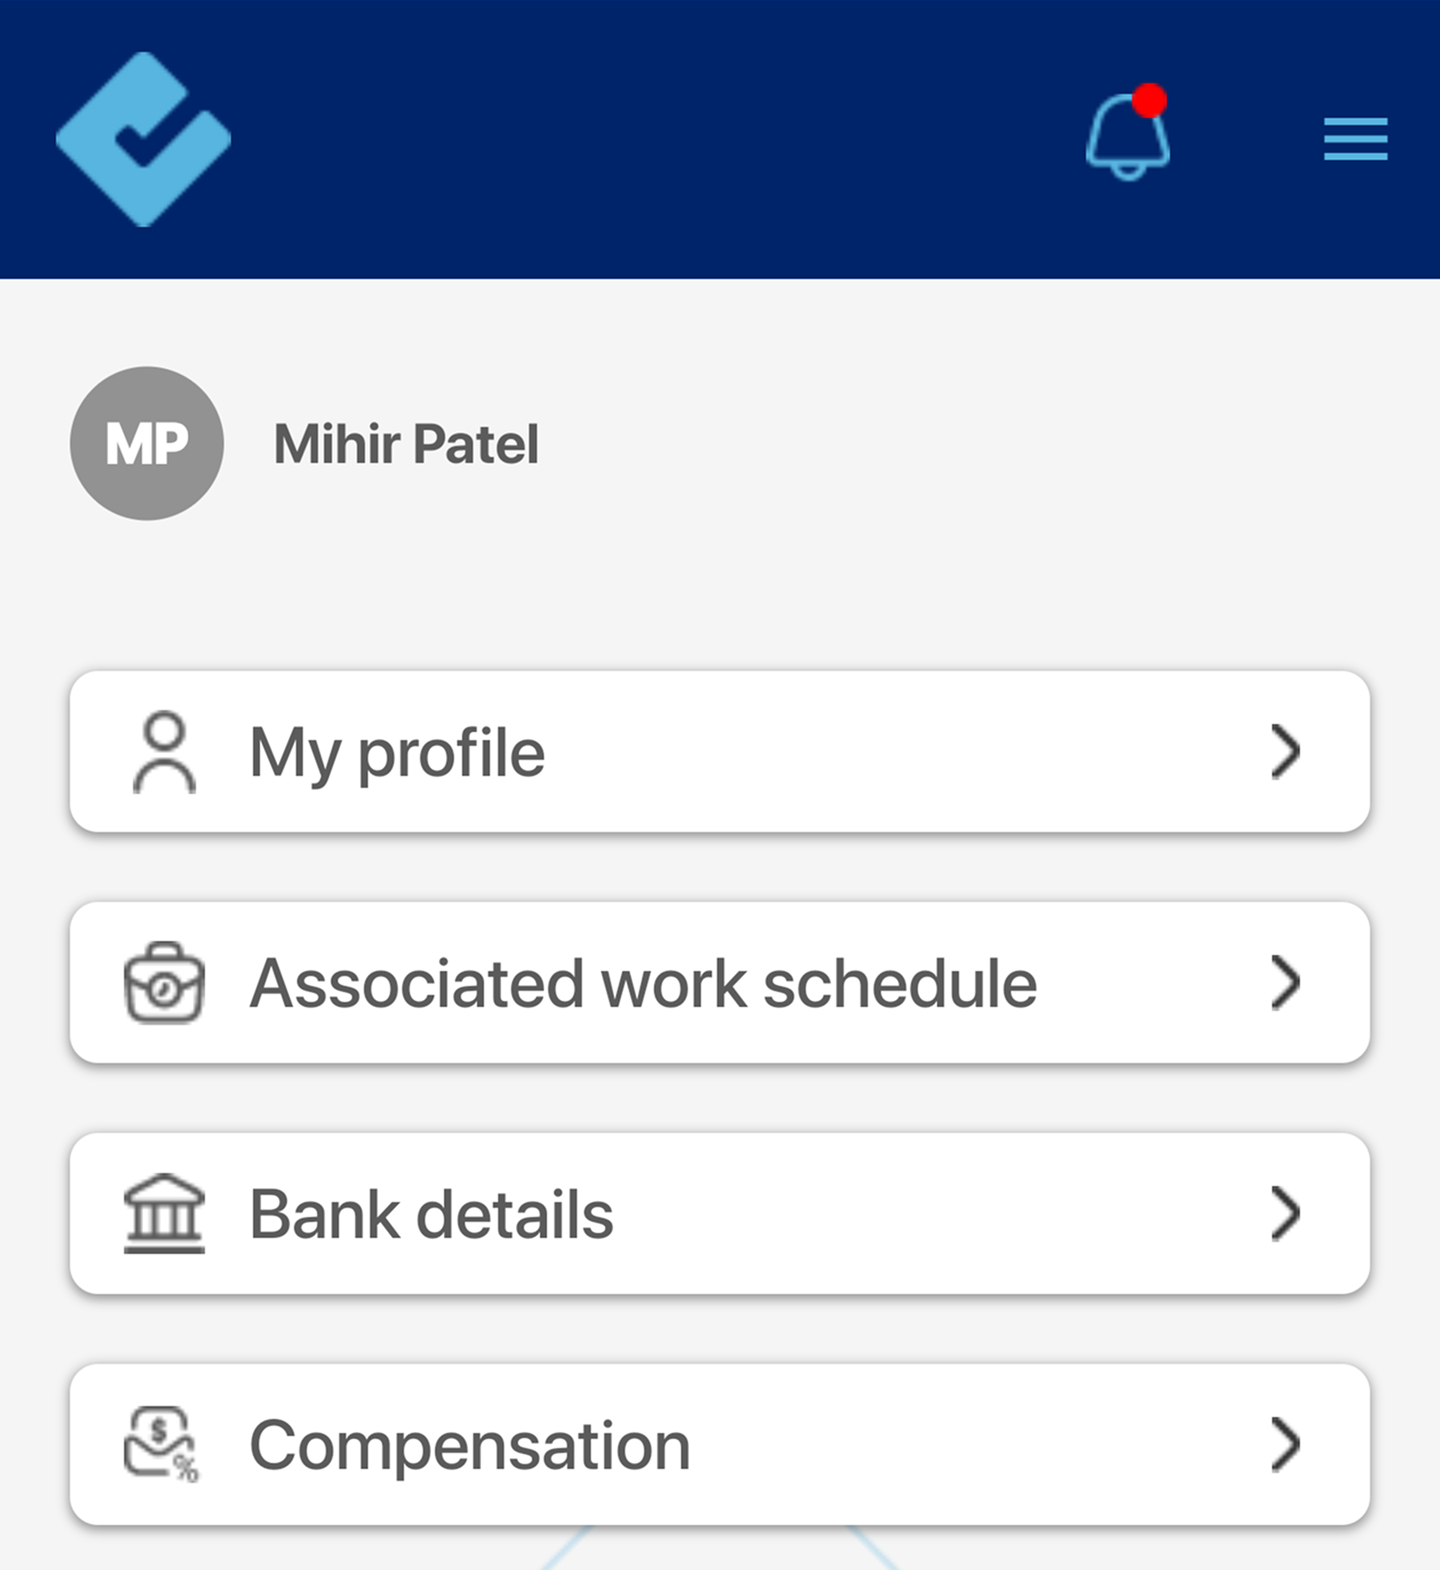
My Details:
View and update personal information such as:
- Profile
- Bank Details
- Identity Documents
This sign ( > ) navigates you to individual sections, allowing you to easily add, view and update some of the information.
Reimbursement:
The Reimbursement feature allows you to raise reimbursements requests for yourself.
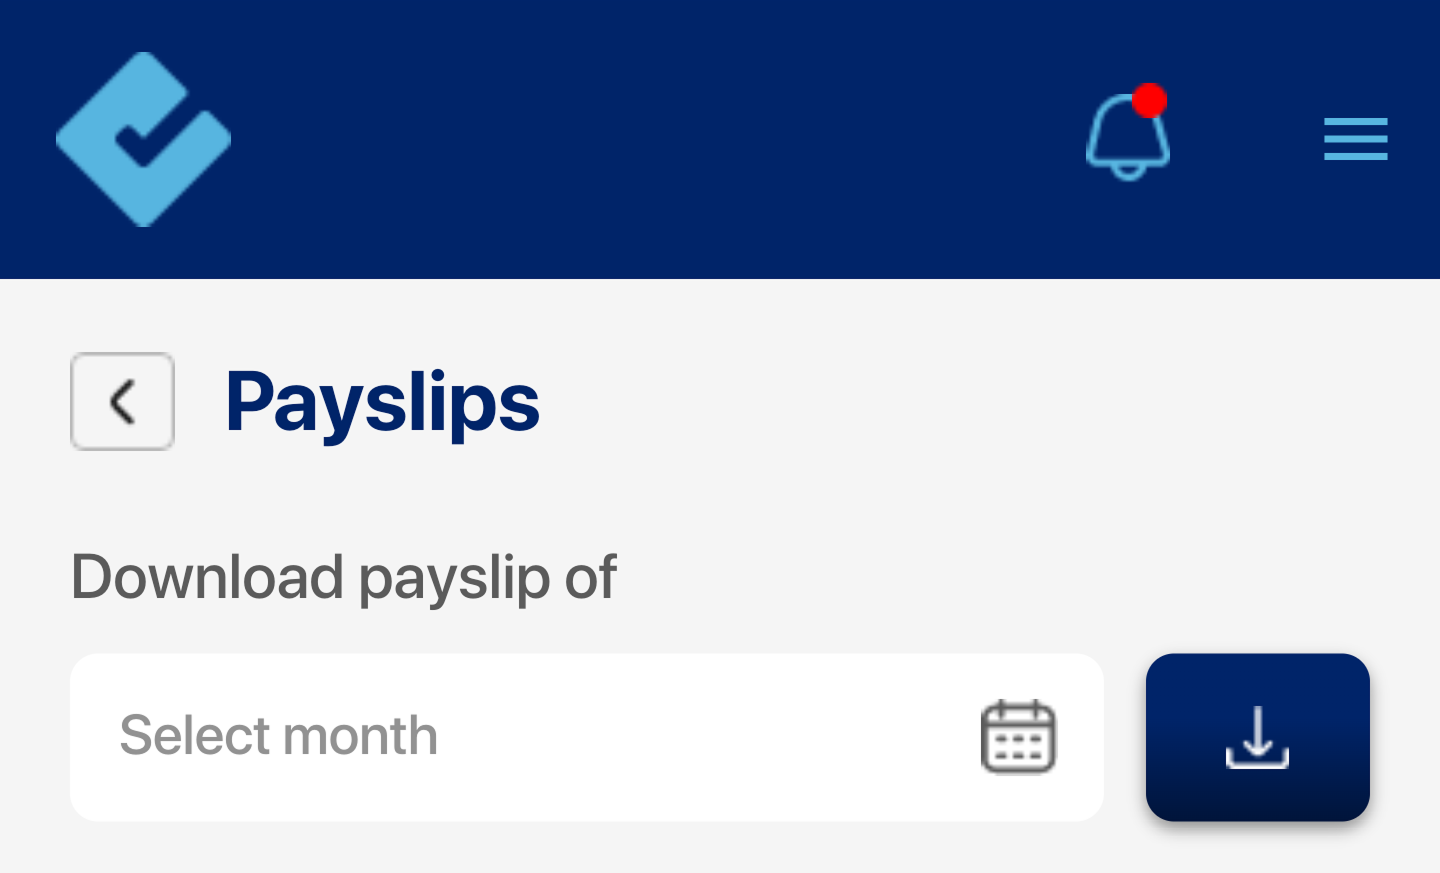
Payslips:
Download payslips for the desired month.
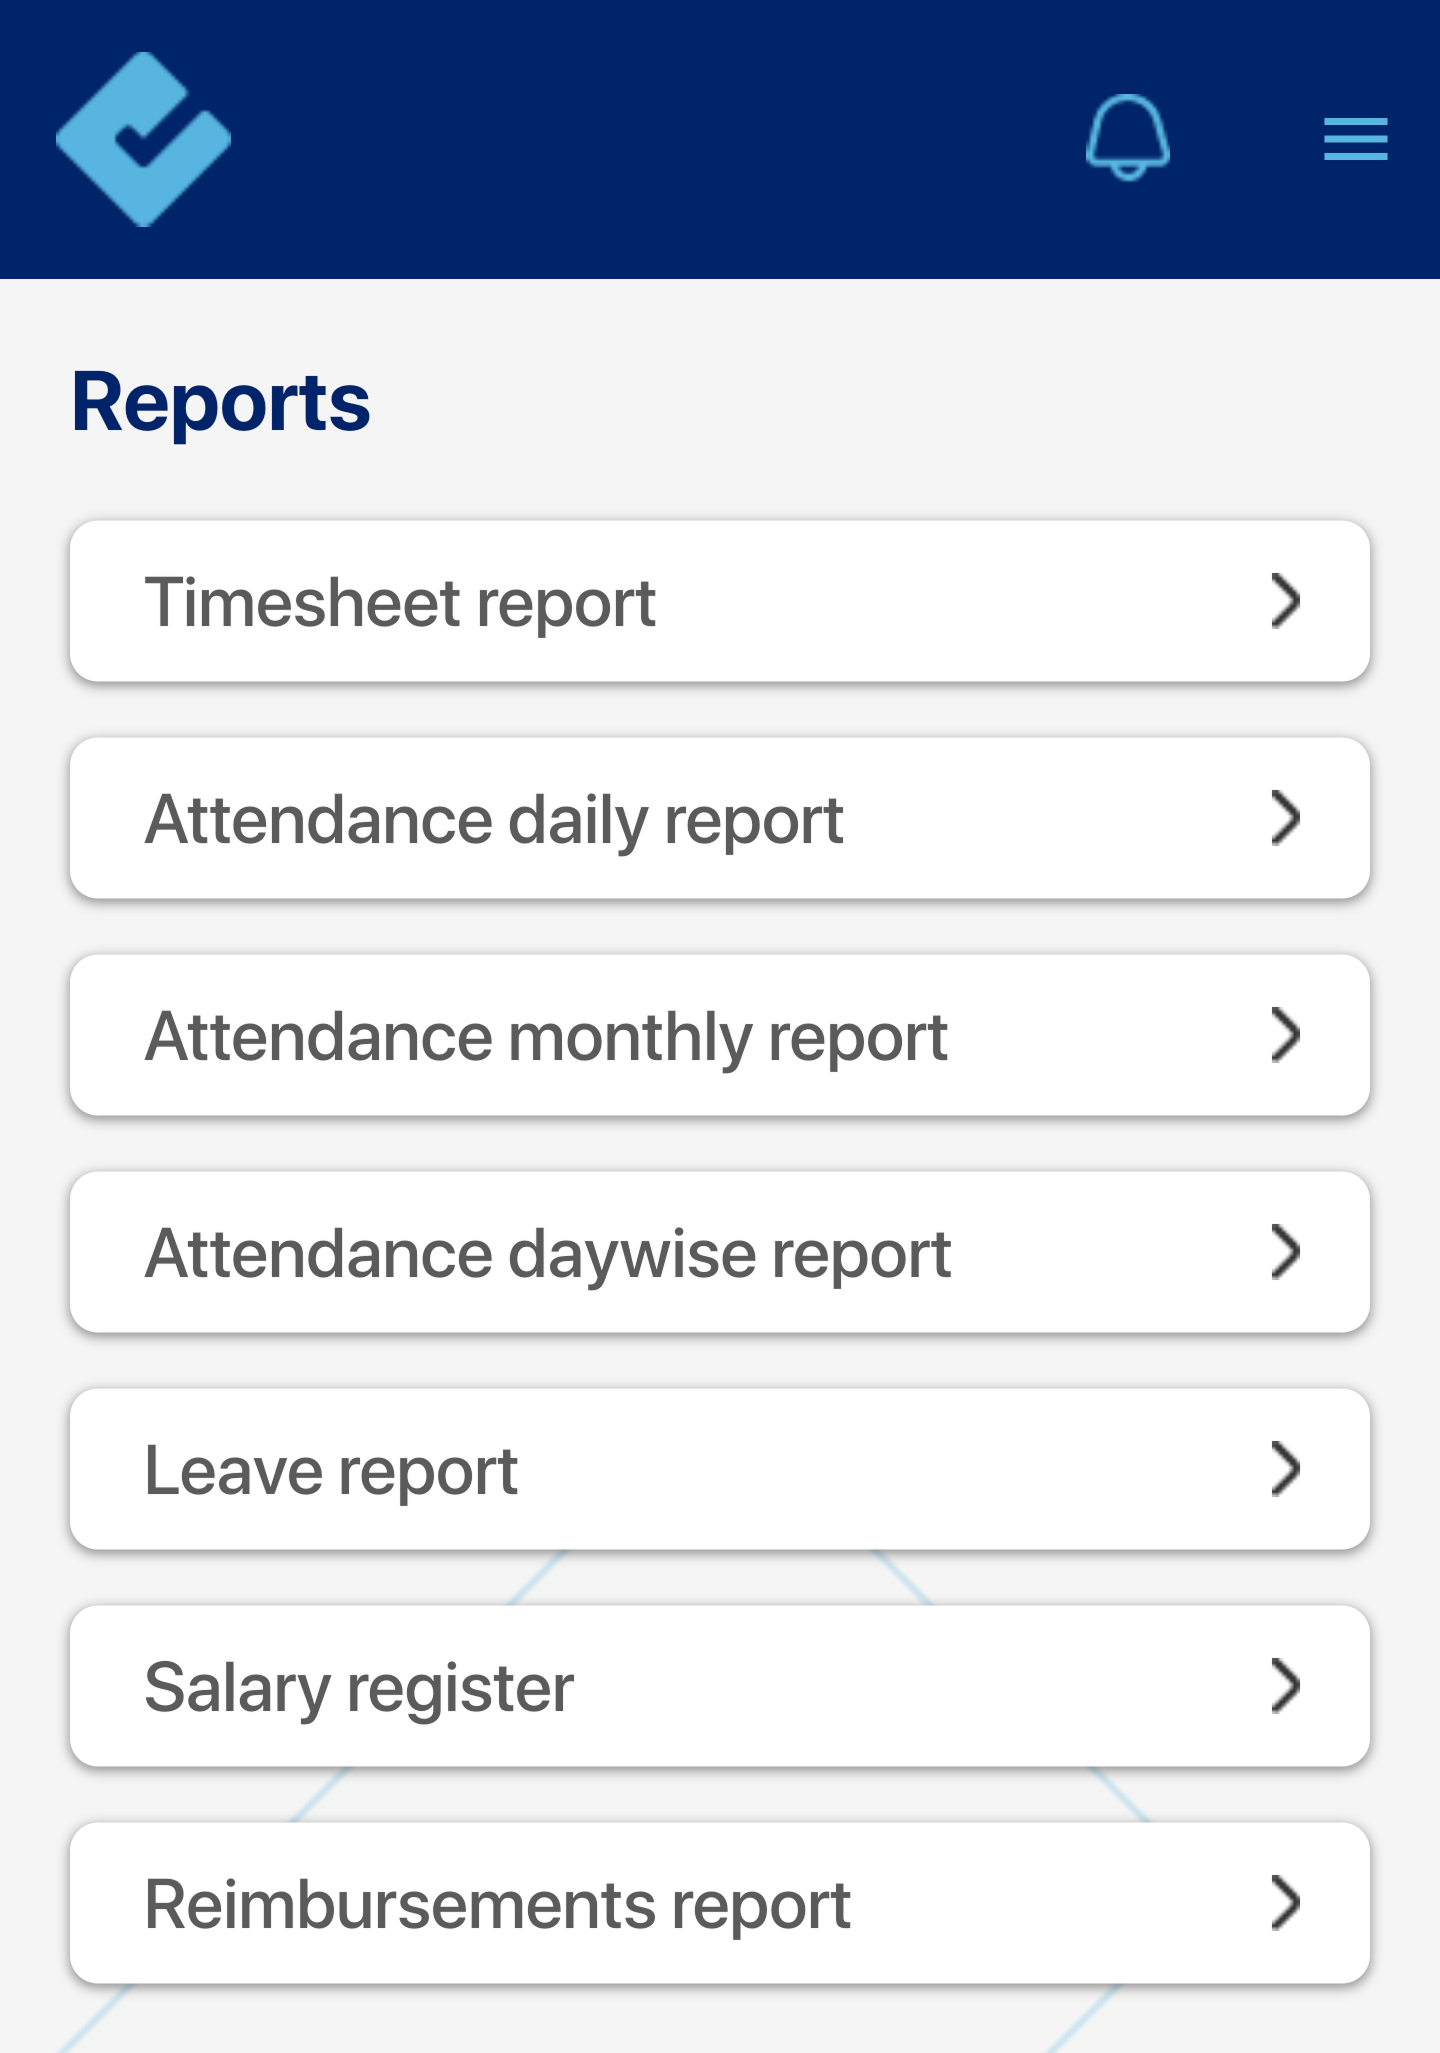
Reports:
Generate reports on:
- Leave
- Attendance
- Timesheets
- Reimbursements
Click this sign (>) to:
- Download reports for specific report sections.
- Select the desired month of the report.
This ensures a seamless reporting experience tailored to AMH needs.
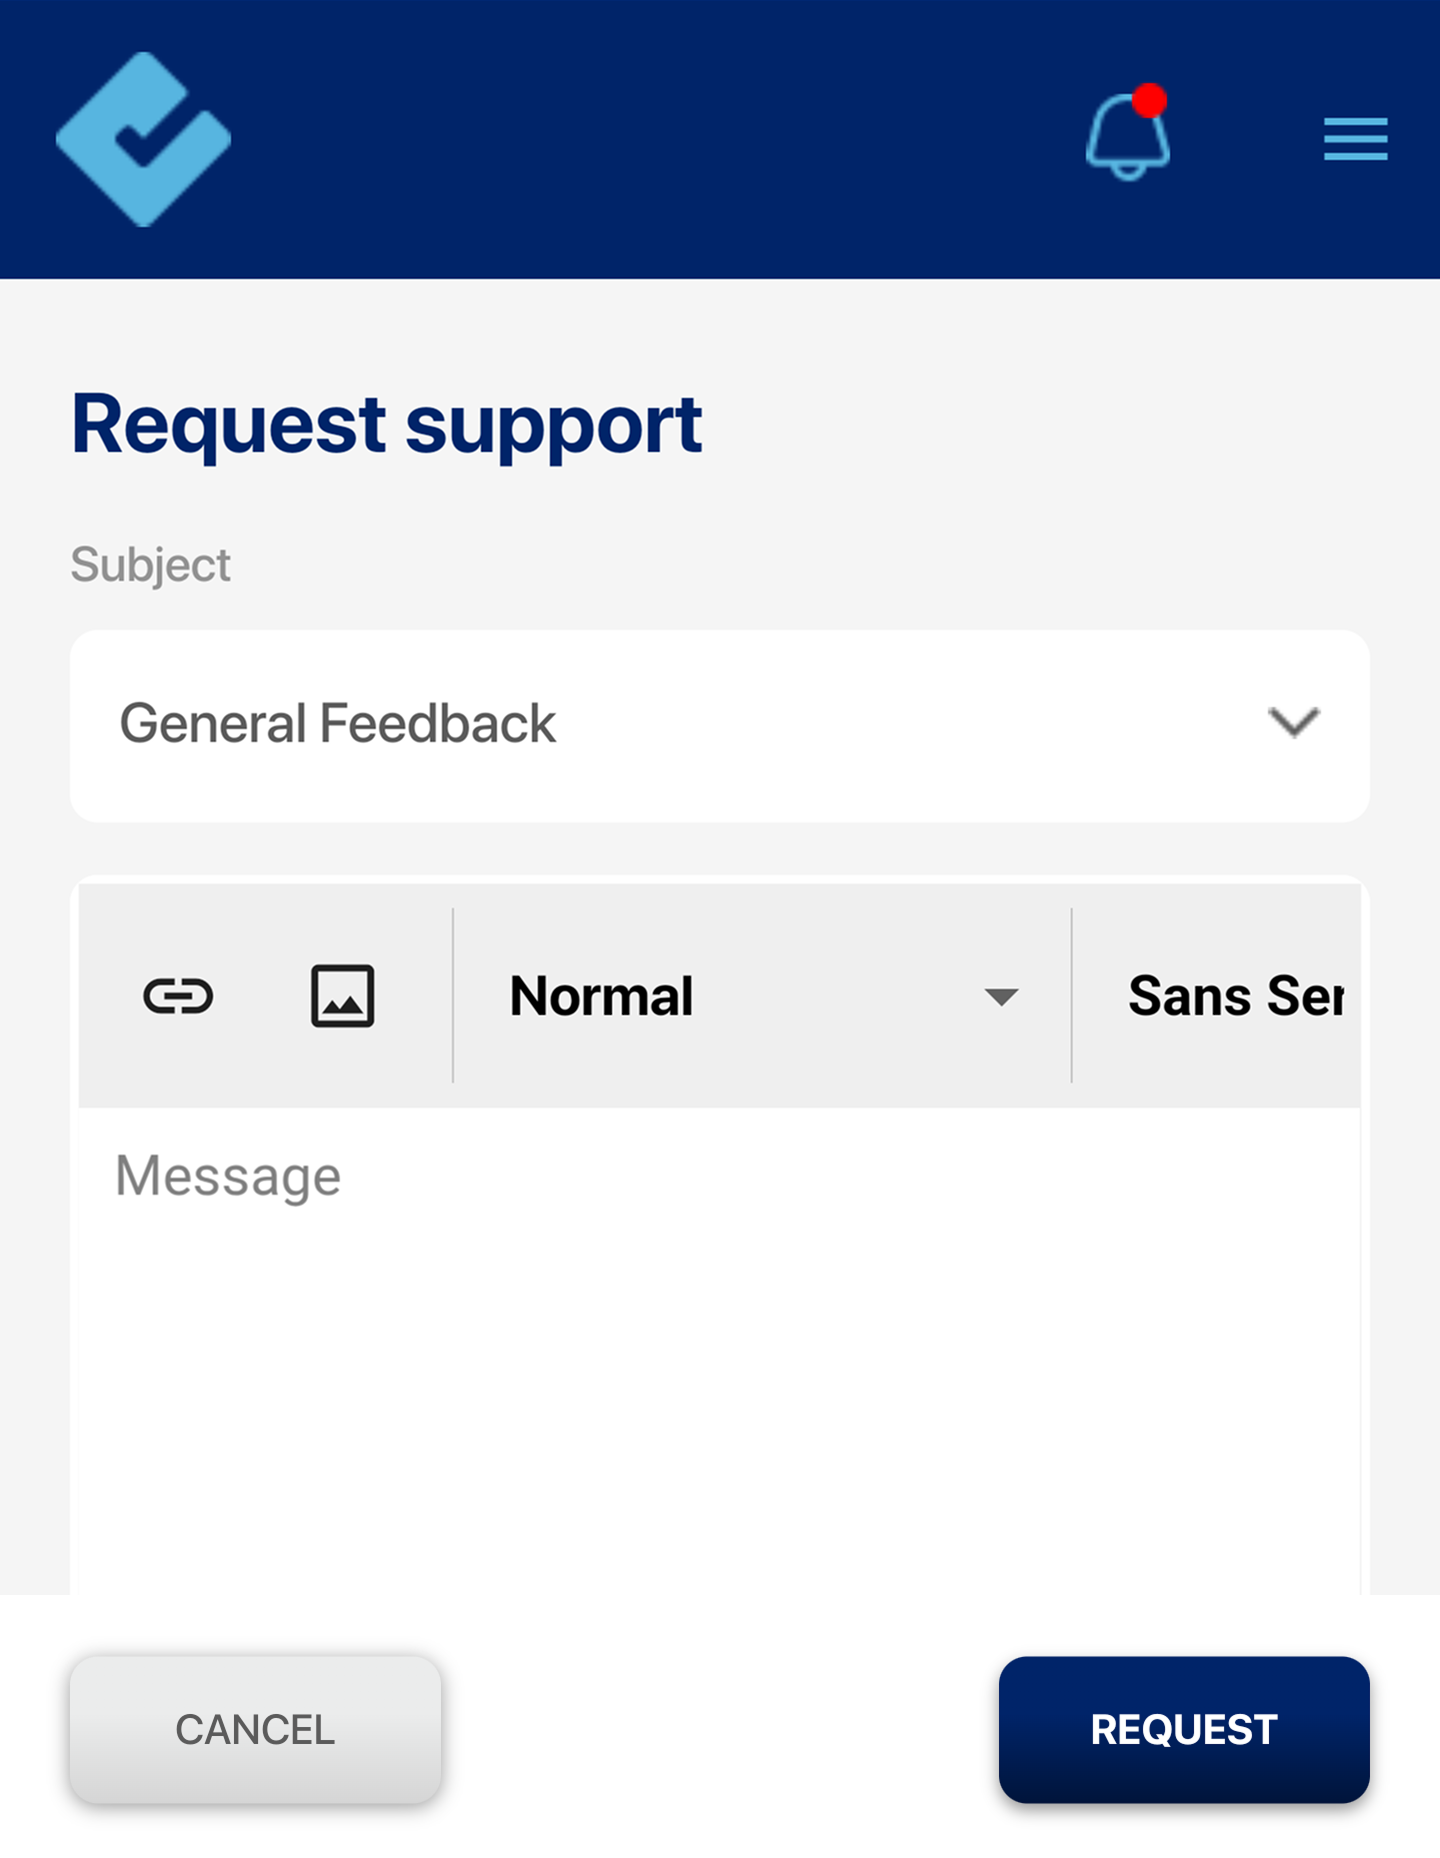
Support:
You can request support from the CheckTrack team whenever needed. Simply click this sign ( > ) in the subject field to choose from three options:
- General Feedback: Share your thoughts or suggestions.
- Application Support: Get help with any issues you encounter.
- Feature Requests: Suggest new functionalities for CheckTrack.
Settings:
The Settings feature of CheckTrack allows you to enable or disable notifications for various features such as approvals, tax deductions, and timesheets. You can choose between emails and mobile notifications or enable both based on your preference.
We hope this guide helps you use CheckTrack with ease.
If you need further assistance, feel free to reach out to our support team anytime.
